Yesterday, I invited you into my real food pantry. Today, we’re going to get a bit more personal. I’d like to invite you into my bedroom.
“The bedroom? I thought you were all about real food and natural living around here?”
Yes, this post is a bit off-topic for Live Simply. That happens from time to time around here. Remember the time we talked about making money on a blog? And then there was the time I invited you into my studio. “Off-topic” sometimes happens. And as always, I have a perfectly good explanation…
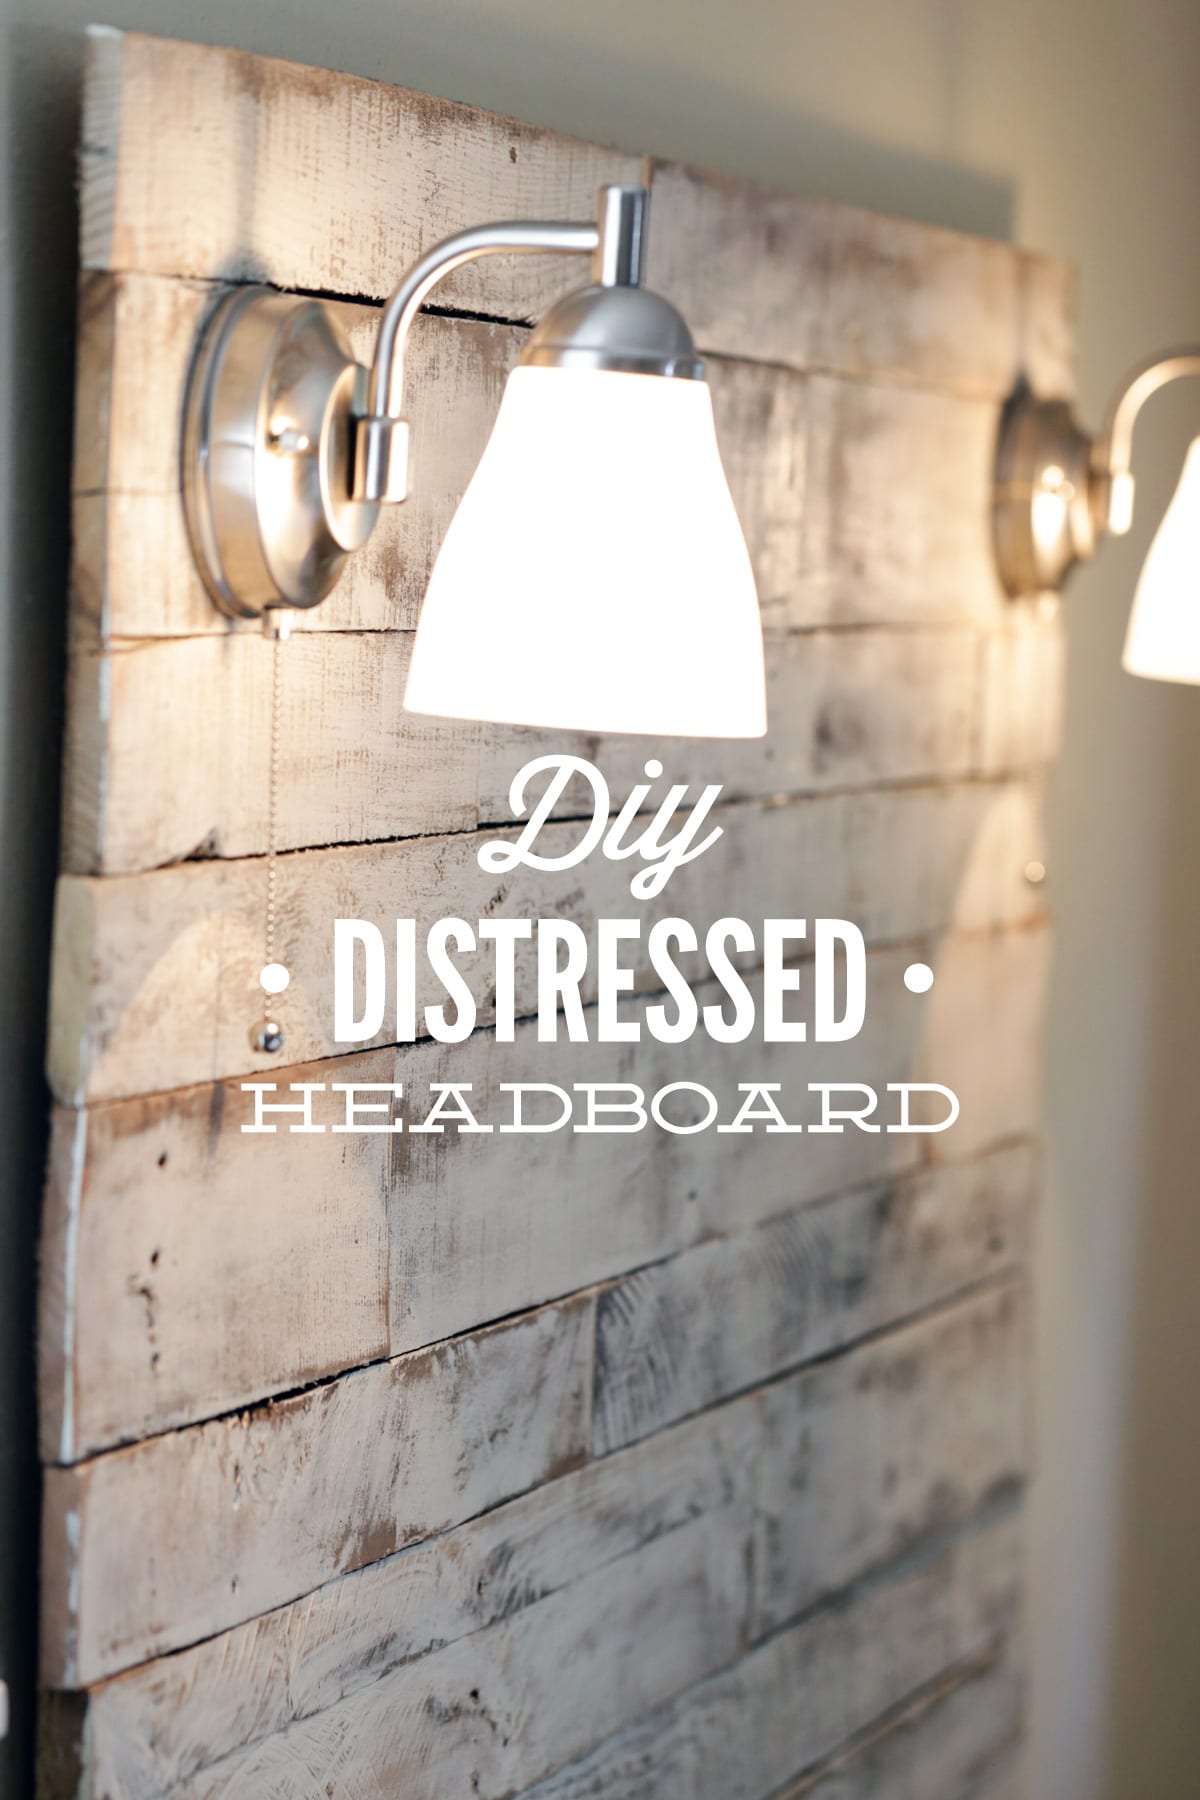
Last month I posted a picture on Instagram. By the way, are you following Live Simply on Instagram?? You really should! The picture was of a custom headboard Dustin had built over the weekend from salvaged wood pallets. The excitement over his weekend project was contagious. Many of you commented, “I need one! Directions??” Men, I thoroughly apologize for the DIY envy I sparked in all the ladies out there.
I’ve received multiple requests since posting that simple black and white picture of our DIY headboard. Many of you have asked for directions and a tutorial. So today, we’re taking a little break from Easy Crock-Pot Shepherd’s Pie (which is currently cooking in my crock-pot) and DIY Milk and Honey Body Wash. Get your power tools and salvaged wood ready, let’s make the uber-popular Instagram headboard.
 To guide you through this project I asked Dustin to share a complete step-by-step tutorial.
Dustin, they’re ready!
Hey, it’s Dustin here! First, let me apologize to all the men out there. I’m sorry Kristin posted this project on Instagram, creating hundreds of hours of work for the husbands or handy DIY ladies. Hopefully this post isn’t coming in the middle of your favorite sport’s season. The hard work will be worth it in the end, I promise. Rewards await!
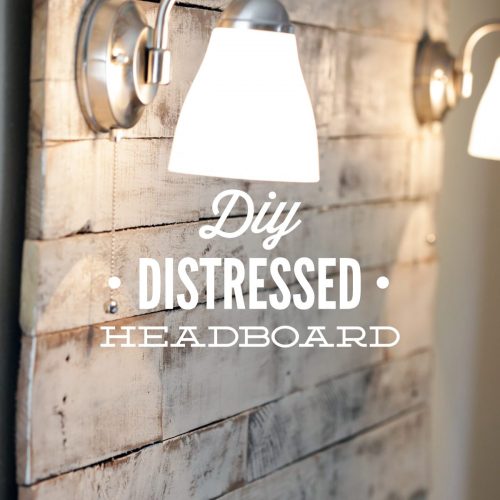
DIY Distressed HeadBoard
Ingredients
- 5 wood pallets
- 1 3/8 in plywood sheet cheaper alternatives: OSD or chipboard
- circular saw
- hammer
- pry bar
- brad nailer
- nails 3/4" - 1" depending on the thickness of the wood pallet boards
- paint
- paintbrush
- sandpaper 80 grit
- hand sander
- wood glue
- 3 heavy duty wall anchors to secure a pallet board to the wall
- 2 wood screws to secure the header board to the pallet board
optional, if you'd like to add lights:
- 2 wall sconces with on/off switch at the light fixtures
- 2 lightbulbs 25 watt
- 1 staple gun to secure the extension cord to the board
Instructions
- Measure
- Source and Cut the Wood
- Secure the Wood
- Paint
- Add Lights and Hang the Board
Notes
Step 1: Measure
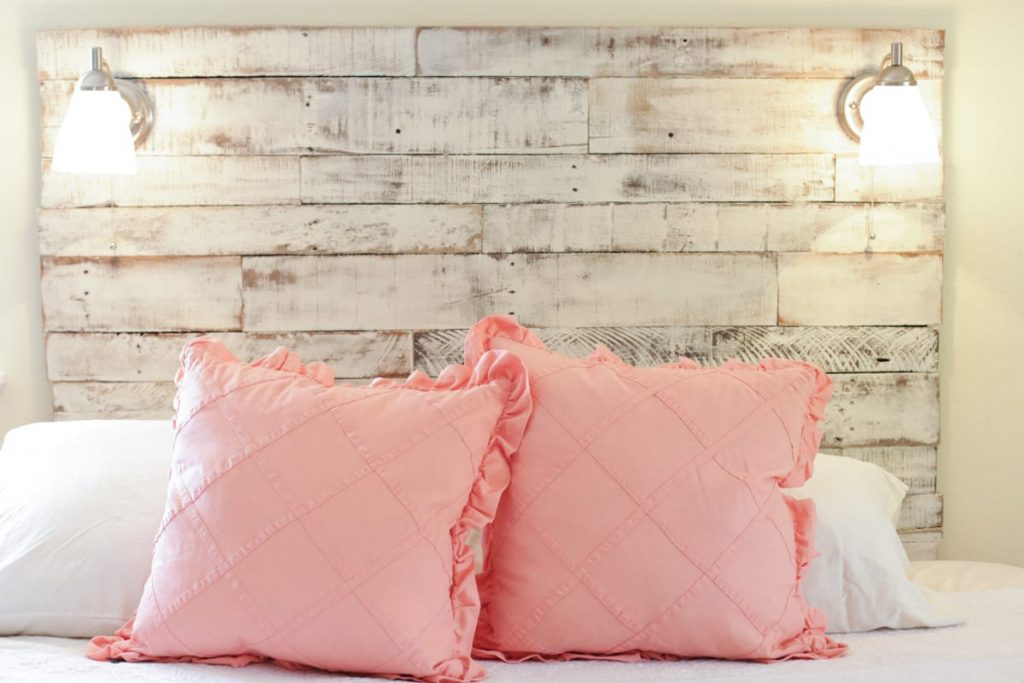
First, measure the size you’ll need for your headboard based on the size of your bed. You can make the headboard any width or height you desire. I decided to make our headboard a bit thinner than our actual bed size. We have a king-size bed, so for us the final dimensions were 60 inches wide x 42 inches high.
I don’t have a full workshop in my garage, so I had my local hardware store cut a sheet of plywood out to those dimensions. I used plywood as the backing support for all of the wood pallet boards which later were nailed to the plywood. Cheaper alternatives to plywood are OSD or chipboard.
Step 2: Source and Cut the Wood
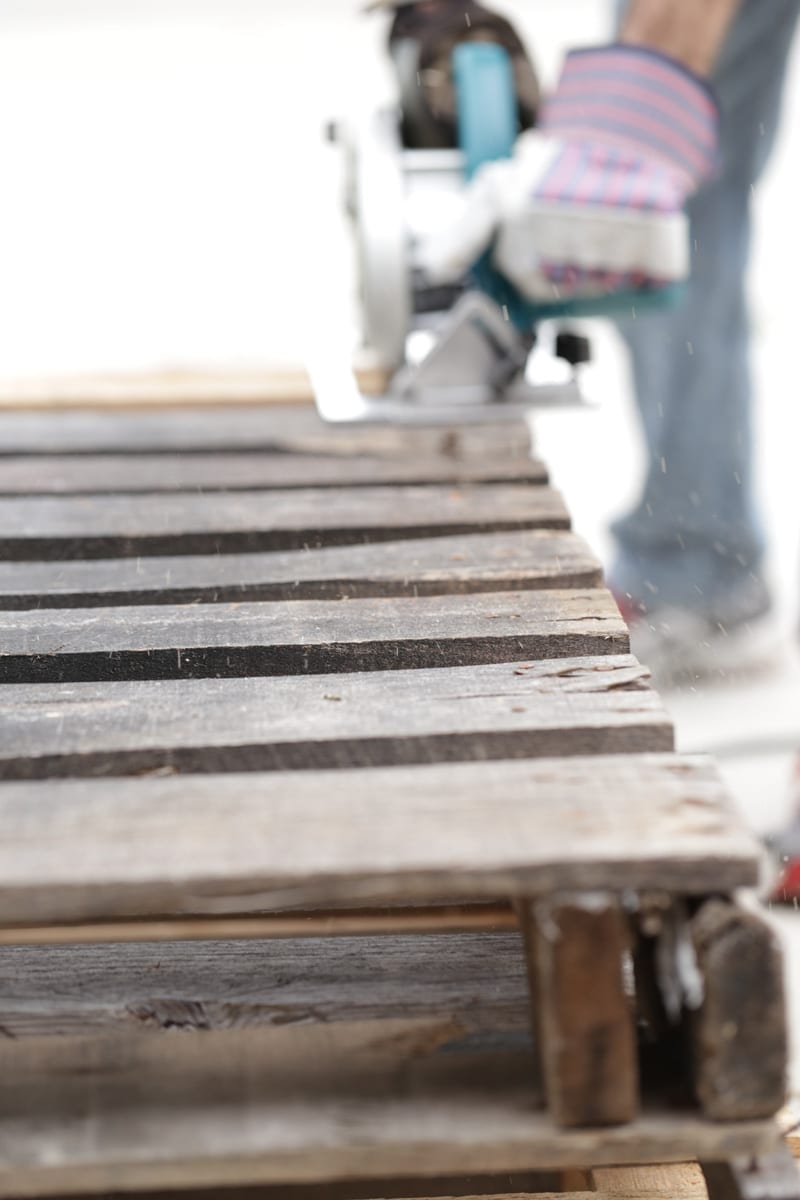
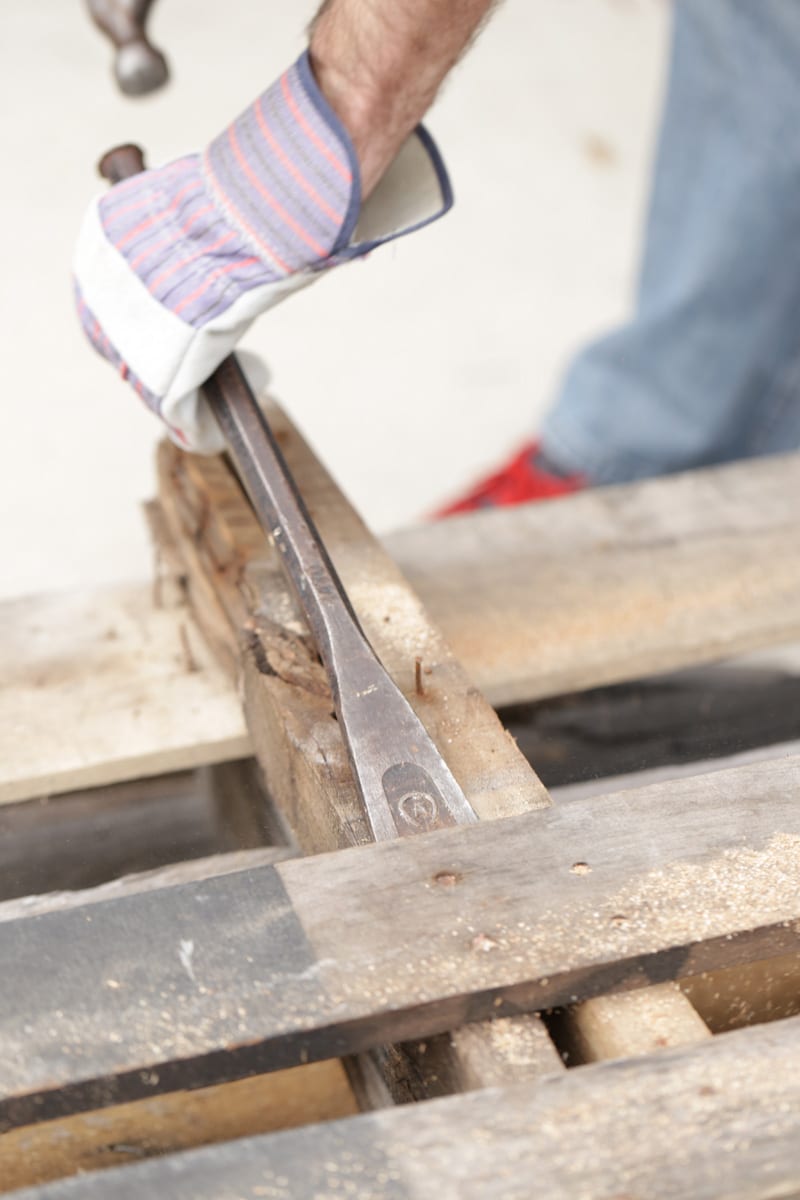
You can get wood pallets for free from local businesses around your area (check Craigslist). I prefer wood pallets because this type of wood is a rough-cut which allows you to create a very distressed look after the headboard is painted and sanded. Using wood pallets can be labor intensive since you have to disassemble the woods boards yourself.
Cut the pallets next to the ends with a saw so you don’t have to bother pulling out all the nails. This saves a lot of time since you only have to concentrate on pulling out the nails from the middle section of each pallet. It took three pallets to cover the the dimensions for our king-size bed.

Step 3: Secure the Wood
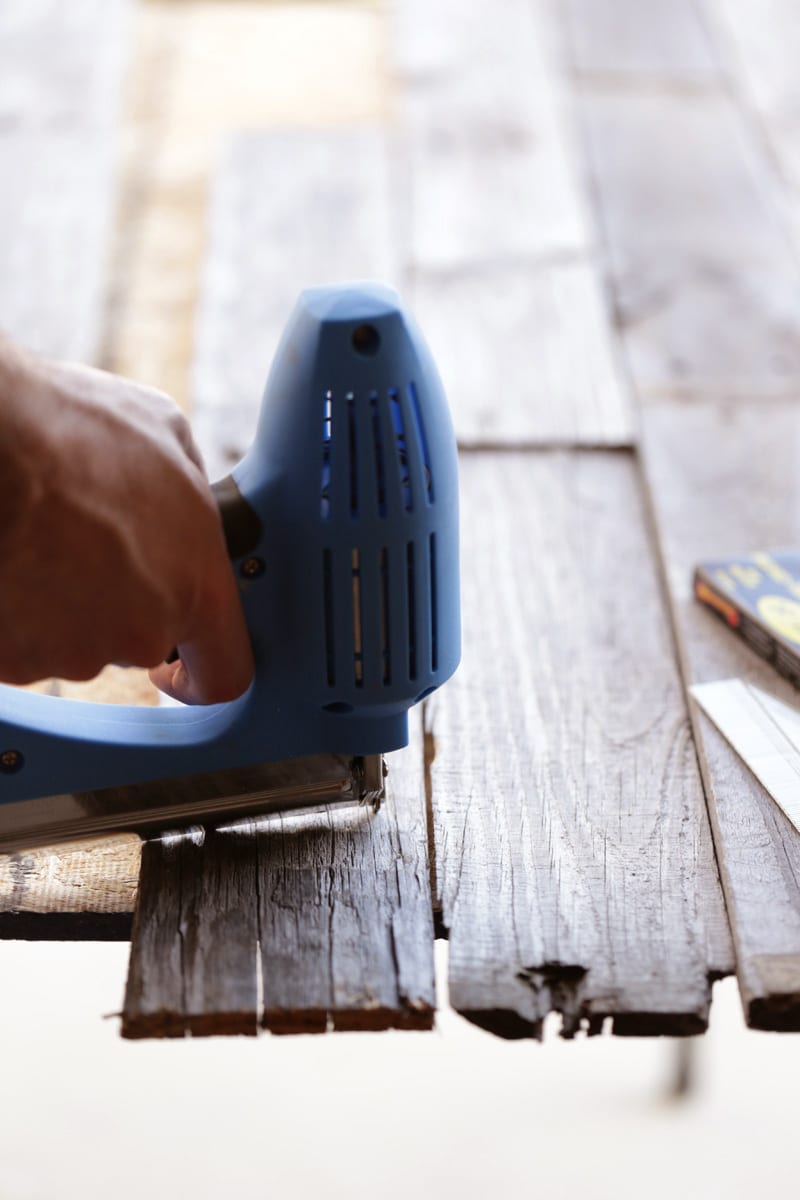
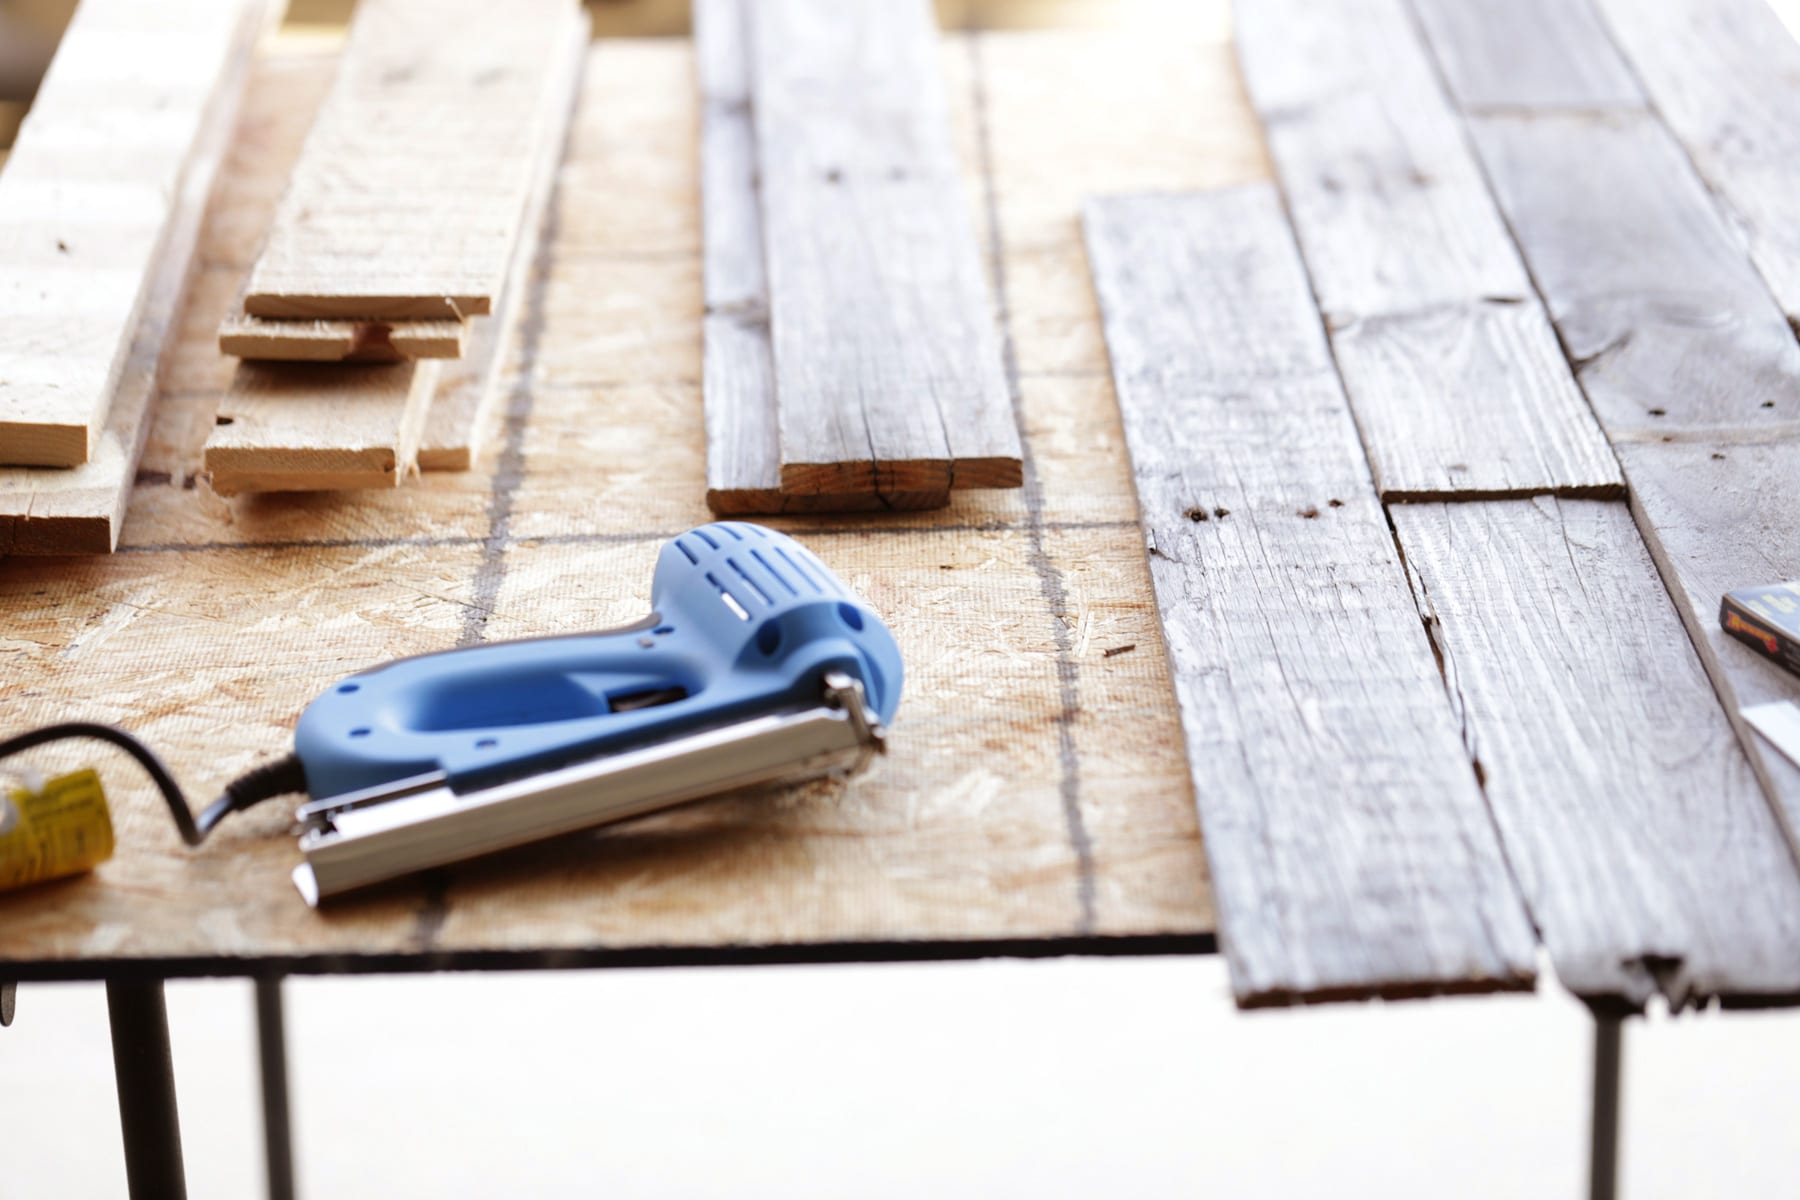
Lay out the pallet boards on the plywood to get the pattern you desire. I staggered the ends of the boards to create a rustic look instead of squaring off the ends in a straight line. Before you nail the boards to the plywood you can paint the plywood black where the seems will be. The black paint hides the lighter colored plywood behind the boards if they don’t perfectly line up.
In addition to nailing the pallet boards to the plywood, gluing the boards to the plywood with wood glue is another option for durability. After gluing, I used a brad electric nail gun to secure the pallet boards to the plywood. The length of the nails will depend on the thickness of the pallet boards. I used 3/4-inch nails for our headboard.

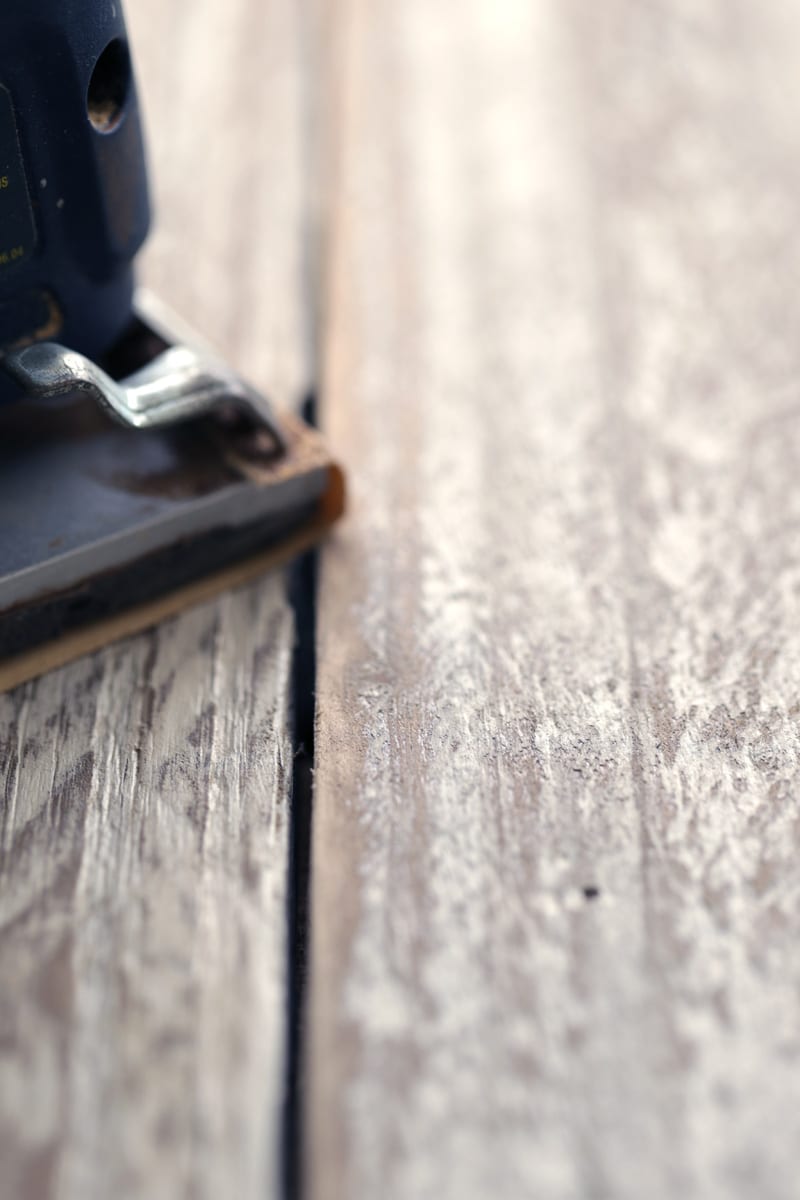
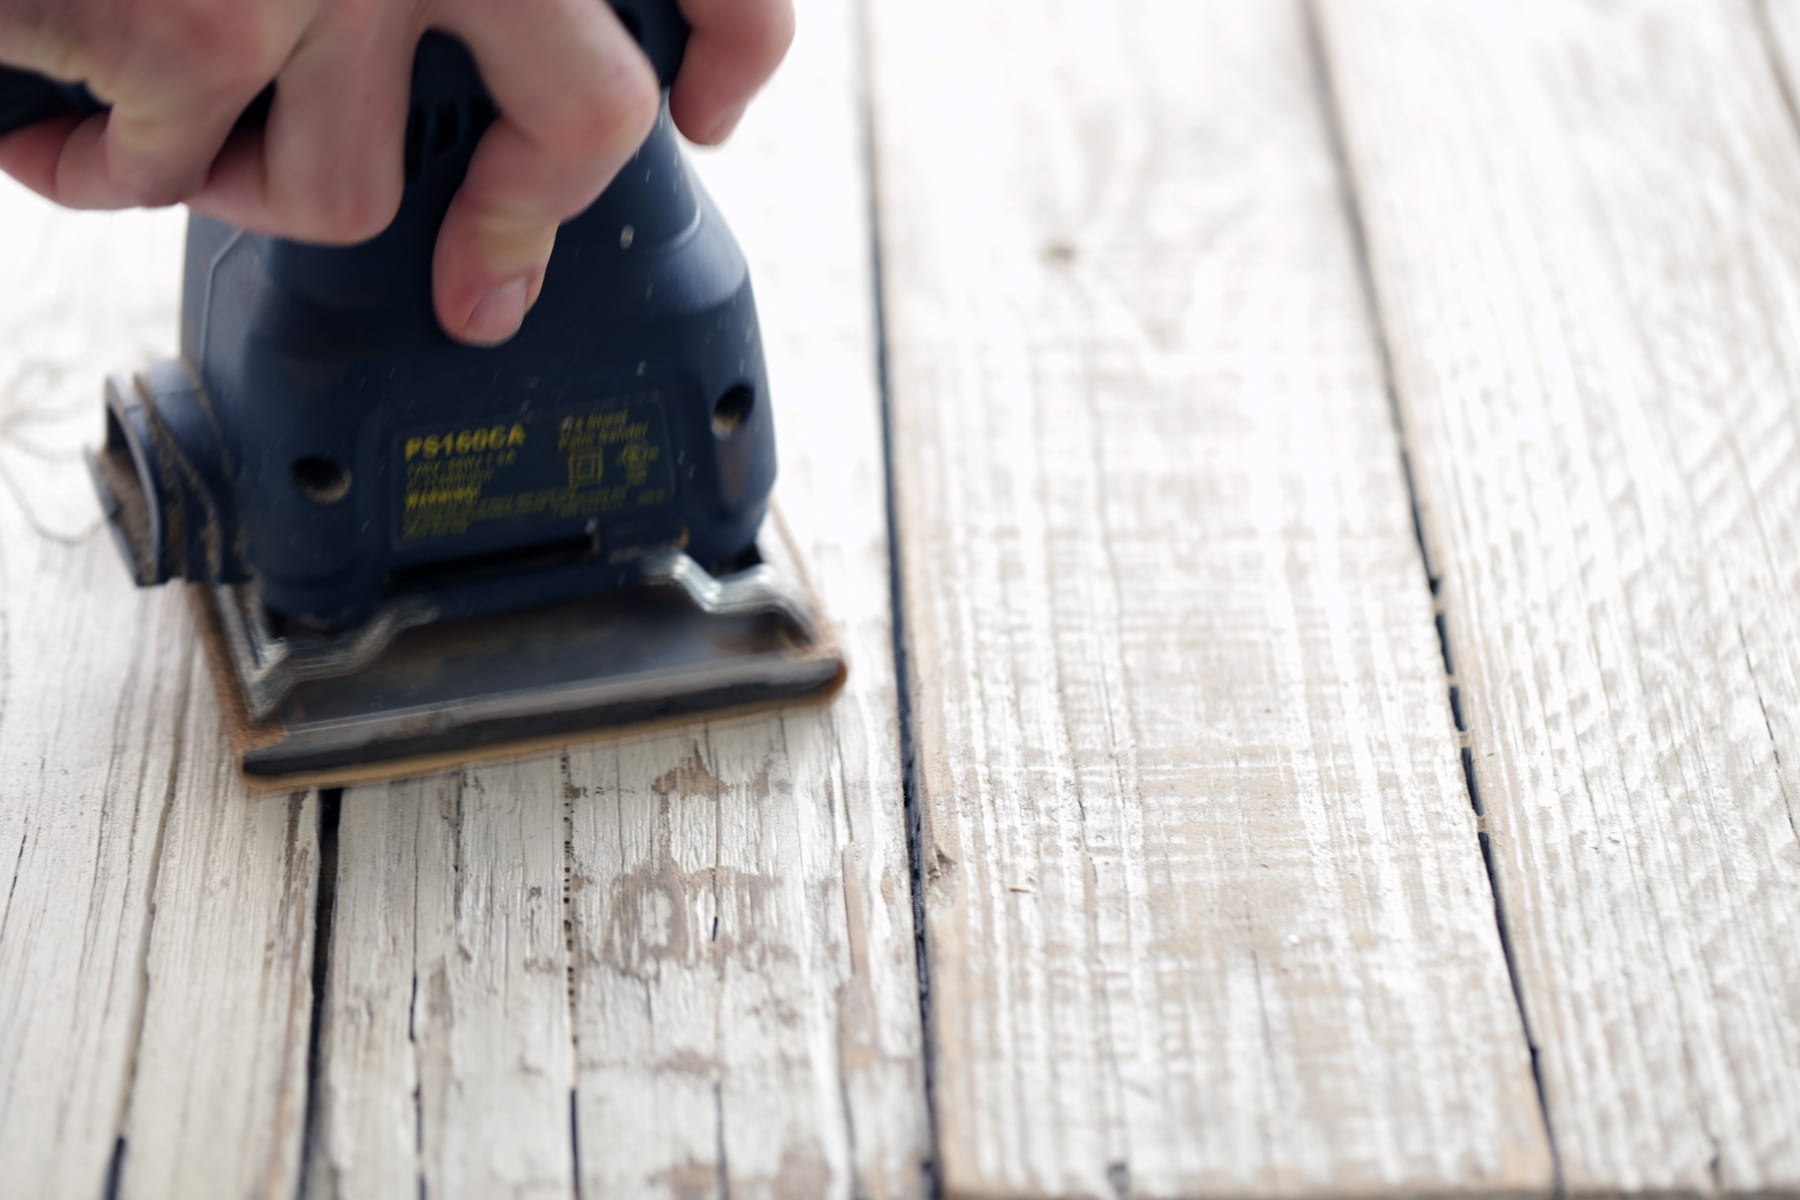
Step 4: Paint
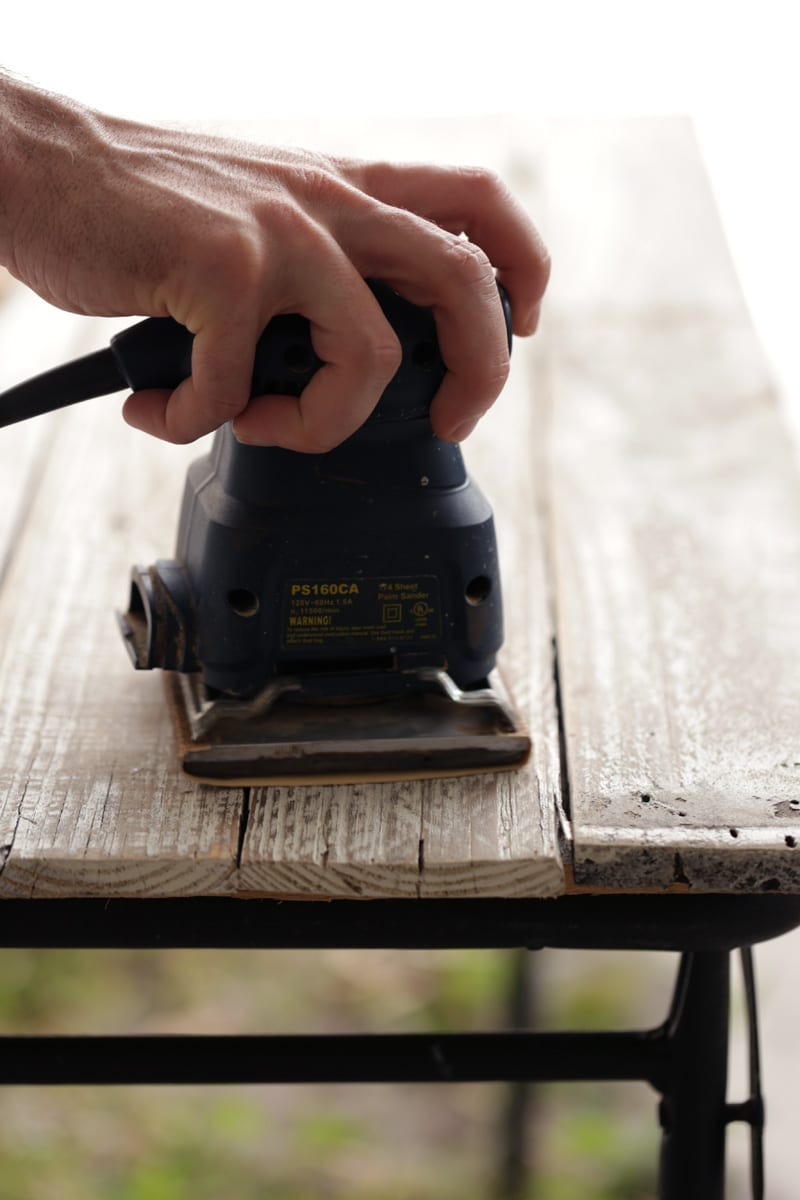
Once all the pallet boards are secured to the plywood you’re ready to paint. I chose an antique white color paint with a satin finish. Our headboard only needed one coat of paint to achieve the look we desired. I let the paint dry overnight. The next day, once the paint was fully dry, I used a hand sander, with 80 grit sandpaper, to achieve the distressed look.

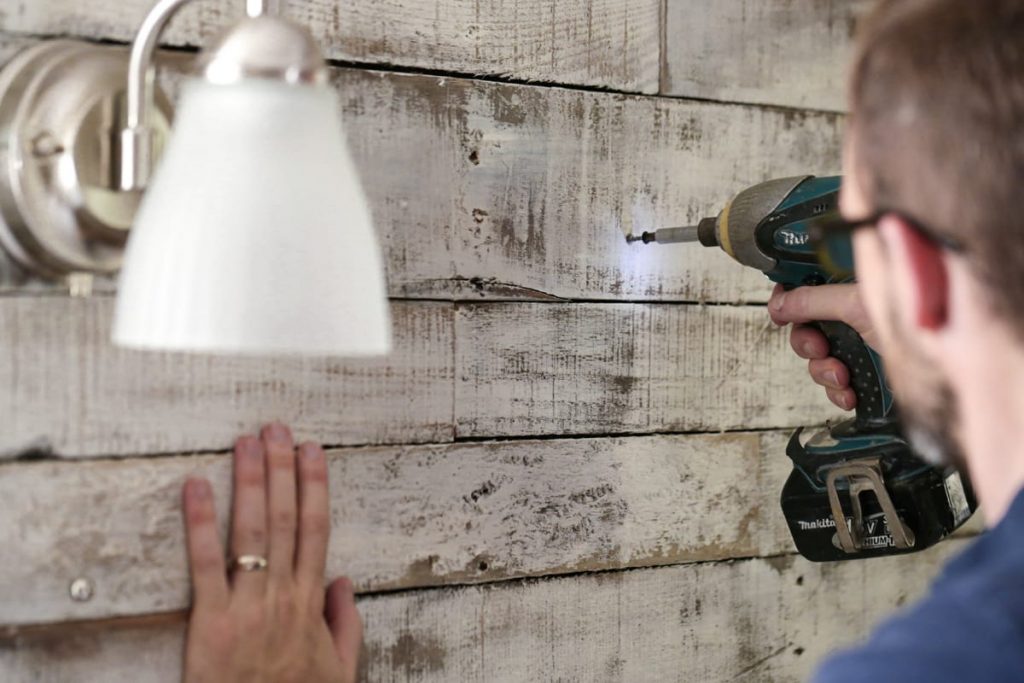
Step 5: Add Lights and Hang the Board
One of the main issues we’ve had in our bedroom is the lack of soft lighting at night. Kristin likes to read before bed but we only have a ceiling fan and closet light, so I decided to add wall sconces to the headboard. I used a simple 15-foot electrical extension cable to tie the connections together and stapled the cable to the backside of the plywood with a staple gun.
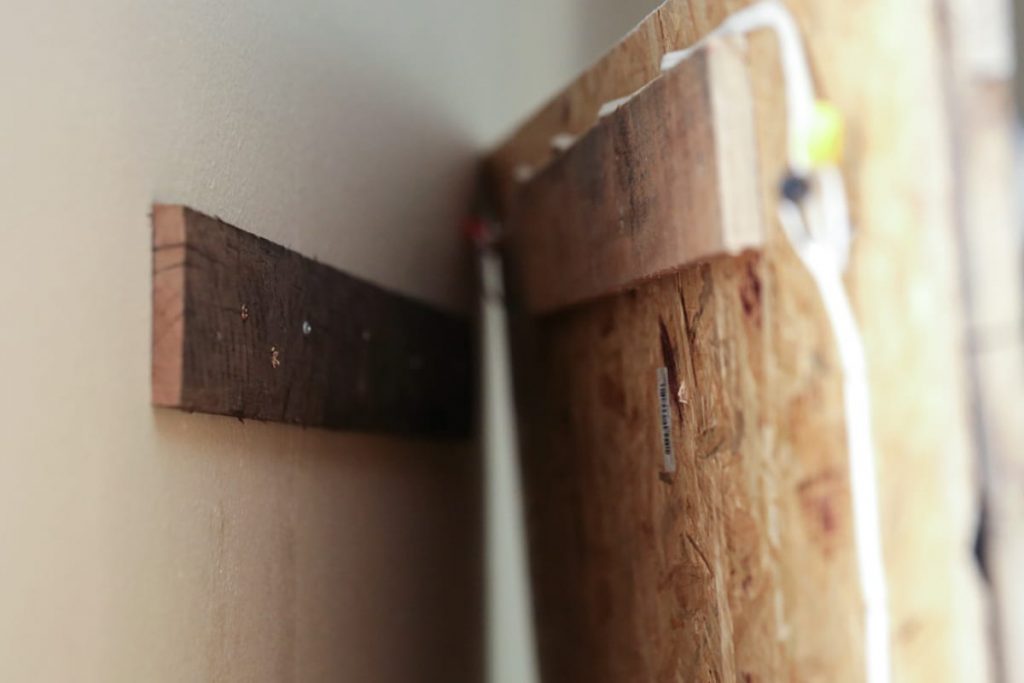
Finally, I secured an extra wood pallet board to the wall, using heavy duty wall anchors, and then rested and secured, with two-two-inch wood screws, the headboard on the pallet board.
More DIYs You May Like:
DIY Homemade Milk and Honey Body Wash
Hi! Love this headboard. I just built mine this weekend. I have a question about the lights. Mall sconces come as a hard wire set up, not a plug in set up. Can you describe how you did that connection? Did you rewire them or did you just use wire nuts and tape? I will need to plug mine in, so trying to understand how to do that with hard wire fixtures. Thank you in advance!
Hey Kir, I used wire nuts and tape, and had to buy separate extension cords and wired them together to plug into a wall.
I am not sure what you pained black it looks like it the pallet boards but it said the plywood but the next picture the plywood is not painted….please help almost done!! Thank you!
Thanks for replying. So what size boards and what steps attaching those? I might have just overlooked that step but couldn’t find anything on that in Dustin’s“. Instructions. I’m certainly a novice at this and hubby is willing to attempt IF I get the instructions! He has the boards ready and I’m so excited. I’m trying to duplicate the look exactly! Thanks so much for taking time out of what I’m certain is a busy, busy life to answer me! I appreciate it.
Love, love the headboard. One question. On one picture the sides (ends) the boards are just cut flush and not enclosed, on the other picture there is a frame around the entire headboard. Are there two different headboards or just one? I love the framed one but didn’t see anything about how to finish that out.
Hey Mary, It’s the same headboard.
We have a bunch of thick wood planks from a neighbor’s deck re-do. Can we use that kind of wood instead of the kind from pallets, or is that wood too thick and heavy? We know we’d need to sand it since it was likely weather-treated. Thanks!
What would you suggest if I wanted to attach this to a frame instead of a wall? No plywood? Wood pieces running down the back and attach to the bed frame?
I am not sure what type of frame you are describing. But the most important thing is to make sure all the boards are well secured and there is enough support from the legs or frame to not allow it to fall over.
This is fantastic and just what I needed, even right down to the lighting! Wow, thank you!!
Awesome, glad to hear!
Hi there! I loved this tutorial. My husband and I made our own pallet headboard over the weekend, but need some info on finishing touches. What type of anchors did you use for the pallet board attached to the wall. Are they an anchor that screws into the wall? Anchors like on the back of a picture frame? I am a newbie, so I am sorry if this question has an obvious answer.
Great question Mary, It depends on the wall you are fastening the headboard to. For drywall it is always best to find a wood stud to screw into, but sometimes they are hard to find. If you can’t find the stud, I like these self-drilling zinc anchors http://amzn.to/29QcOC1. They are easy to install and easy to get rid of, and they are rated to hold up to 100 lbs each. My headboard is very heavy and these anchors worked great. They are definitely over-kill for a standard size picture frame.
I’m having trouble understand how you hung the board on the wall. You attached a board to the back of the plywood and then one to the wall and screwed the headboard to the board on the wall from the front or top of the headboard? Hope I make sense!
Hi Mallory, The board on the back of the plywood simply rests on the board on the wall. This bears all the weight, since there are no feet on the ground to support it. The 2 smaller screws go through front of the headboard and go into the board on the wall to prevent it falling off. Side note: Anchoring the board on the wall is much easier for one person to manage.
How did you hide the cable from lights? Did you drill holes to run the cable through the headboard and out to the back?
Thanks
Yes, drilled holes and ran the cable through the wood and used wire nuts to tie into the extension wire. Make sure there is no exposed wire.
What is the color name of the paint you used and what type of distressing wax/gloss did you use
Hi Kayli, the exact paint color name is Cappuccino White by Glidden. We did not use a wax, but if you want to I recommend this product from Minwax http://amzn.to/1RMANkd
Do you remember where you found the lights? Plug in wall lights can be tough to find!
Hey Jessica, We found them at Home Depot :).
Love this look! I’ve already priced out the materials, but hit a snag with the lights. Are the lights shown plugged into a wall outlet or are they hardwired?? Searching for a similar model has been a challenge for this techno-klutz. lol Thanks so much for your creativity! I can’t wait to make this. 🙂
Hey Sarah, Thank you so much. The lights are plugged into an outlet and connected in the back of the board with an extension cord :).
Amazing! I showed your post to my husband, I told him to make a BIGGEST headerboard for our king bed. He nodded “Ohh hmmm, let’s see what we can do..” We have a lots of wood pallets in our backyard. I’ve pinned this 🙂 Thank you for sharing 🙂
That’s awesome, Joyce! I can’t wait to see your headboard!!
I am not sure what you pained black it looks like it the pallet boards but it said the plywood but the next picture the plywood is not painted….please help almost done!! Thank you!
Hey Gina, I’ll ask Dustin. Will get back with you soon.
Kristin, When I saw this headboard months ago, I just loved it and knew I wanted to make it. Thank you Dustin for doing this great tutorial! I found myself in possession of a few pallets from some work we did here so I got started. I just finished my headboard and it turned out great. A little different but not by much. I’m not sure how to post a picture or I would.
Thanks again for the inspiration!
That’s awesome, Nita! If you post a picture on Instagram, tag me @livesimplymom and I would love to see it. That’s the best way to see a pic.
I think I did the tagging right. Picture is up. 🙂
I like this shabby chic or rustic cottage look. Adding the lights has the effect of showcasing the headboard. Combining old/rustic with beautiful new bedding is a great look.