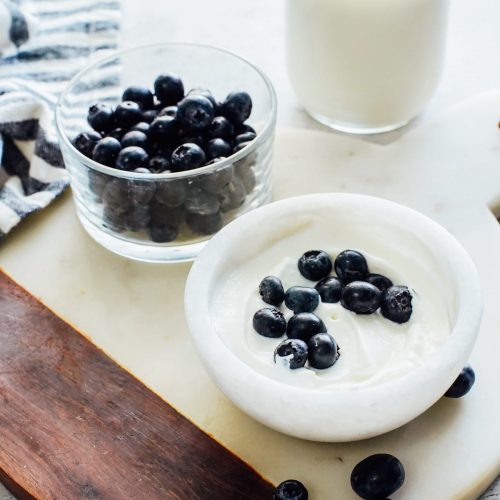
Homemade Yogurt (Instant Pot Method)
I've made yogurt using a number of methods of the years. Using the Instant Pot (or electric pressure cooker) is the best and easiest method. This step-by-step recipe will help you make a delicious homemade yogurt, with a consistency and flavor you'll love.
Print Recipe
Ingredients
- 1/2 gallon raw or pasteurized whole milk DO NOT use ultra-pasteurized milk
- 1/4 cup plain whole milk yogurt that contains live active cultures
Special Equipment:
- Instant Pot *
- large bowl to make an ice bath, or partially fill up your sink with a few ice cubes and cold water
- candy thermometer or any thermometer used for cooking
Instructions
- Pour the milk into the Instant Pot.
- Place the lid on the Instant Pot and set the valve to sealed. Press the Yogurt button. Press the button again, until the screen reads "boil." It will take about 30-45 minutes for your yogurt to go through this initial warming/boiling phase. Once the yogurt has been warmed, the Instant Pot will beep and the screen will read "yogurt."
- Remove the lid from the Instant Pot. There isn't any pressure built up, since you didn't pressure cook the milk, so there's no need to release steam from the valve. Simply open the lid.
- Prepare an ice bath in the sink by placing a large bowl in your sink, filled with cold water and a few ice cubes. The bowl needs to be large enough for the Instant Pot liner to fit inside. Alternatively, use a stopper to plug your sink and fill about a quarter the way full with cold water and a few ice cubes.
- Carefully, with hot pad holders, remove the liner from the Instant Pot and place it in the ice bath. The goal of this step is to cool the milk so you can reach a desirable temperature for the good bacteria to thrive and culture, without killing the bacteria.
- Place a thermometer in the milk. Once the thermometer reaches between 115-110F, remove the thermometer and the Instant Pot liner from the ice batch. It takes the milk about 10ish minutes to reach this desired temperature.
- Add the yogurt to the milk and whisk to combine.
- Return the liner to the Instant Pot. Place the lid on the pot and make sure the valve is set to sealed.
- Press the yogurt button (again) and this time use the + button to increase the time on the screen to 10:00. This tells the Instant Pot that you want to keep the pot warm for 10 hours so the milk has time to culture, which is what will turn that milk into delicious yogurt. The longer you culture, the tangier the yogurt. Between 8-12 hours is the usual recommendation. I've personally found that 10 hours in the sweet spot for me.
- Now, walk away. Your job is done, for now.
- After 10 hours, the Instant Pot will beep, indicating the yogurt is ready.
- At this point, I like to remove the lid and then the liner from the Instant Pot, checking on how thick my yogurt is. Depending on your milk, the yogurt may be super thick or slightly runny (still thick, just not super thick).
- I highly recommend placing the lid back on the liner, or covering the liner with a towel or whatever you desire, and placing the yogurt in the fridge for several hours. This step helps the yogurt thicken and develops the flavor.
- After a few hours in the fridge, remove the liner and spoon the yogurt into a storage jar. The yogurt is ready to enjoy, or may be refrigerated and enjoyed later. Serve as-is or flavor with fruit, honey, vanilla, or spices.
To Make Thick Greek-Style Yogurt:
- If you want super thick Greek-style yogurt, place a sieve or colander over a large bowl (it's best if the sieve can sit on top of the bowl versus sitting down in the bowl). And drape a clean linen towel (or a thin towel of choice, or a couple sheets of cheesecloth) over the sieve.
- Remove the yogurt from the fridge (or you can do this once the 10 hours is up and skip the fridge stage) and carefully pour (or spoon) the yogurt into the cloth. Allow the yogurt to sit at room temperature, until you've reached the desired consistency. You'll notice the whey separating through the sieve and into the bowl. Keep in mind, when you do this, you'll end up with significantly less yogurt (2-3 cups less), but it will be super thick.
- Carefully spoon the yogurt from the towel and place in a jar. The whey may be saved in a separate jar and used in a variety of ways, or discarded. Store the yogurt (and whey, if keeping) in the fridge.
Notes
*Important Instant Pot Note:
I have two Instant Pot models. My first Instant Pot is the Instant Pot DUO60 6 Qt 7-in-1. The second Instant pot (recently acquired) is the Instant Pot LUX60V3 V3 6 Qt 6-in-1. The 7-in-1 model includes a yogurt button which allows you to easily make yogurt. The second model, the 6-in-1 model, does not include the yogurt button. This is very important. Check your Instant Pot before continuing with this recipe.
The silicone seal ring inside the lid of the Instant Pot has a tendency to trap odors. If you cook fragrant meals in your pot, there's a strong chance your yogurt may have a cumin or garlic taste. I personally haven't had this happen, yet, but I've been told by others that it's an unpleasant experience. If you plan to make yogurt regularly, you may want to purchase a separate seal ring to use--just to ensure strong odors don't transfer over to your yogurt.
Nutrition
Calories: 1192kcal | Carbohydrates: 94g | Protein: 62g | Fat: 64g | Saturated Fat: 37g | Cholesterol: 197mg | Sodium: 842mg | Potassium: 2593mg | Sugar: 98g | Vitamin A: 3125IU | Calcium: 2213mg | Iron: 0.6mg
Servings: 6 cups
Calories: 1192kcal