I do not know about your family, but in our house these few words resound a lot, “Mama, I’m hungry can I have a snack?”
In my quest to find real food that nourishes my family, I came to a dilemma: Finding satisfying snacks I felt good about feeding my family besides just fruit and vegetables.
Now, don’t get me wrong, fruits and veggies are great snacks and wonderful sources of nutrition, but sometimes you just need something sweet and chewy that makes you say “Mmmmm“. Problem is I’ve found most snacks from my local grocery store that are sweet and chewy and make you say “Mmmmm” are not nutrient-dense foods that fill you up and tide you over for meal time.
I was doing my best by choosing what I thought were safe and healthy options. I mean really, how bad can store- bought “natural” granola bars be, right?
Wrong!
When I took a look at my so called “healthy options,” I found ingredients like: corn syrup, sugar, caramel coloring, preservatives, and synthetic oils. Those are the ones I could read.
My kids and husband love those little oat bars with chocolate and sometimes peanut butter. If I was going to rid our pantry of those chewy, sweet bars, I needed a darn good replacement. One that would be equally if not more satisfying and unlike the store-bought bars, nourishing. Guess what?
I did it!

Not only are these bars delicious and nutritious, they are so easy to make even a caveman could do it. These chewy, store-bought knock-offs are a healthy snack and one I can feel good about feeding my family.
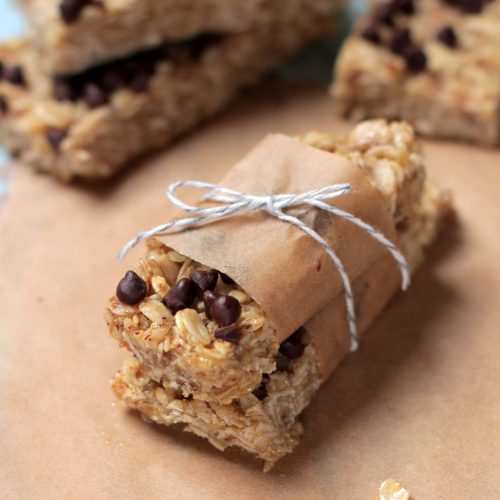
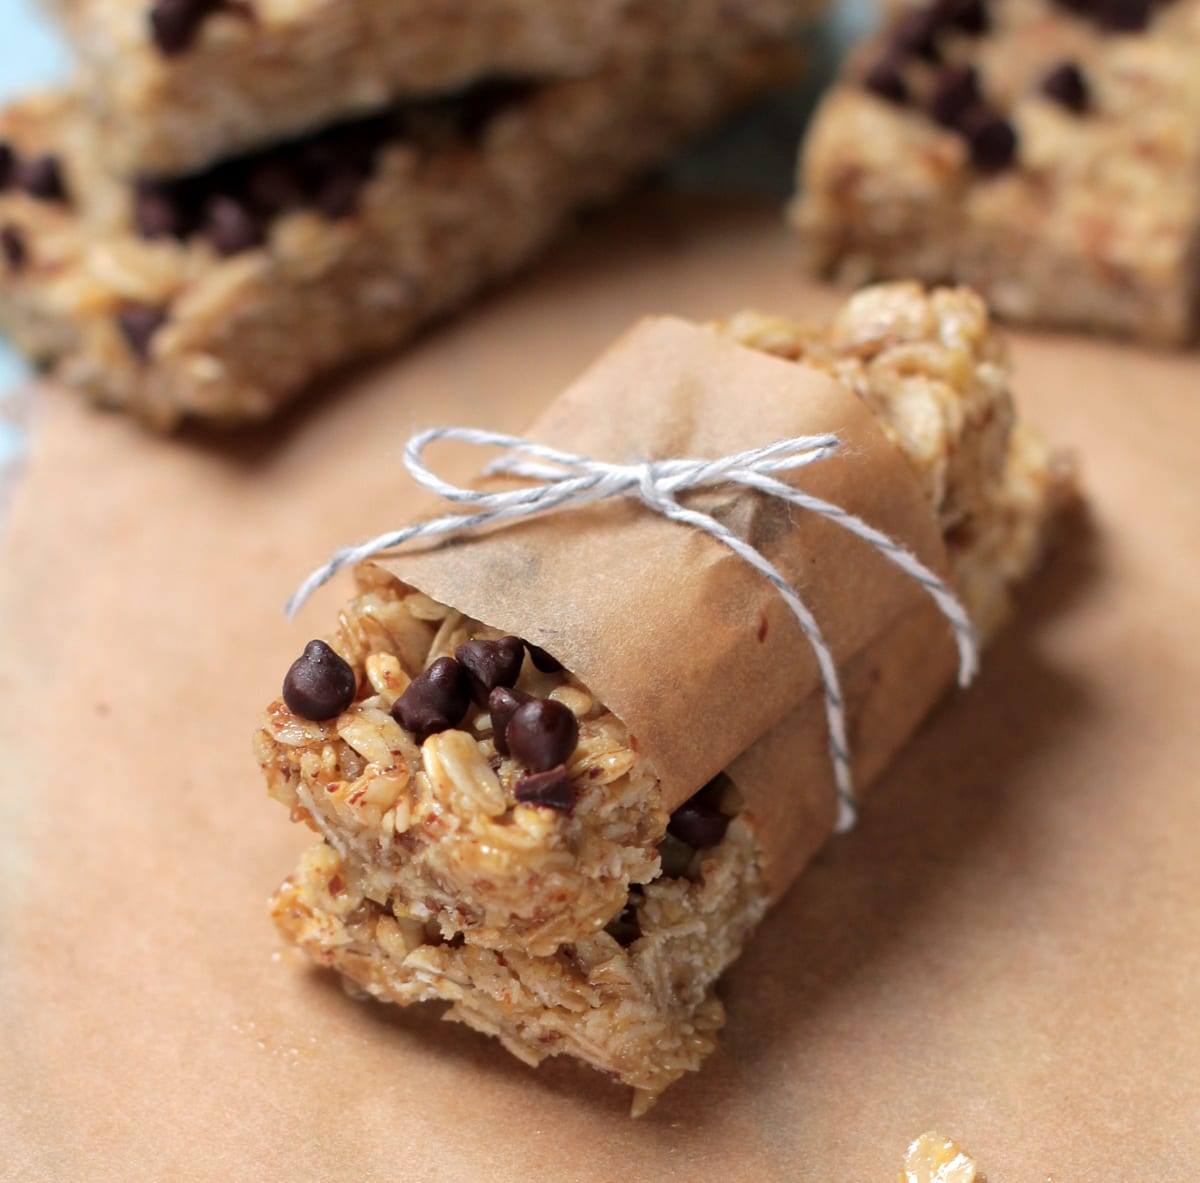
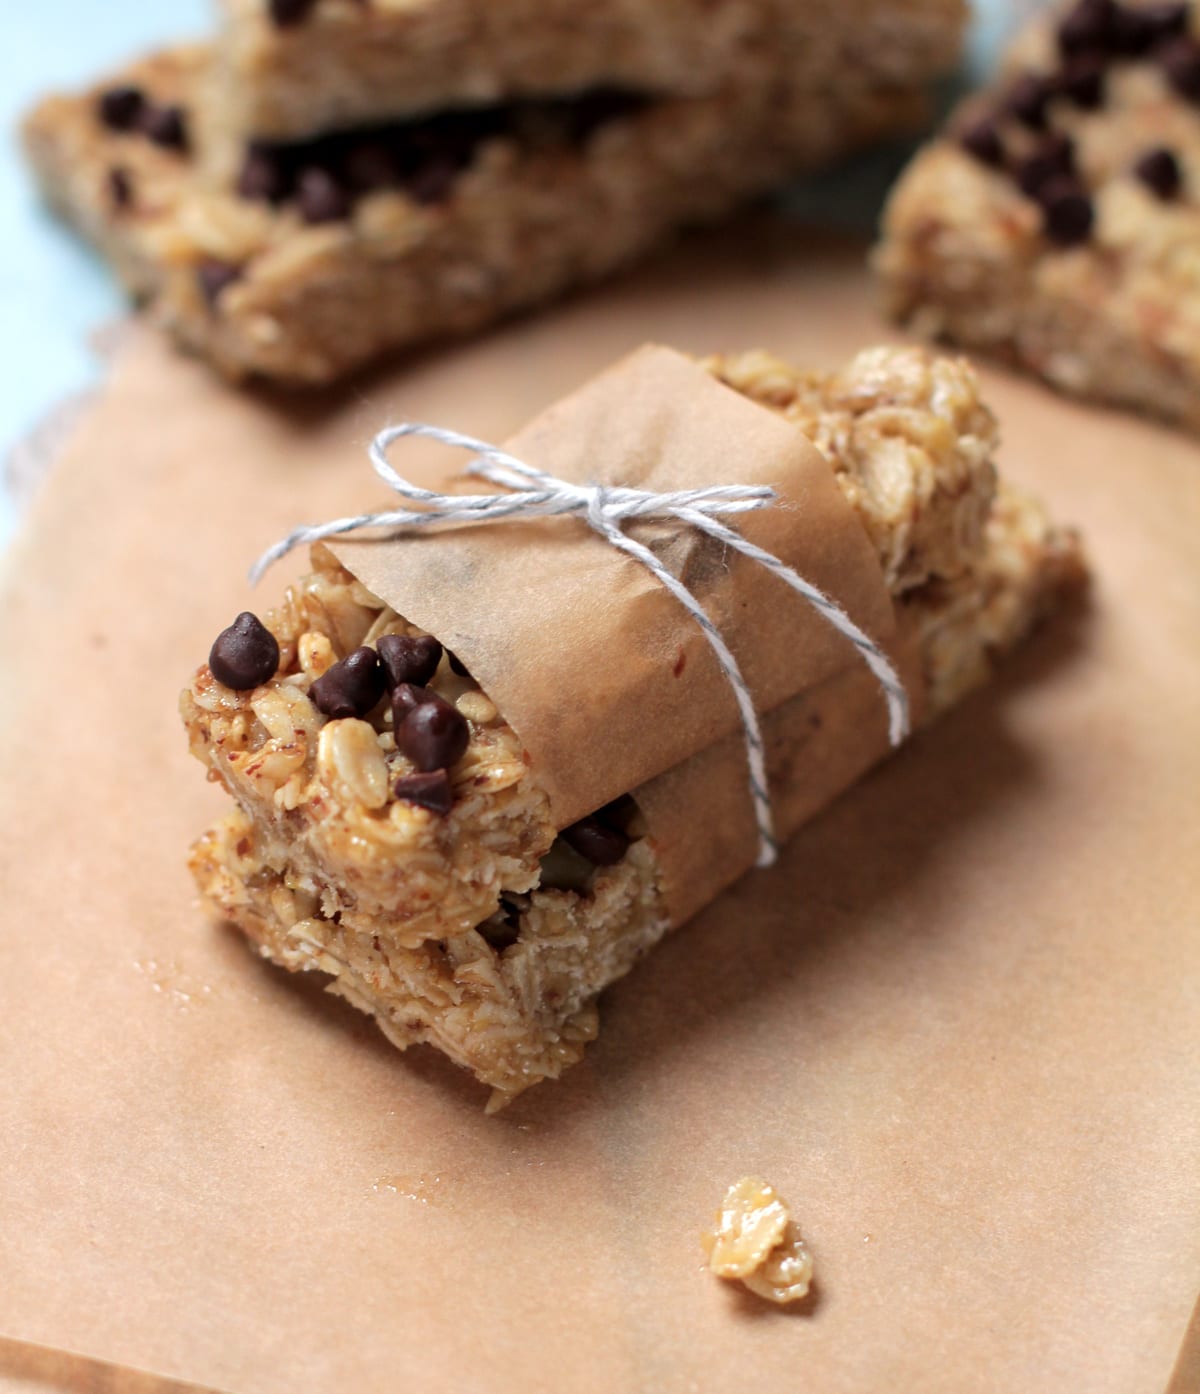
Homemade No-Bake Granola Bars
Ingredients
- 1/4 cup coconut oil or butter
- 1/2 cup honey
- 1 tsp pure vanilla extract
- 2 cups old-fashioned rolled oats
- 1/8 cup flax seed milled or whole
- 1/4 cup organic semi-sweet chocolate chips
- 1-2 TB peanut butter optional
- 1/3 cup dried fruit and/or nuts, optional
Instructions
- Heat your stove top to medium heat.
- To a saucepan over medium heat, add your coconut oil and honey. Stir to melt and combine.
- The oil and honey will start to bubble. When you see this, keep watch as it will soon take on a nice amber color, but do not let it get to dark or you will have made candy.
- Once you get a nice rolling bubble, let it go for about 30 seconds to a minute and then turn off your heat and add your vanilla.
- Add in the oats, flax seed, and optional peanut butter. Stir together until combined
- Line a 9x9 pan with parchment paper (be sure to have some extra hanging off both sides).
- Pour in the oat mixture. Using the back of a spatula press down about 1/2 inch until mixture is smooth.
- Sprinkle chocolate chips, nuts, and/or dried fruit over oat mixture. Place in the fridge for about 30 minutes to cool.
- The cutting process: Remove the pan from the fridge. Use the extra parchment hanging off sides as handles to pull your entire granola out of the pan and place on counter. It will be a solid piece. Cut width-wise into one-inch sections. Then one long cut down the center of the pan. This will allow for 12 individual servings all equal size.
- Note: This recipe can easily be doubled for 24 using a 9x13 pan.
- Store in an air-tight container in the fridge.
Nutrition
*Rolled oats can vary in texture and thickness between brands. If the bars are not “sticking” well reduce the oats amount by 1/4 -1/2 cup.
Note: Press the granola mixture firmly into the pan before cooling. This will help the granola bars “stick” once cooled.
I just made these and they are delicious…. Perfect snack, even the teens liked them. Thanks
Yay! Thank you for sharing.
I’d love to know if Ali tried them with soaked oats and how that turned out.
Hi Debbie, If you would like to soak them, I’d recommend soaking and dehydrating the oats and then making these bars. I personally have tried soaking these many times and the result is never pleasant.
Made these last night! So yummy but the bottom of mune were really really sticky. Any suggestions?
Hi Shawna, Glad you liked them. I’ve found oats can differ greatly from one brand to another in texture and thickness, so if the mixture seems just a bit too sticky, add just a few tablespoons more of oats, before cooling. This should help the stickiness on the bottom.
Yum, I can’t wait to try this recipe. Thanks for sharing!
They are super yummy 🙂
These look amazing! I can’t wait to try them! I have pinned for later!
Thank you, Danya. They are really yummy :).
i don’t see quantities of ingredients listed?
Angela, We’ve had some technical issues with our recipe plug-in this morning. I’m in the process of updating the error.
Should all be fixed now. Thanks for letting me know 🙂
Hi, I would like to try your recipe but right now I don’t have honey, I was wondering if can I use maple instead? Thanks.
I have never tried but I would think maple would work well. If it doesn’t want to bind try chilling it to harden. Good luck! Let us know how it turns out!
I’m curious why you didn’t soak the oats for proper nutrient digestion? I am going to give it a try with soaked oats and a little tweaking.
We try to soak the majority of grains and legumes we consume, however, there are times it just doesn’t work out. This recipe is one of those recipes. It’s a nice occasional treat. A dehydrator may work well for using soaked oats in this recipe, however, may dry the bars out too much. Would love to hear what you come up with.
Candice, just a few quick questions. On the toppings, could you mix them in, like chopped nuts and almonds, or is it best to lay them on top of the mixture after laying? I think I understand the non-hardening of the bard could be cause by not cooking the oils long enough. Do you think, if massed produced, that these could be frozen in anticipation of camping and hiking trips? Thanks in advance, these look like what I am trying to accomplish!
Heith,
I’ve found it works best as a topping but nuts could be incorporated in mixture as long as their finely chopped. Some readers have found it made it more difficult to solidify resulting in more of a granola topping. If you find this happens pop them in the fridge for an hour and that should do the trick.
As for freezing, I have not tried this yet but don’t see why it wouldn’t work as long as there’s adequate thawing time as the honey will be hard as a brick and you don’t want to break a tooth. Happy snacking on the trail!
Thanks. Just did our first batch as you described and will be experimenting later.
Can’t wait to hear how it turns out!
i have made 2 batches and the don’t get hard. (no flax, no pb) i tried the first with coconut oil the second with butter any idea’s
Hi laura ,
This has been a popular issue …I think you might not be cooking the coconut oil and honey mixture long enough OR need to add more honey less coconut oil/butter. It should bubble and the bubbles should stick together when you drag a spoon through the center of the pan. Thats actually how I knew the mixture was “candied enough without making candy. You want a nice caramel or amber color .. Lastly make sure to let these bars set about 1 to 2 hrs before trying to cut them. Hope those tips help!!
Laura, I am in Florida and right now the humidity is a killer for things like this in my house. I have been refrigerating mine for about 30 minutes to help set due to this issue 🙂
We are trying to eat “cleaner” and these sound great!!
http://www.sarahowe.blogspot.com
Yes snacks made with real ingredients..something you can really enjoy and feel good about..double score!!
I just made these & cannot wait for them to set up!! =) They were super easy to make, I just need to find a cheaper way to buy the organic raw honey & coconut oil!!
Costco sells coconut oil and you get huge bang for your buck! $16 for 54 oz. Container. Shop local outdoor markets or local farms for a great prices on raw honey. Then you will have plenty to make as many various batches of granola as you wish! Happy cooking!
I buy local raw honey at our farmers market for $16 for 16 oz, pretty good price.
Wow! That’s a great price. Enjoy 🙂
Thanks Shauna!!!!!!
These look so delicious! I could totally eat a whole batch myself right now, lol! Thanks for linking up at last week’s The Weekend re-Treat on The Best Blog Recipes! Your link was chosen as a featured link at this weeks party that will start later tonight! I’ve also pinned your link to my Link Party Recipes board 🙂
Hope to see you back at this weekends link party!
Shauna
Thank you so much!
Can you substitute the honey for something else possibly to keep them together? I am doing the Daniel Fast & honey is not allowed nor is any syrup.
Yes real butter would also work well!
You could try Brown Rice Syrup as well if that is allowed.
What a perfect solution to the healthy snack dilemma! I am so making this. Thanks for the recipe!!
Thanks Andrea I think so enjoy!
Are they sticky?
No they are not sticky, nor are they dry..very moist and chewy.
Also how long do they last? I’m sure not long but wanting to know if they would be good for a couple days after making them. Thanks
They don’t last long in our house because our family ..especially my picky eaters devour them. But if they did last …it would be a week to a week and a half in a sealed container.happy cooking!
Love this! I can’t wait to try this today! I agree it is so hard to find good snacks other then fruit and veggies. I have a very picky eater, praying she will love these. Thank you for all your hard work and sharing, so Mom’s like me can provide healthy snacks for our kids 🙂
I love this! How do you store them? I’d be afraid of the chocolate chips melting everywhere? Especially since its summer time and warmer in the house? Great recipe though!
Whitney I individually wrap in parchment paper. In fact this is what I do when I bring them for my sons soccer team snack! Otherwise i store in a sealed container. You could always omit the chocolate chips and experiment with other toppings!
Thanks for the recipe! Mine were delicious, but fell apart really easily. Do you know if it would work better to roll them into tight balls to store in the refrigerator?
Hey Megan, One trick to achieving “sticky” bars (in a good way ;)), is bringing the honey (and butter) to a boil and allowing it to boil (stirring) for a minute or two, without burning. This is similar to making candy and will help the bars stick together.
I’ve never tried making these into balls, but I think that method would work. The oats will be sticky, so I’d coat my hands in water first before rolling to prevent a sticky mess.
Let me know how it goes!!