You guys, today is a big day. A day many of you have been waiting for. It’s time for another homemade lotion recipe.
We’ve already made homemade lip balm and body butter, and today we’re making a silky smooth lotion.
Want to Save This Article?
Enter your email & I’ll send it straight to your inbox. And you’ll get new recipes & tips each week.
First, a little background story…
A few years ago, I started thinking about making the switch from a laundry-list-of-toxic-ingredients that I’d used to clean my home and care for the outside of body. My family had already been enjoying “real food” for a few years at that point.
Now, let me pause here, and go down a bit of a “rabbit trail.”
There’s an idea going around, which I first believed when making the cleaning and bodycare switch, that chemicals are bad. Friend, I would suggest just the opposite. When I talk about making the switch from toxic products to “more natural” products, I’m not talking about banning chemicals from our homes, because that’s impossible! Everything from baking soda to water has a chemical composition, and we certainly know those ingredients aren’t toxic.
When I talk about making the switch, I’m talking about choosing or making products that aren’t made with highly questionable/toxic ingredients. If you’re curious about some of the questionable/toxic ingredients used to make many of the beauty and cleaning products in the US, many of which are banned in Europe due to health concerns, I recommend checking out the Environmental Working Group’s Database. On the EWG site, you can check out overall safety ratings for products and brands, as well as individual ingredients.
Just remember, my natural living goal is to source or make safer products, not eliminate chemicals. Because that would mean having to eliminate my beloved baking soda, water, and vinegar, too.
Okay, back to the lotion story ;)…
My switch to more natural products started with bodycare items, particularly foundation powder and moisturizer.
I had read about coconut oil being a miracle product, so I switched out my store-bought moisturizer for coconut oil. Within a few months, it was clear that my skin didn’t think coconut oil was a miracle product. After much research, I determined that coconut oil just wasn’t something that I could use every day as a moisturizer.
Side note, I still use coconut oil for DIYs, so I’m not saying coconut oil is bad news. Rather, I’m just suggesting that everyone is different, and so the products we love and use will vary, too. My skin tolerates coconut oil in deodorant, and as an occasional post-shave moisturizer.
At that point, I decided to create a homemade lotion that would be shelf-table, and could be used in place of the coconut oil. After lots of trial and error, I developed a homemade lotion, which technically is a body butter, that’s thick and luxurious. My skin loved the change from 100% coconut oil to this new product. And here’s where my backstory meets today’s DIY lotion recipe…
I shared that lotion/body butter recipe two years ago on Live Simply. Since that time, I know many of you have tried that recipe, and love it! I also know, based on comments and emails, that many of you would like a creamier/less thick lotion that has more of a store-bought consistency.
Today, I’m excited to share with you a new lotion recipe that’s soft, creamy, and even “pumpable.” Before I share the recipe, let’s chat about a few things to keep in mind…
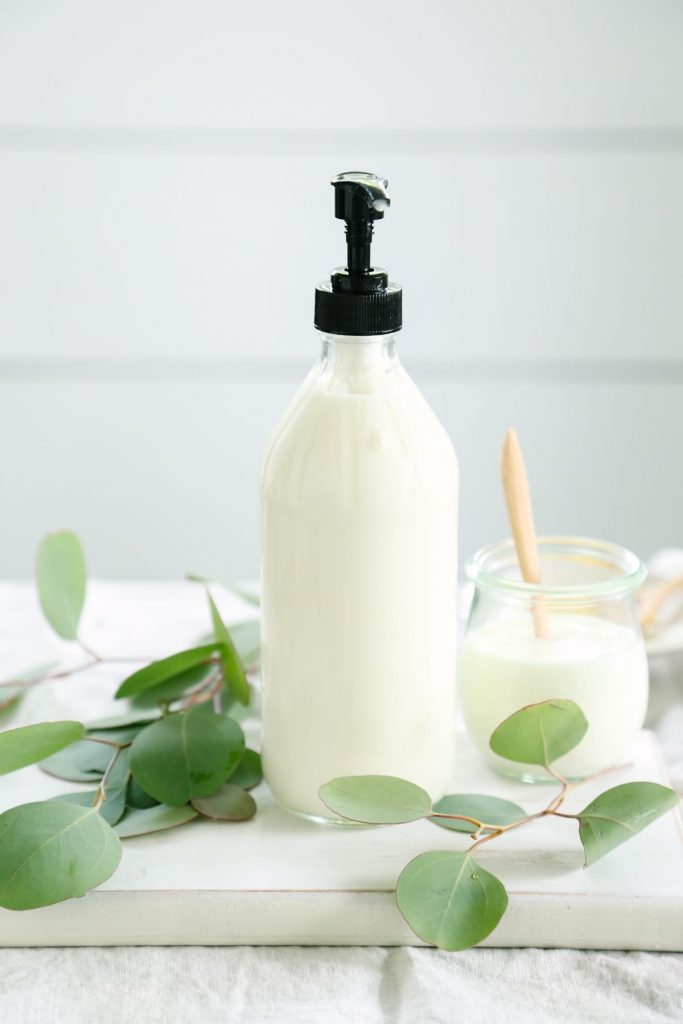
1. This recipe is “pumpable.” This means the lotion is smooth and liquid enough to be used in a pump bottle. My ultra-moisturizing lotion/body butter is very thick, which means you have to store it in a jar (it won’t pump). While you can store this lotion in a pump bottle, cleaning the “straw” (what is that little thing at the base of the pump called?) is tricky, because well, you’re dealing with lotion.
If you use a pump bottle, know that you may need to replace the pump and straw if you can’t thoroughly clean them out before making a new batch of lotion. Alternatively, this lotion could also be stored in a bottle or jar, and then poured on your hand, or spooned out. I personally go with the jar (other than for photos here), since I store this in the fridge.

2. This lotion does require a number of ingredients, and is a bit of process to make. So if you’re feeling overwhelmed by the idea of making one more thing, let me encourage you…
You don’t have to make lotion to use “cleaner” bodycare products. It’s perfectly okay to purchase pre-made lotion.
Yep, that probably sounds contradictory for a homemade lotion chat. Here’s the thing, simple living isn’t about “doing it all.” In fact, if you’re “doing it all” you’re probably not living simply. It’s okay to say, “You know what, I’m going to make a homemade dinner for my family, and purchase a ‘cleaner’ lotion from the store.” I personally don’t make lotion the majority of the time because I have to prioritize other tasks and I know my health food store sells some decent lotion options.
If you’re going to purchase lotion, I highly recommend checking out the EWG. I personally like Every Day Shea brand.
With that being said, today’s recipe is for the folks who want to make a silky smooth lotion at home.
5 More DIY Recipes With Shea Butter
- Shea Butter Lip Balm – Use shea butter and oil to make this natural lip balm recipe.
- Honey Lip Balm – Use honey, shea butter, and beeswax to make an ultra-hydrating lip balm.
- Lotion Bars – Moisturizing lotion in a solid bar, made with shea butter and beeswax.
- Body Butter – This luxurious lotion is made with shea butter and oil and moisturizes the whole body.
- Face Moisturizer – Combine shea butter and oil to make an all-natural face moisturizer.
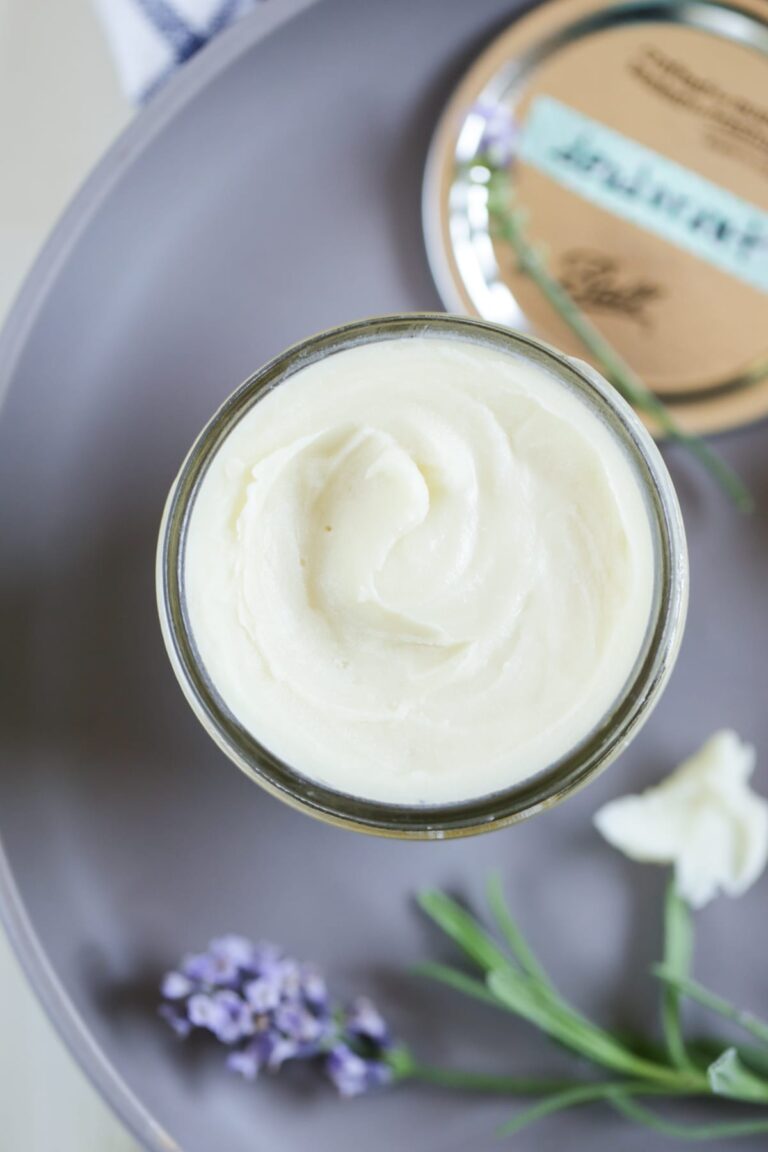
Silky Smooth Homemade Lotion
Ingredients
- 3/4 cup sweet almond oil 157 grams
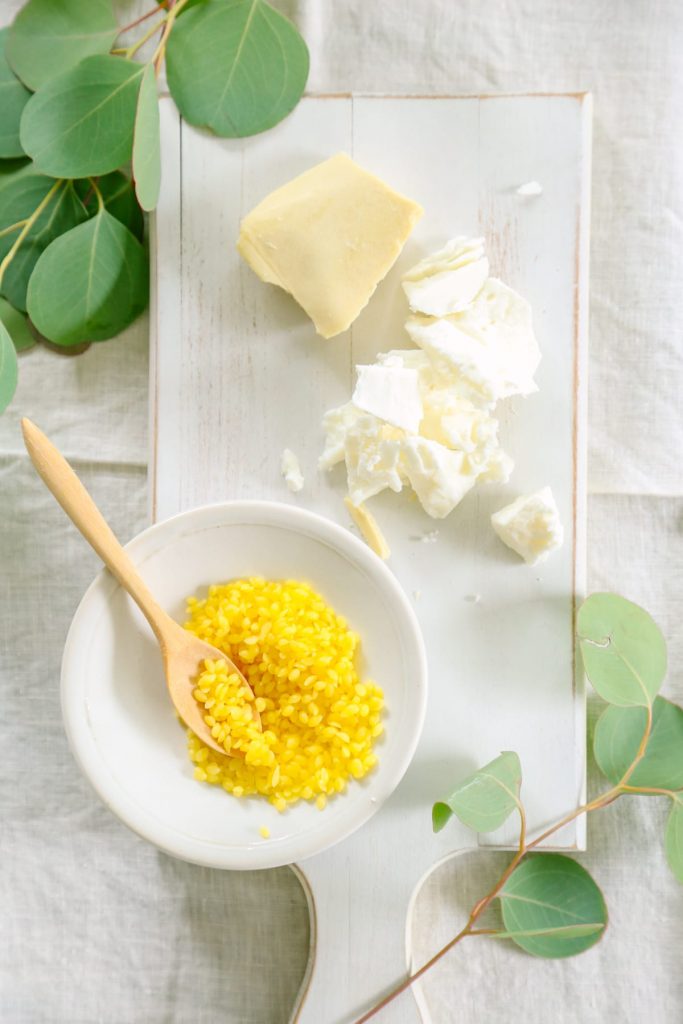
- 3 TB refined mango butter 40 grams
- 2 TB cocoa butter 14 grams
- 1 TB beeswax pellets 8 grams, or finely chopped beeswax
- 1 tsp vitamin E oil
- 43 drops lavender essential oil or orange essential oil, can be reduced to 20 for young children
- 1 cup distilled water or a floral hydrosol – rose lavender or calendula all work well – must be room temperature or lotion is more likely to separate, 220 grams, the hydrosol is my preference
Instructions
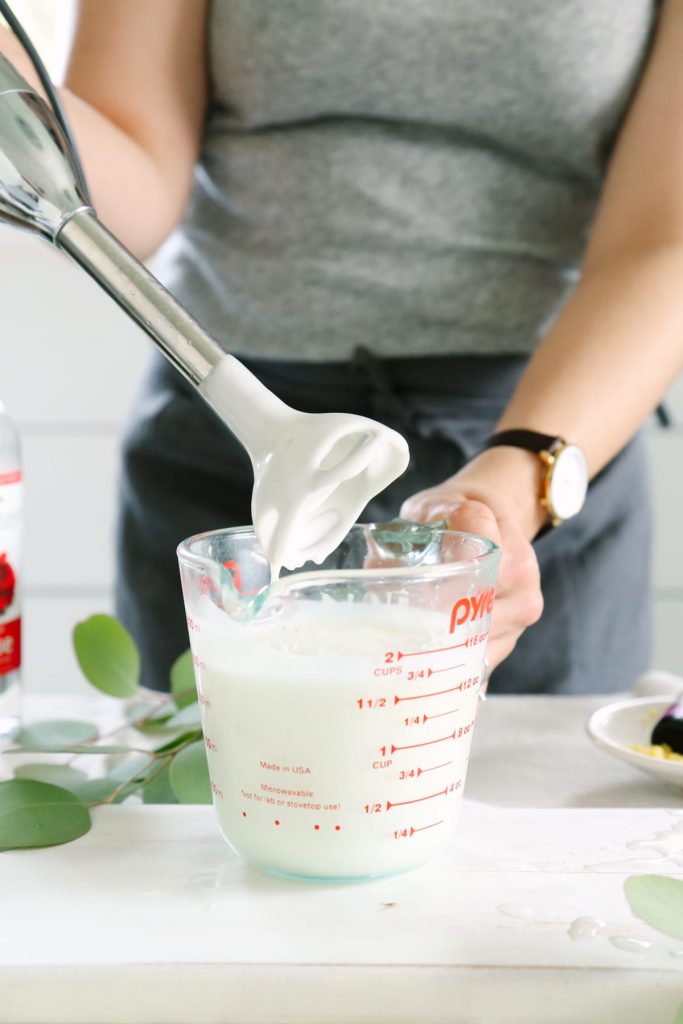
- Make sure that your blender or immersion blender (you can use either one–I prefer an immersion blender because it’s easier to clean), bowl and all utensils are very clean when you make this. If they’re not fully sanitized, then your lotion can grow bacteria or mold. Clean everything with hot soapy water, then swab with rubbing alcohol or vinegar, and let air dry.
- In a heat safe glass bowl, combine the sweet almond oil, mango butter, cocoa butter, and beeswax.
- Place the glass bowl on top of a saucepan partially filled with water, over medium heat. This creates a type of double boiler. Stir occasionally until everything is melted and combined.
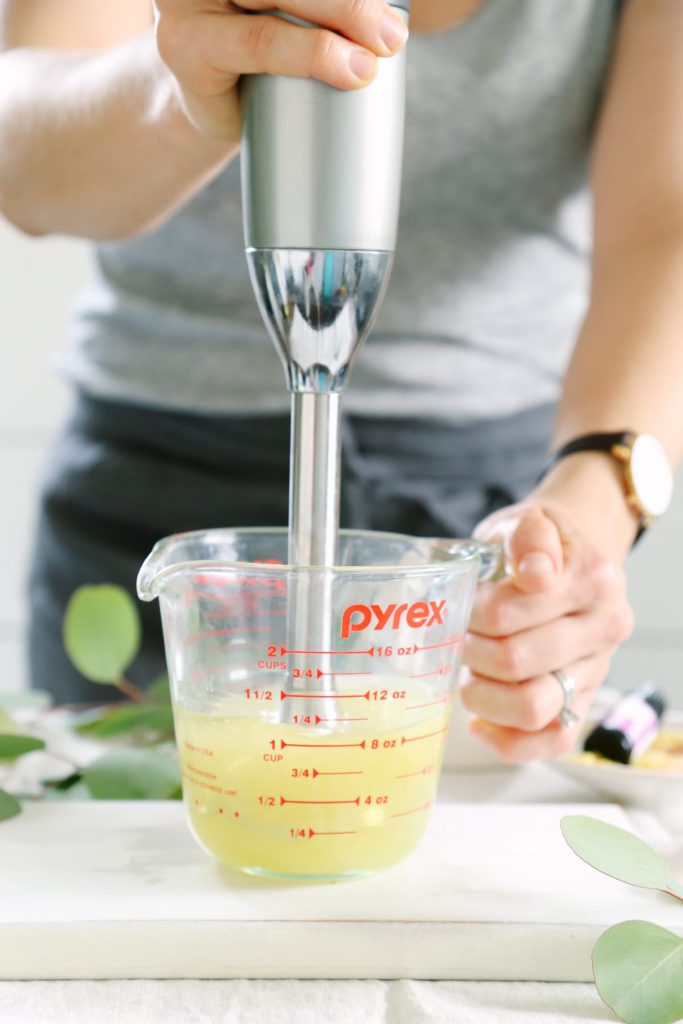
- Allow the oil mixture to cool for a few minutes before pouring it into your blender (if using a table-top blender). Let this mixture cool until it’s room temperature. It should look creamy, thick and opaque, but don’t let it get solid. Optional: You can place the blender in the fridge for about 35 minutes to speed up the process.
- Add the vitamin E oil and essential oil to the cooled oil mixture. If you’re using a table-top blender, blend the mixture with the lid on for a few seconds. If you’re using an immersion blender, place the stick in the bottom of the mixture (in a high-rimmed bowl), and blend for a few seconds, pulsing up and down at the bottom a few times.
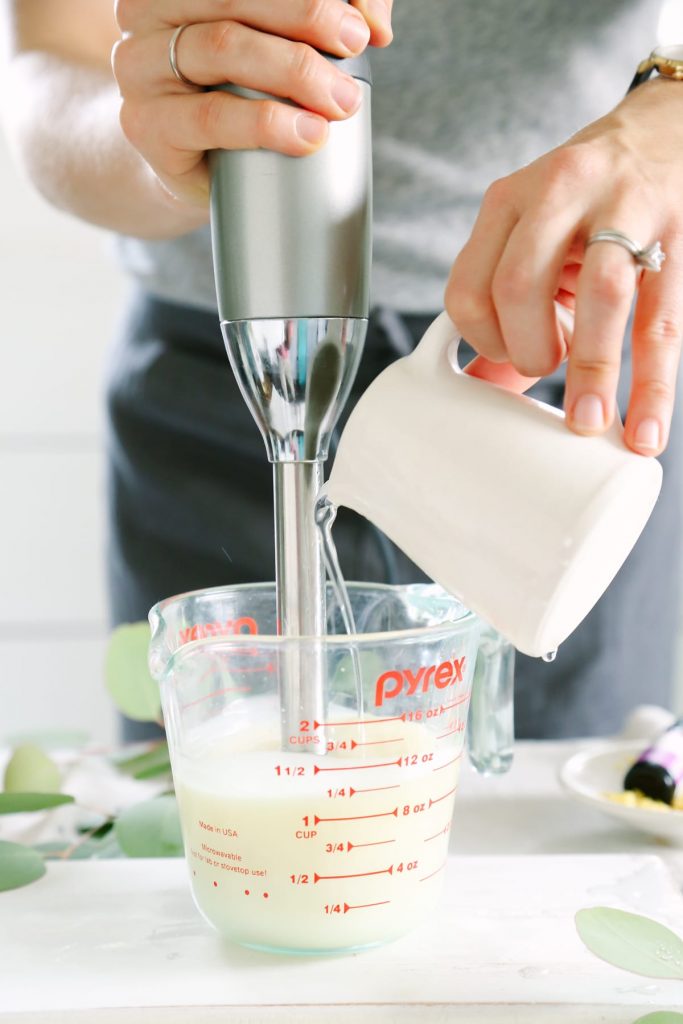
- If you’re using a table-top blender, take the lid off of your blender, or just the top part of the lid if you have that option on your blender. With your distilled water or hydrosol in the glass measuring cup, slowly pour it into the oil mixture in a very thin drizzle while the blender is on medium/low. If you’re using an immersion blender, with the blender on and at the bottom of the jar, slowly pour the distilled water or hydrosol into the oil, pulsing the immersion blender up and down at the bottom just a few times.
- If you’re using a table-top blender, slowly increase the blender to medium speed and blend the lotion for 30 seconds more. If you’re using an immersion blender, continue to blend, pulsing the immersion blender up and down, for about 30 seconds more.
- Immediately pour the lotion into a jar and store away from light and heat.
Notes
Natural Body-Care Simplified
Learn how to make your own body and beauty products with simple ingredients.
thanks.
My skin still feels a little bit dry after I use the lotion. What ingredient should I add more? Oil, butter or water?
Also, for eczema skin, do you think what essential oil is good?
I have so many questions, thanks for your patience and help.
Hey Marina, Hmmm, I would try using some 100% shea butter after the lotion. I wouldn’t add anything to the lotion once it’s made. Lavender is very soothing, so I would try that.
Hey,
Where can you get mango butter?
Hey Elizabeth, The blue link in the recipe (mango butter) will take you to a brand I’ve used on Amazon. You can also find it via Plant Therapy (their own online website)–another source I’ve used. And some health food stores will sell it in the beauty/supplement section.
Does avocado butter function closer to Mango butter? Or shea butter is closer to Mango butter?
Thanks.
Hey Marina, I haven’t tried avocado butter before, so I’m not sure how it will perform compared to mango butter. Shea butter is closer to mango butter than something like cocoa butter, but it’s still a bit different. Here’s a bit more about each butter: https://livesimply.me/2017/03/31/how-to-make-easy-body-butter/
Hi Kristin:
You mentioned that the product can not last long if water is added. Usually how fast I need to use it up?
How about floral water? The product with it can not last long either?
As a beginner, I have so many questions. Thanks for your kind sharing.
Hey Marina, I use water-based products within a few weeks, about 2-3 weeks. Some folks may feel this is too long, and some folks feel the product can go longer, but that’s my personal comfort zone. With hydrosols (the rose water), I generally go a bit longer–6-8 weeks. Again, this is my personal comfort zone. You can add a preservative to extend the shelf-life even longer, but you’ll need to make sure it’s incorporated according to the package (if a certain temperature liquid is required, etc.). You can also refrigerate the lotion to extend its life.
For shelf life, my favorite is body butter, because it will last months (6 months +). It’s used just like lotion, it’s just not “pumpable.”
Hi Kristin. I notice that my lotion has now gone a bit grainy. I used your exact recipe, do you know what may have cause that. Thanks
Hey Susan, I’m not sure what may be causing the grainy texture. Usually the culprit is shea butter, but since you didn’t sub in shea butter that isn’t the issue. I know some preservatives need to be added at very specific times in lotion-making, when the liquid ingredients are at certain temperatures–I wonder if this may have happened? I honestly don’t have a solid answer as to what’s causing the grainy texture.
what brand of hydrosol do you use? can you give the amazon link? . If I use shea butter to replace mango butter, how much do I need?
thanks
Hey Marina, I use Plant Therapy hyrosols (here’s a link to their site). For the shea butter, you can try a 1:1 sub. Although the shea butter may produce a thicker and grainer lotion.
I thought emulsifier is needed to combine water and oil, but I do not see emulsifier in this receipt. Does the butter act as emulsifier here? Thanks.
Hey Marina, The emulsifier is beeswax.
thanks. I just started to DIY and learnt a lot from you. I did not see any normal shampoo and conditioner receipt. Can not wait for your receipt for them.
Hey Marina, I don’t have a recipe for shampoo and conditioner, and probably won’t experiment any further with developing them. I’ve found that making a good homemade shampoo and conditioner, that doesn’t leave my hair feeling greasy or completely dry it out, hasn’t been possible. I love 100% Pure Shampoo, and I don’t use conditioner.
Hi Kristin, I used germall plus liquid preservative in this recipe. I’ve heard lots of good reviews about germall plus. I’m wanting to make this recipe again and try hydrosol. I did a bit of research on hydrosol and found it to be a flower water that is already scented with EO. If I use floral water, would I still need to add the 43 drops of EO? Again, this recipe is amazing, I so happy how it came out so creamy and it works great in my lotion pump bottles but best of all, it feels amazing on skin. Oh and I used 4 grams of germall plus in this recipe which is 1% and added it when my ingredients were 122F or lower, any higher and the germall plus will not work.
Thanks so much for sharing, Susan! I know that will be helpful for other makers in the future. Hydrosols are the by-products of making essential oils, so most are fragrant like essential oils (although they’re not concentrated like essential oils) but don’t carry the same dilution concerns. As long as its a pure hydrosol, the same amount of EO can be used.
I just made this (April 7, 2017) and it turned out amazing. followed the recipe exactly accept I added preservative. I scented it with geranium rose EO and a couple drops of peppermint. It smells and feels so good on the skin and it’s not greasy. Thanks so much for the recipe
Awesome, Susan! I bet geranium and rose smell amazing in this lotion. Geranium is one of my favorite essential oils. May I ask which preservative you used–this question has come up before about this recipe, and I’d love to refer to your addition as an example of what someone has used. Thanks so much for sharing!
Kristen,
I was so excited to find this recipe. I am allergic to coconut oil and virtually all the homemade lotion recipes I found had it as a main ingredient.
I made the lotion, and I’ve let it settle for a few days before using. I didn’t have any mango butter (I’m allergic to mangos) so I used Shea Butter and Cocoa butter. I also added a few drops of Frankincense Essential Oil, but otherwise followed the directions very closely.
The lotion came out oily. I have extremely dry skin with rosacea so I didn’t think it could be too much but the lotion just sits on my skin and won’t dry or absorb. I can’t imagine what I’ve done wrong! 🙁
Hey Erica, The lotion will be very oily compared to store-bought lotions. With the ingredients used, a little bit of lotion goes a very long way, so I’ve found that using just a pea-sized amount really helps–especially when it comes to shea butter and nourishing oils. Another option is to try adding arrowroot flour (just a small amount–a couple of teaspoons possibly) to cut down the oily feel. I’m not sure what else may help.
Hi Kristin, I can not find mango butter in my town (South America). Which one I can replace instead it?
And how long do you think it lotion stay fine withouth adding preservative?
Hey! Thanks so much for this recipe I look forward to creating it and getting my kitchen witch on! I was wondering if this recipe would still work if I used soy or carnauba wax instead of beeswax. Let me know ! And thank you again!
Hey Sarah, Carnauba wax may work as an emulsifier, but I’m not 100% sure. Let me know if you try it!
Thank you for answering my question and for your help!
I’m glad you like Puerto Rico!
Hi Kristin, I’m from Puerto Rico and I will try to write correctly, but if I don’t sorry for that…
I made your lotion and it’s wonderful. I used coconut oil (2 parts) and avocado oil (1 part), and 5 tbs of shea butter instead. For preservative I used opthipen and 1 tbs of glycerin.
Consistency is perfect and oily like my friends like. But I noticed that have very tinny granules before 2 or 3 days…
Can you tell me why? Is one of my ingredients?
Hey Michelle,
I’m so glad you’re enjoying the consistency. I think the issue is with the shea butter. Shea butter, once it’s cooled, can produce the tiny granules you’re experiencing. I’ve found that quickly cooling shea butter is the key to making sure this doesn’t happen (such as putting the bowl in an another bowl with cool water and a few ice cubes) versus allowing the shea mixture to gradually cool.
PS: We were just in San Juan in January! We absolutely loved Puerto Rico–so beautiful!!
Hello there, the lotion looks really good. Just wondering if you could help me out? I have very dry and flaky skin and tried making your Ultra-Moisturizing Lotion (Without Coconut Oil) and that worked great. Do you know if this lotion would work just as well for dry skin? Thanks in advance for your help.
Hey Trent, For really dry skin, I’d stick with shea butter since it’s super moisturizing. So I’d probably stick with the ultra-moisturizing lotion.
Hi Kristen, new to your products but they sound wonderful and I Love Plant Therapy EO’s, hydrosols, and products! I also love their safety posts. Since I can’t use this up (even in half) very fast, I need a preservative. Only thing I have is optiphen 20. Do you know if that would work? Thanks for your reply!
Hi,
I just joined your family and I’m super excited to make all these beauty products. I want to start with the moisturizer but wanted to ask if this is gentle enough to use on face or is for body only. My skin is very sensitive so just wanted to make sure.
Thanks!
Hey Manu, Welcome!! Yes, you can use this on your face, too. The only caution is that cocoa butter can cause some folks to breakout.
Hello! I this recipe looks great! I was wondering, do you have any suggestions for making a tinted moisturizer? I have tried but when the natural pigments got wet it was far too dark for my extremely pale skin.
Hi Savannah, I don’t know if Kristin has personally tried this, but I’ve heard of others adding a bit of powdered foundation (here’s Kristin’s recipe: https://livesimply.me/2013/06/27/homemade-foundation-powder/) to create a tinted lotion. But I’ll make a note of your comment and have Kristin come back and answer you as well when she returns from vacation. ~Rachel, answering on behalf of Kristin while she’s traveling outside the country
Hey Savannah, I’ve had a similar experience with tinting lotions and creams. Unfortunately, right now I don’t have any successful recommendations.
I am so excited to have found Live Simply! I have been creating more natural products for my skin and home for several years now. I will be making your lotion and powder TODAY! I would like to humbly add that in my research and experience and living with acne-prone skin), coconut oil on my face was not-such a great idea (coconut oil has a comedogenic rating of 4 (on a scale of 1-5). I also believe that the Vitamin E in the recipe is a sufficient preservative in this recipe and have every confidence keeping this on my bathroom counter for a few months without an issue. Thank you again for sharing your recipes.
Hey Sheila, Welcome to Live Simply! I’m so glad you’re enjoying the blog. 🙂
Hello. Made this recipe and love it but have noticed the water separating from the solids. Did I do something wrong?
Hey Amy, Is the water fully separating, or is there just a bit of water at the top? If it’s fully separating, then the oil mixture may not have been cool when you started the emulsifying stage, or maybe the water needed to be added at a slower rate. I’m glad you’re enjoying the lotion.
Hello 🙂 Your lotion sounds lovely. However, I really think you should expand on the
dangers of what will happen if you don’t use a proper preservative. I would hate to
see someone get sick. Bacteria starts growing way before the human eye can even
see it. I hope you are not offended in any way. As a doctors wife, I see many blogs
such as yours that show similar recipes + cringe to think what could happen if someone
did get sick, especially a child. Something to think about. Also, most hydrosols are lightly
preserved from the manufacturer due to them being so delicate, but still require refrigeration.
Rose is the most stable. But still, further preservation is required to a lotion since water is added.
Kindest regards:)
Hey Dee, The link in the recipe notes, going to the Nerdy Farm Wife’s blog, provides extensive information about using preservatives. Her post goes into lots of detail about how, when, and why to use preservatives.