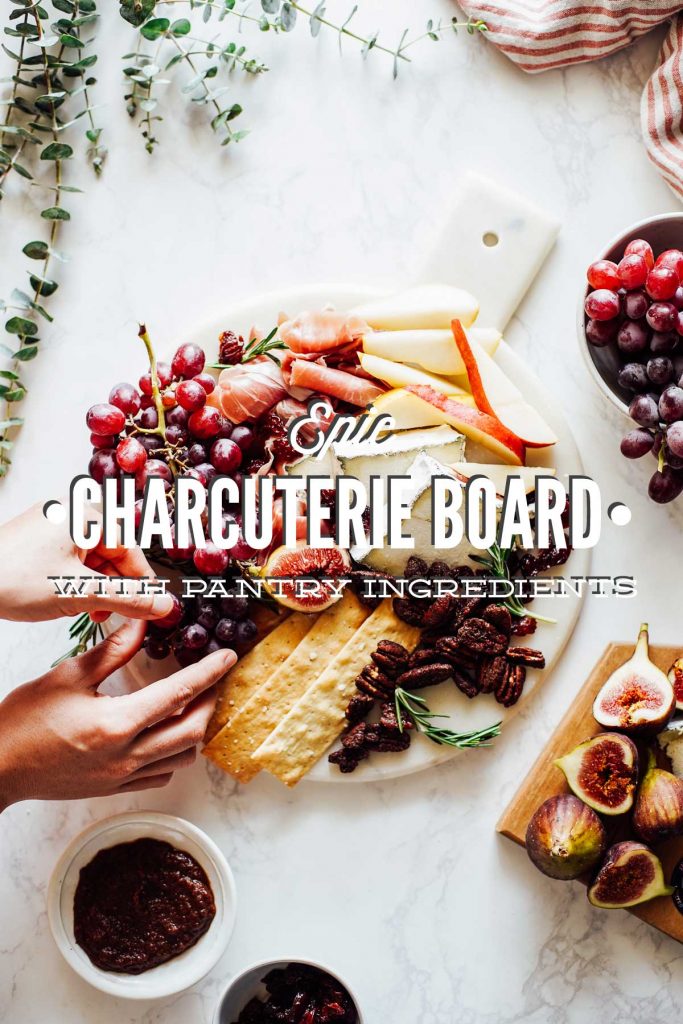
My favorite way to keep lunch and dinner simple on the weekend is with a DIY charcuterie board. To make a charcuterie board in our home, I pull from whatever is leftover in our fridge and pantry from the week. A charcuterie board is a great way to serve a family meal that everyone loves (because there is something for everyone to pick from), clean out the fridge (and pantry) each weekend, and take a break from cooking. Let’s take a look at how to build an epic charcuterie board with whatever you have in your fridge and pantry!
Want to Save This Recipe?
Enter your email & I’ll send it straight to your inbox. And you’ll get new recipes & tips each week.
Watch: DIY Charcuterie Board Tutorial
What is a Charcuterie Board?
Charcuterie itself is a French term that means the art of preparing meats (particularly pork) such as: bacon, ham, sausage, pate, etc. This word, in French, also refers to a butcher shop, where meats would be cured, made, and sold. These particular meats are very traditional in nature and were a way to preserve a bounty of meat before the age of refrigeration. Something like bacon or prosciutto (an Italian cured meat that dates back to 10BC) would be salted and cured (a natural process that occurs).
These meats, just like with many traditional methods that are trendy today (like sourdough bread and fermenting foods) have been around a very long time and are real foods. (What is real food? Read this.) Yes, there are cured meats that take major shortcuts today (just like with any ultra-processed food knock off of a traditional, real food), but cured meats shouldn’t be feared and cast aside. Curing and fermenting are incredibly traditional and a beautiful way to preserve meat before our modern age or refrigeration.

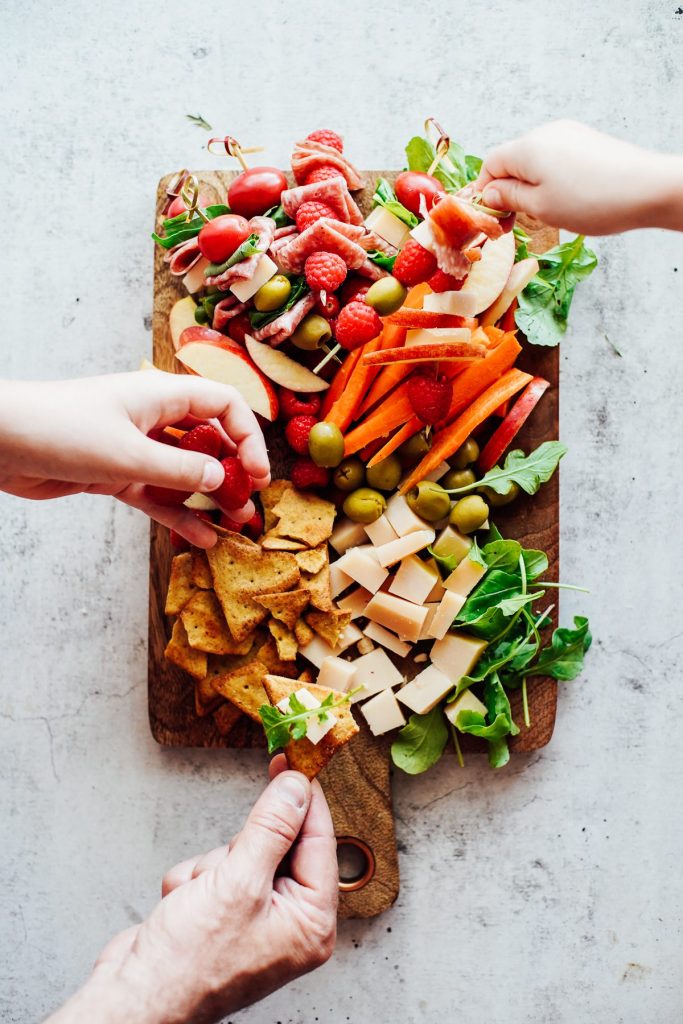
Today, a charcuterie board is usually a display of meats (and possibly cheese) along with other foods that compliment the meat, such as honey, nuts, olives.
With my DIY take on this traditional concept, I definitely take some liberties with how we make a charcuterie board, getting away from a meat heavy board (which I love, but can be quite expensive) and using whatever is my pantry and fridge to make a “grazing board” that’s inspired by a traditional charcuterie.
How to Pronounce Charcuterie
As an American, this word hasn’t been the easiest for me to pronounce and I still butcher it many times (see what I did there?). I’m not the best person to teach you the authentic way to pronounce charcuterie, but there are several audio lessons you can find online (here’s a great audio lesson).
Tools for Making a Charcuterie Board
Other than some meat, cheese, and whatever else you have in your fridge and pantry, here’s what you’ll need to make a beautiful charcuterie board (or grazing board–which is basically what you do when eating a charcuterie board: graze on all the ingredients and foods!):
- Cutting Board: A medium to large cutting board is ideal. Stick to something that doesn’t have food odors (like garlic) trapped on the board. Other options: a rimmed sheet pan (what you would use for baking) or a large serving tray.
- Serving Utensils: If you choose to use a soft cheese, you’ll need to add a cheese knife or butter knife. And if you have people outside your family enjoying the board, you may want to add little forks for the olives and meats (some people may not love multiple hands on the food).
- Small Bowls: Small bowls work great for olives, nuts, or dips that you may choose to add to the board.
Charcuterie Board Ingredients
Here are a few ideas for what you can use to make a DIY charcuterie board (grazing board):
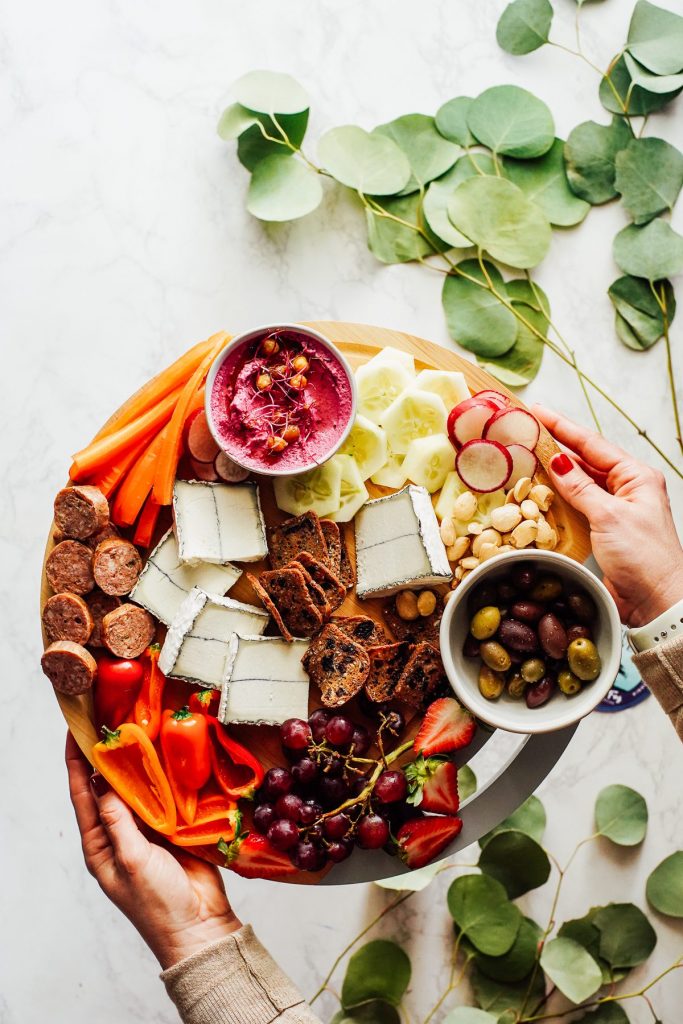
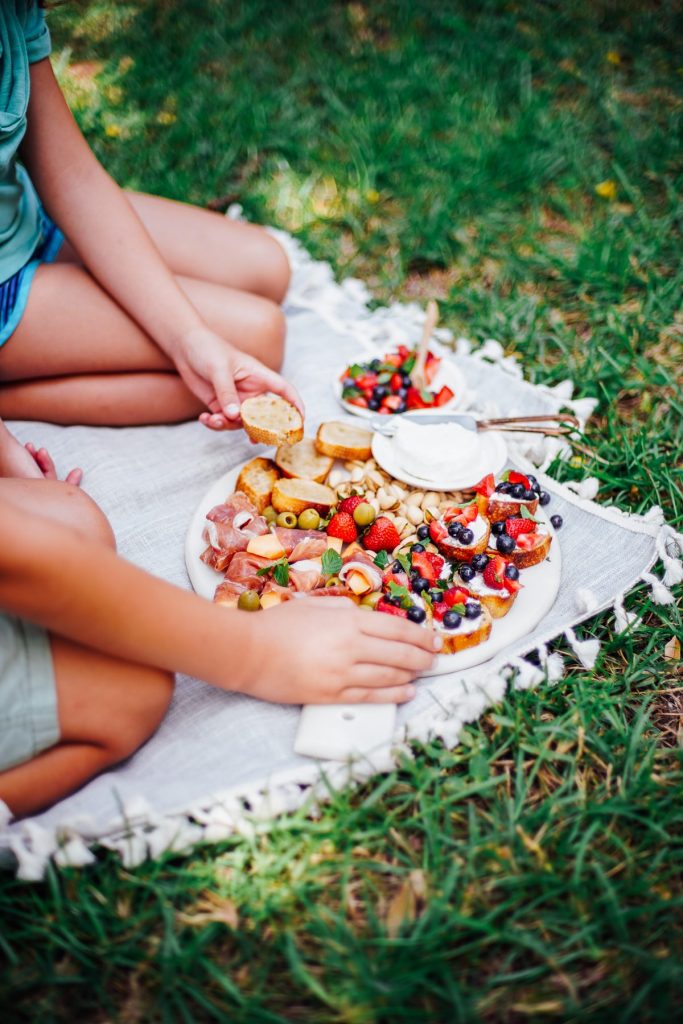
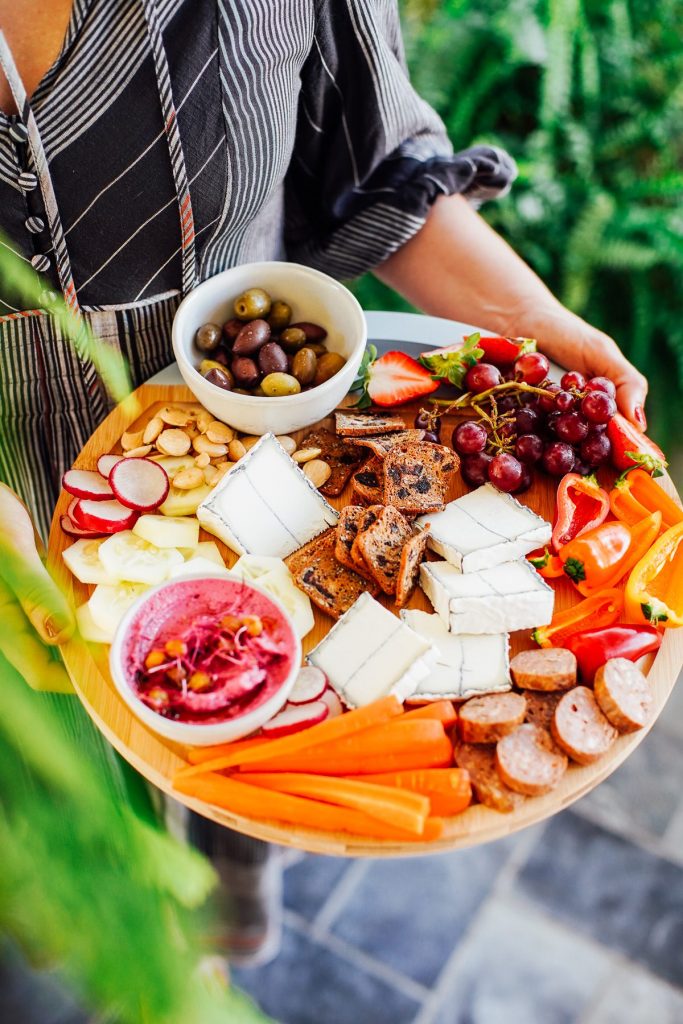
- Assorted cut veggies: Cucumbers, snap peas, bell peppers or mini sweet peppers, cherry tomatoes, carrots, kohlrabi, etc. Think about what you have in the fridge and what’s seasonal.
- Assorted cut or whole fruit: Cantaloupe, berries, watermelon, honeydew, grapes, avocado, cherries, etc. Think about what you have in the fridge and what’s seasonal.
- Hummus: Serve plain hummus or add variation by blending up a cooked beet, cooked carrot, or roasted bell pepper.
- Ranch Dip: Homemade ranch is always a favorite to enjoy with cut veggies.
- Pesto: Serve as a dip for veggies, crackers, pita, or toast.
- Guacamole or salsa: Serve with cut veggies and tortilla chips.
- Sourdough toasts: Brush sourdough bread slices with olive oil, and grill or broil until crisp.
- Crackers, tortilla chips, pita bread, or muffins
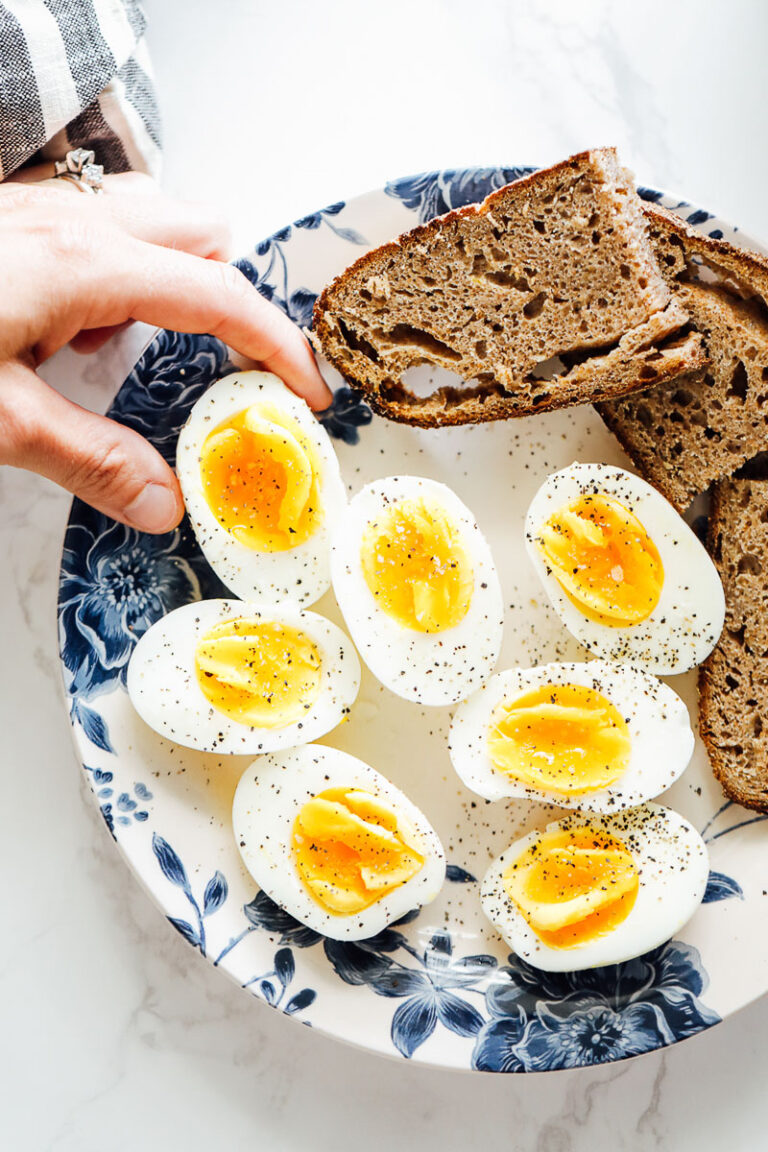
- Meats: Deli meat, prosciutto or salami or other cured meats, shredded chicken, grilled steak, chicken salad or tuna salad or egg salad, or hard boiled eggs. Think about adding 1-2 meat selections.
- Cheese: Parmigiano-reggiano slices, fresh mozzarella balls, different stinky cheeses (as my kids call them), cheddar, asiago, manchego, soft cheese (like goat cheese), etc. Think about adding 1-2 cheese selections.
- Honey for drizzling: Particularly if serving cheese (so good with a goat cheese or blue cheese).
- Nuts or seeds: Try roasting nuts and seeds in the oven at 325F until fragrant (about 15-20 minutes) or serving raw. Hazelnuts, pumpkin seeds, almonds, cashews are my favorite.
- Olives or pickles: Serve various olives, pickles, or fermented veggies (like fermented carrots).
- Chocolate of course!
To make a charcuterie board (grazing board), simply mix and match a few options. Serve with napkins or small plates.
Got a picky eater? Try this!
This serving style encourages exploration in children because they’re in charge of what they choose and the beautiful presentation scores some mega points. Remember, we eat with our eyes first. A charcuterie board allows your child to gain exposure to a variety of foods. Exposure is about more than just tasting a food. Exposure is also about finding, seeing, smelling, feeling, chopping, and cooking food. And, remember, a child may need to be exposed to a food 10-15 times before they’re willing to eat it.
If your child is picky about food right now, serve a charcuterie board on the weekend. Let your child pick out a new fruit or vegetable to add to the tray, or a new cheese or meat or dip. Or, ask your child to help cut the veggies or make a dip for the charcuterie board. This is a very non-threatening way to present a new food, or a food that your child has been apprehensive about in the past.
(This style of serving food is also a great way to serve a salad: build your own style. Put everything out and let your family pick and choose how they build their own salad.)

How to Make an Epic Charcuterie Board with Pantry Ingredients
Ingredients
- cut veggies cucumbers, snap peas, bell peppers or mini sweet peppers, cherry tomatoes, carrots, kohlrabi, etc. Think about what you have in the fridge and what’s seasonal.
- cut or whole fruit cantaloupe, berries, watermelon, honeydew, grapes, avocado, cherries, etc. Think about what you have in the fridge and what’s seasonal.
- hummus
- homemade ranch dip homemade ranch is always a favorite to enjoy with cut veggies.
- pesto serve as a dip for veggies, crackers, pita, or toast.
- guacamole serve with cut veggies and tortilla chips.
- salsa serve with cut veggies and tortilla chips.
- sourdough toasts brush sourdough bread slices with olive oil, and grill or broil until crisp.
- Crackers, tortilla chips, pita bread, or muffins
- meats deli meat, prosciutto or salami or other cured meats, shredded chicken, grilled steak, chicken salad or tuna salad or egg salad, or hard boiled eggs. Think about adding 1-2 meat selections.
- cheese parmigiano-reggiano slices, fresh mozzarella balls, different stinky cheeses (as my kids call them), cheddar, asiago, manchego, soft cheese (like goat cheese), etc. Think about adding 1-2 cheese selections.
- honey for drizzling particularly if serving cheese (so good with a goat cheese or blue cheese).
- nuts or seeds try roasting nuts and seeds in the oven at 325F until fragrant (about 15-20 minutes) or serving raw. Hazelnuts, pumpkin seeds, almonds, cashews are my favorite.
- olives or pickles
- chocolate
Instructions
- To make a charcuterie board (grazing board), simply mix and match a few options.
- Serve with napkins or small plates.