Want to make beautiful, natural candles to burn in your home or gift to family and friends but don’t want to spend hours on a DIY project? Here’s how to make the most beautiful homemade candles using simple ingredients in just 20 minutes (with both scented and unscented options)!
Want to Save This Article?
Enter your email & I’ll send it straight to your inbox. And you’ll get new recipes & tips each week.
In this blog, I’m outlining the exact steps you’ll need to successfully make beautiful jar candles at home. If you’d like to make taper candles, follow this guide.
My DIY Candle Experience
My first DIY ever was homemade foundation powder. That one little DIY project ignited a passion for making my own cleaning and beauty products…
- hand soap
- laundry soap
- homemade surface cleaner
- body butter
- bathroom cleaner
- DIY floor cleaner
- glass cleaner
- and the list goes on…
One of my favorite DIY products to make is candles using soy wax or beeswax.
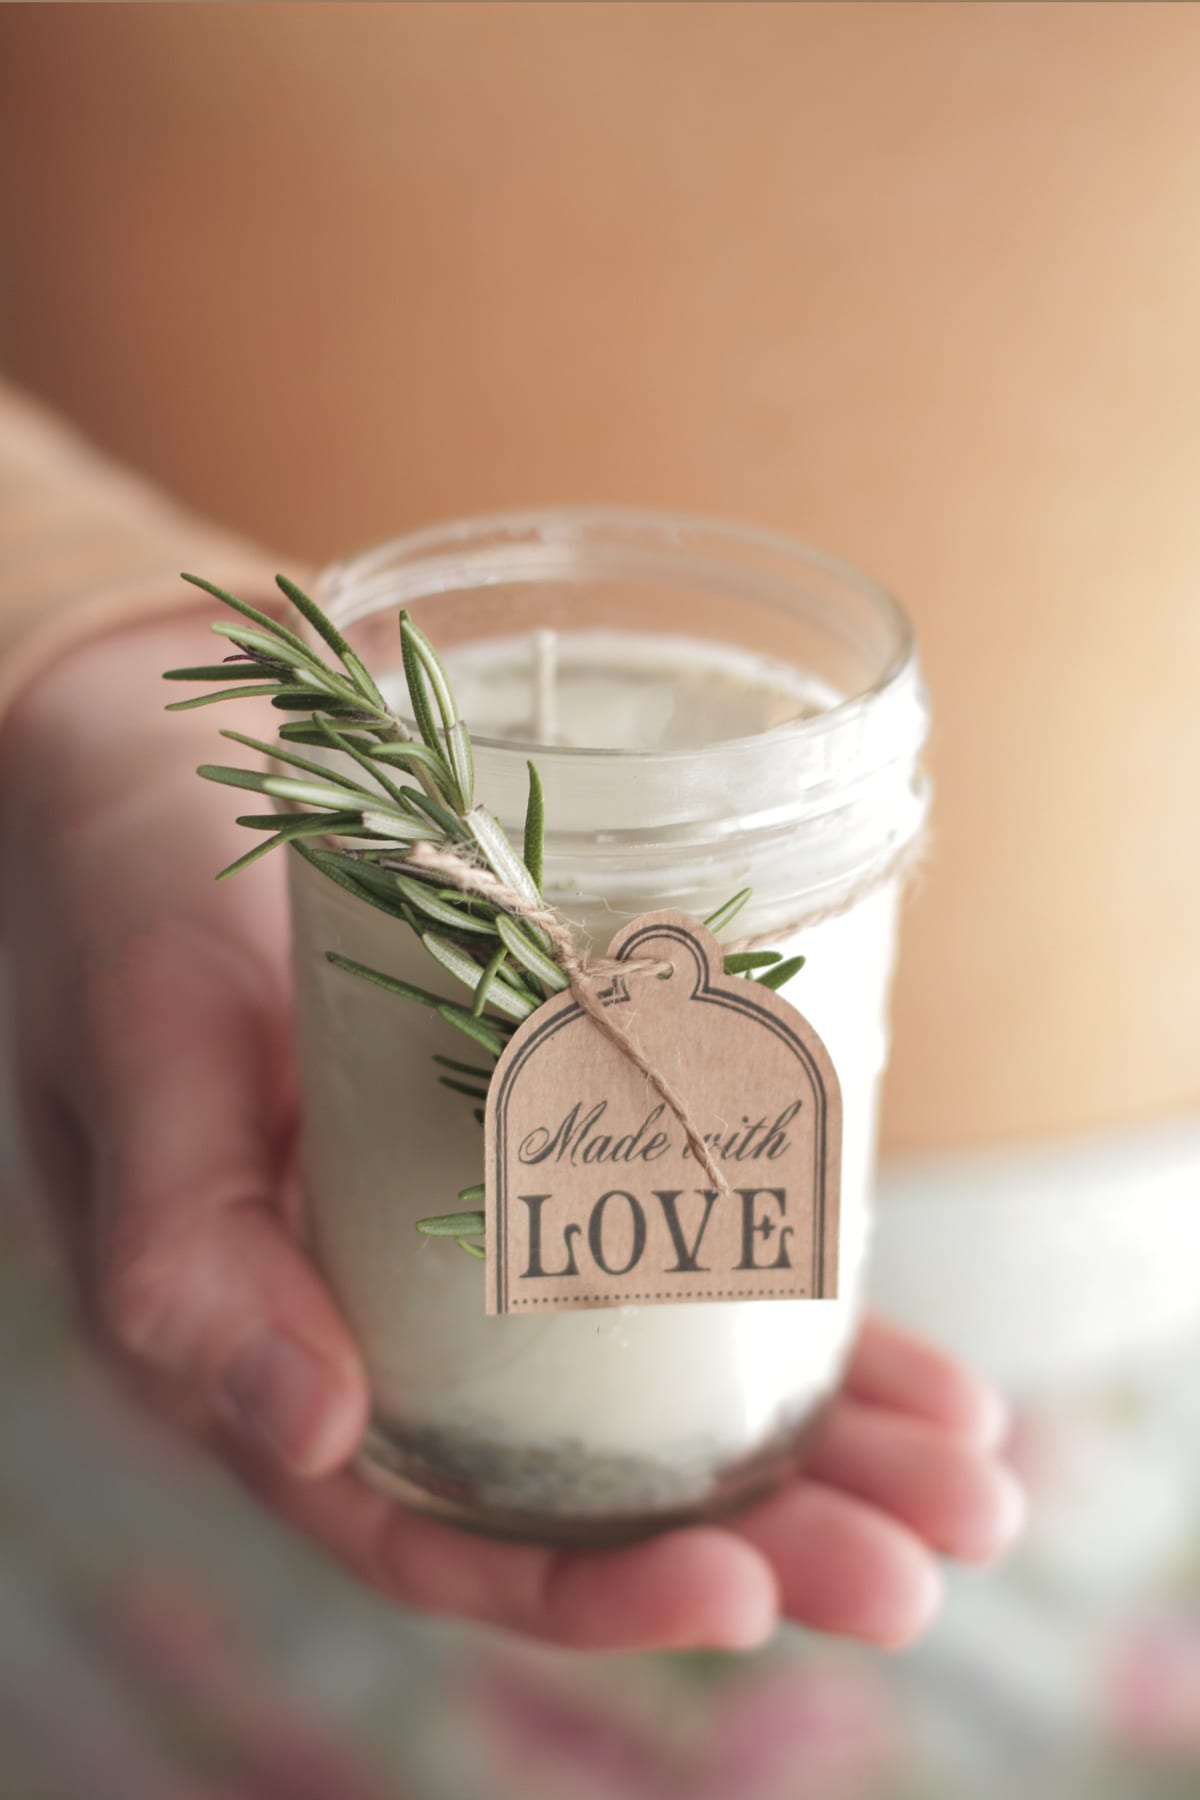
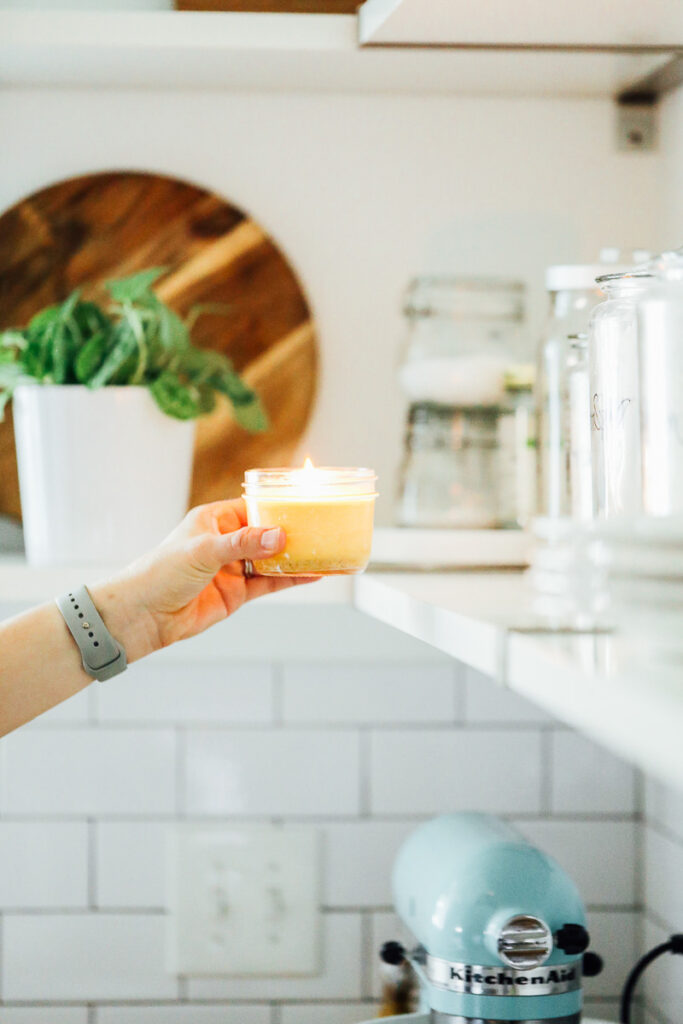
I’ve been making homemade candles for years now and they’ve quickly become the #1 requested homemade gift that we give out during the holiday season. I love adding natural candles to my home, both for the cozy ambiance and scent.
Key Takeaways
- To make your jar candles, you’ll need 20 minutes, a jar, wax (beeswax or soy), a wick, a pot, essential oil or fragrance oil for a scent, and a stove-top (or make homemade candles in slow-cooker).
- This recipe makes 2 candles, but you can easily double or triple the amounts to make 4-6 candles simultaneously (or more).
- Add essential oils or fragrance oil to make scented candles. Or go all-natural and skip the scent.
- This is a beginner-level DIY project! Whether you’re making candles for yourself or others, you’ll find the process simple and therapeutic.
- If you have kids at home, this is a great project for them to get involved with. My kids love making handmade candles for their teachers.
Before You Get Started: What You’ll Need
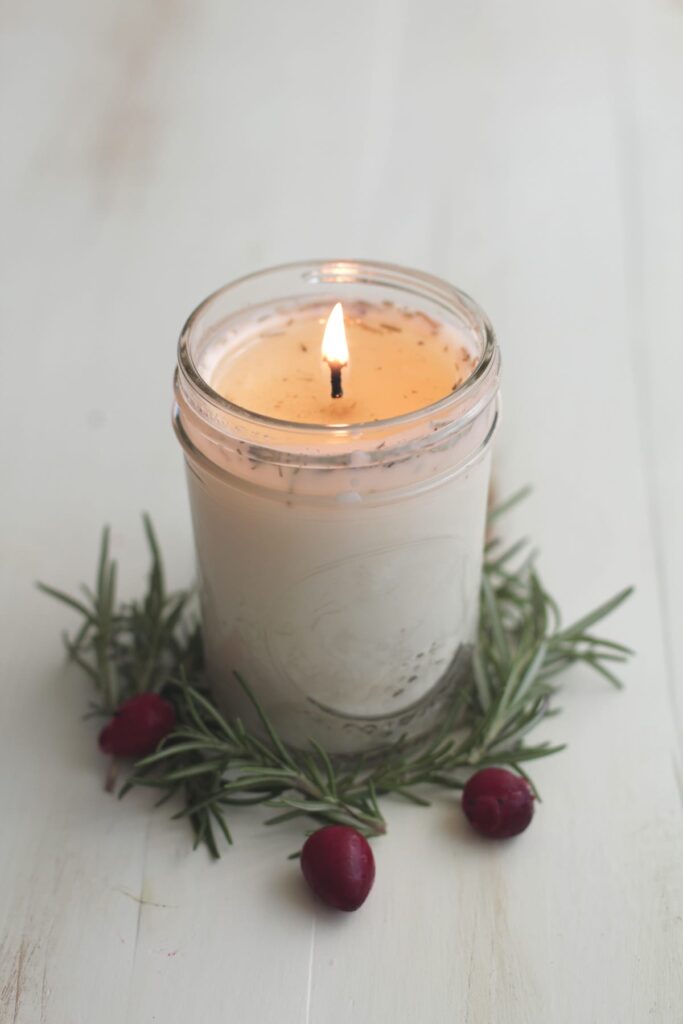
This recipe is a great starting point. Use the recipe (just wax and wicks) and customize with your favorite scents (I love to combine rosemary and lavender essential oils) or go all natural with no added scents.
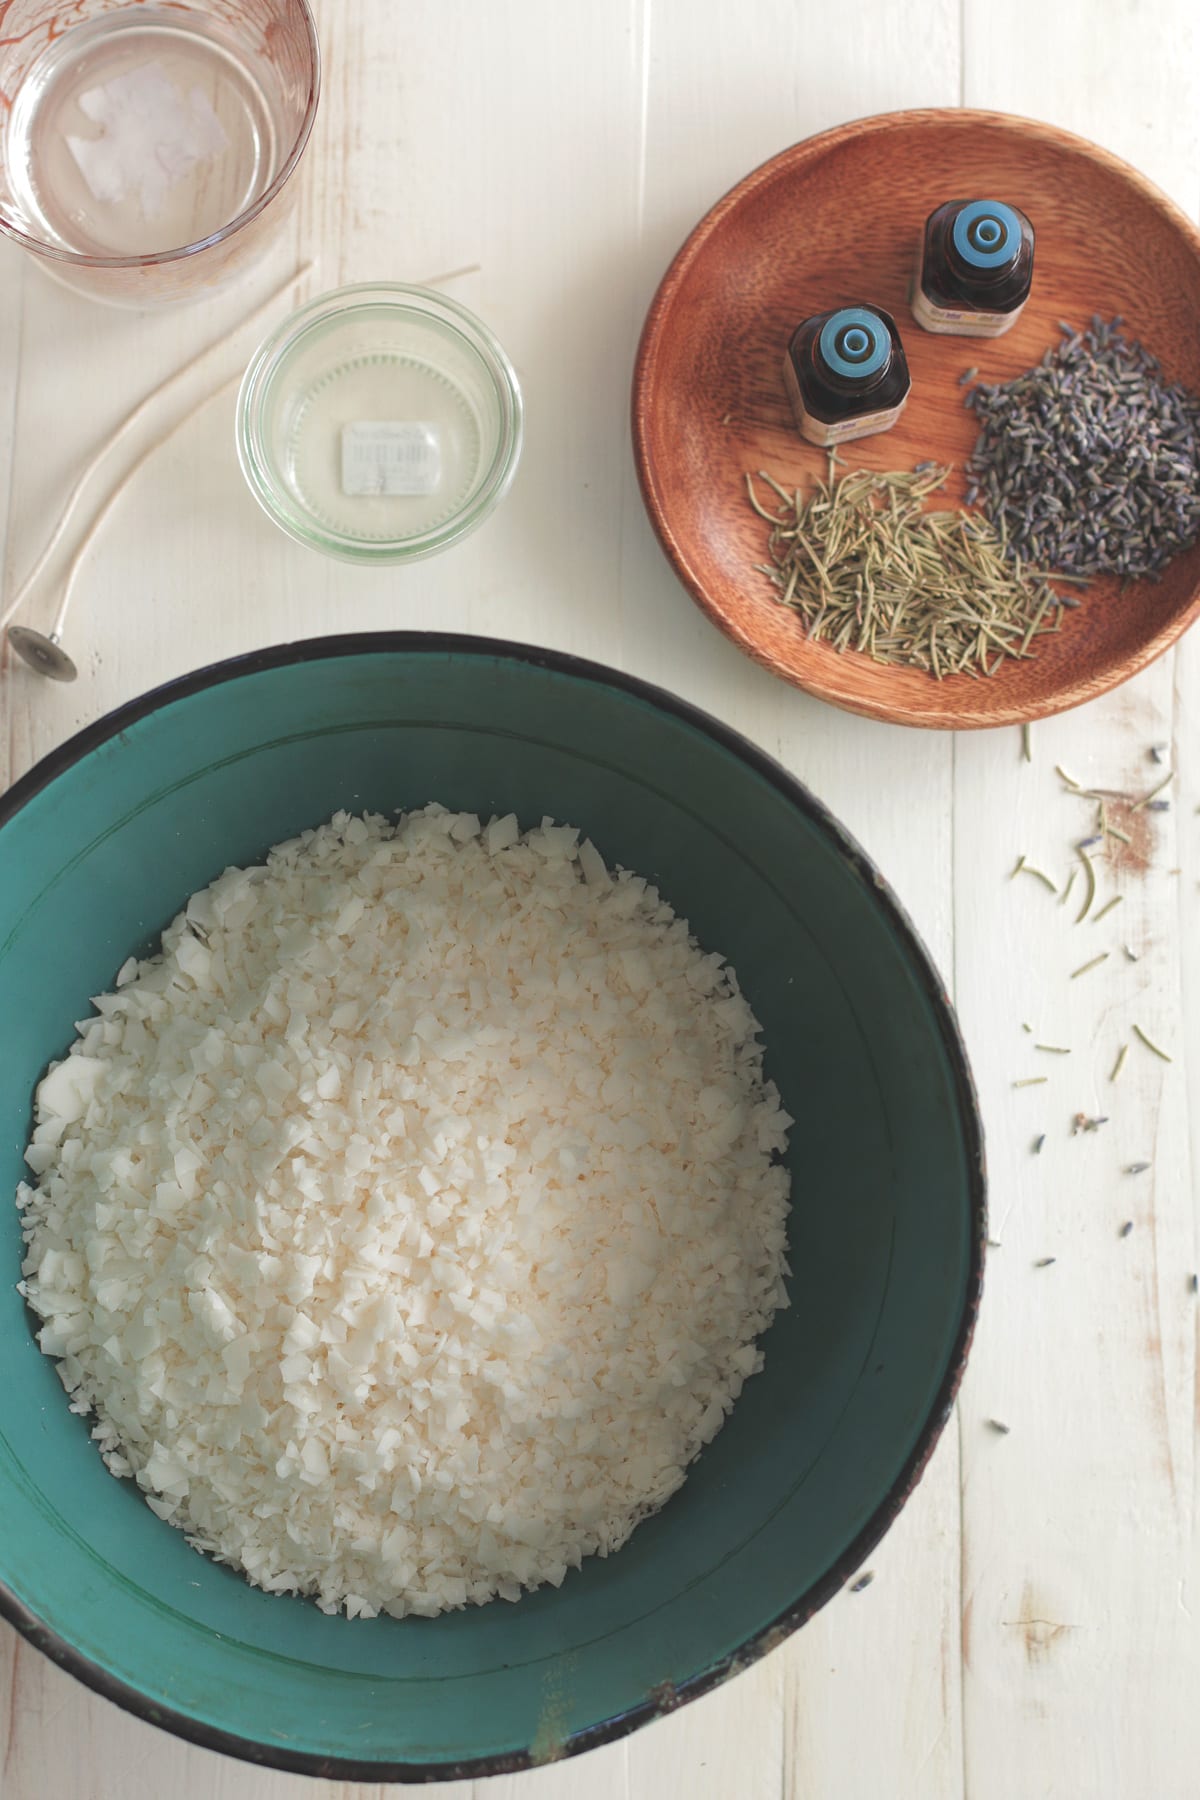
Candle Ingredients
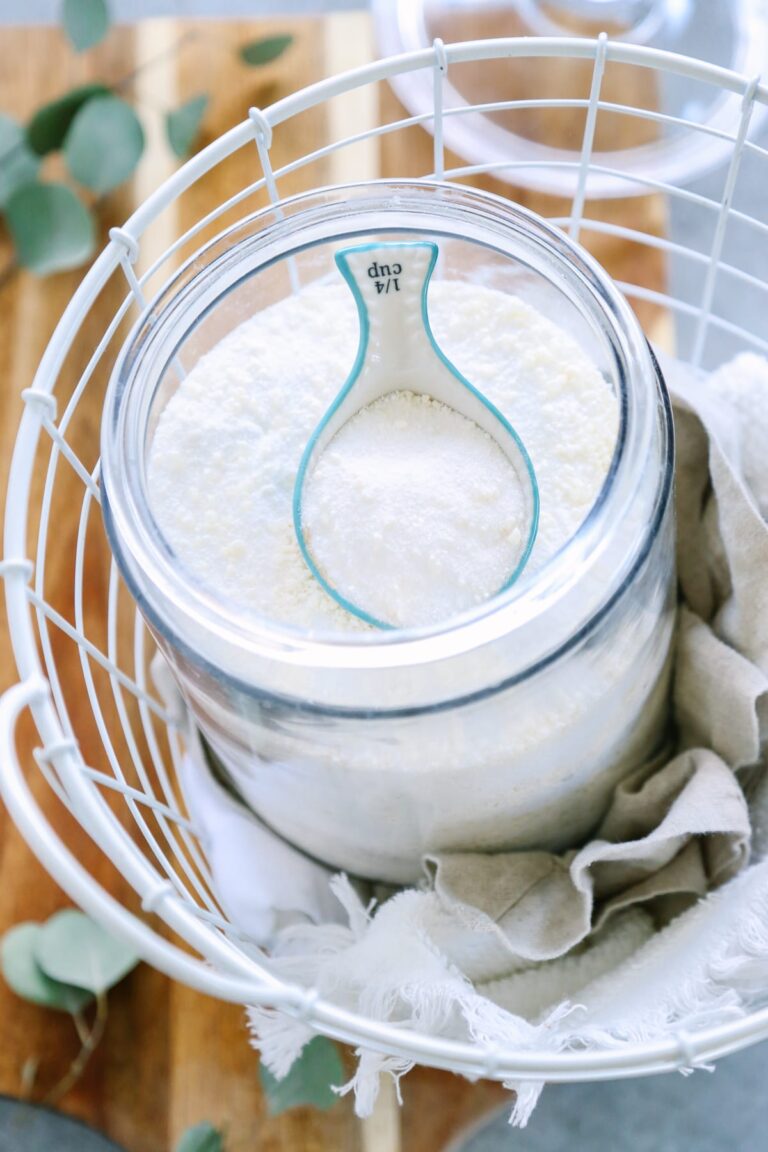
- 4 cups of wax: either soy wax flakes or beeswax pellets
- 2 wicks: Wicks with a metal base are the easiest to work with. I have no experience with wooden wicks.
- (OPTIONAL) 1 teaspoon dried herbs, 60 drops essential oils, or fragrance oils: For naturally-scented candles. Fragrance oils have a stronger, longer-lasting scent, but most fragrance oils are not natural. Essential oils have a very subtle scent. And dried herbs, like dried lavender or dried rosemary, may be used for decoration.
Candle-Making Equipment
- Small cooking pot/saucepan: You’ll fill this pot with water to make a double boiler. The wax will not come into contact with this pot, so use what you have in the kitchen.
- Wax melting pot: Such as a medium-size glass mixing bowl, metal mixing bowl, tall glass measuring cup, or candle pourer. You’ll never be able to use this pot for anything other than candle making, as the wax will adhere to the pot and be difficult to scrape off and remove.
- 2 8-ounce heat-safe jars: mason jars, glass jam jars, tin cans, tea cups, etc. Or use 4 4-ounce jars for smaller candles. Any kind of high-rimmed, heat-proof jar will work for candle making.
- 2 clothespins or mechanical pencils: For keeping the tall wicks upright in the jars.
- 2 washcloths or small towels: This isn’t required. Insulting the outside of the candle jar with a towel can prevent the wax from cooling too fast which may cause shrinkage and cracks at the top of the candle.
- 1 wooden skewer, popsicle stick, or chopstick: Also not required, unless adding a fragrance. For stirring the fragrance into the melted wax. Use something you can toss (or purposely reuse for candle-making) as wax will adhere to this utensil.
How to Make Homemade Candles: Step-by-Step Guide
Once you have your ingredients and tools, you’ll need about 20 minutes to make the candles.
You’ll find a printable version of the ingredients and instructions at the end of this article. Here’s my step-by-step guide with photos to guide you…
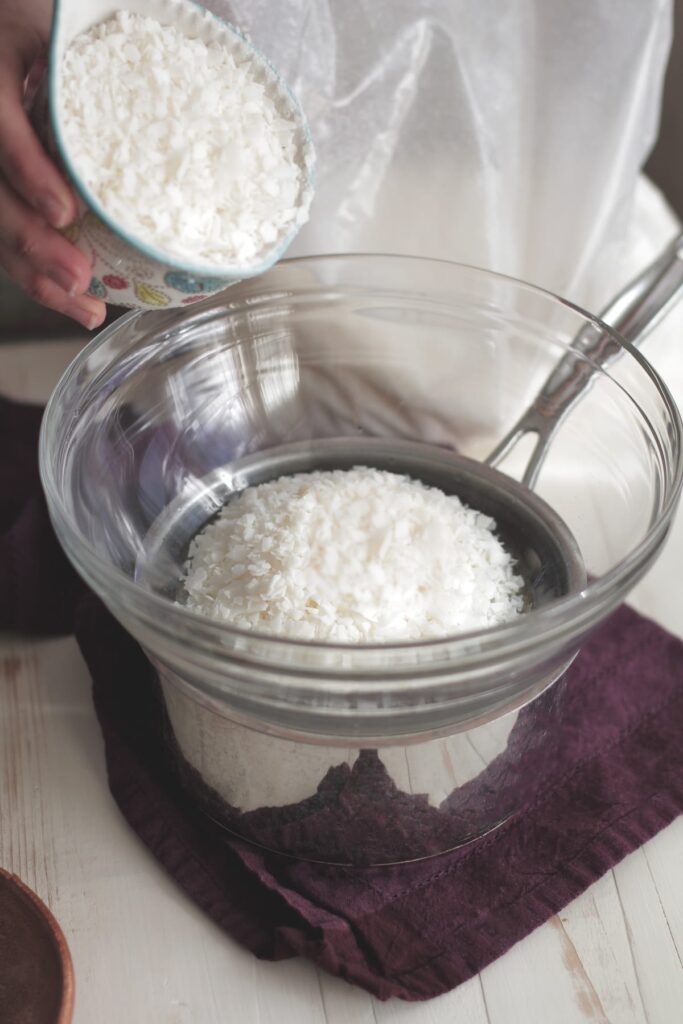


- Step 1: Add water to the saucepan/pot, about 1/2 way full. Place your heat-safe bowl, tall glass measuring cup, or candle pourer either in the water or sitting on top of the water-filled pot (either way is safe). This is called the double boiler method, which keeps the wax out of direct contact with the heat source and avoids burning the wax.
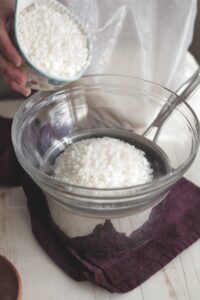
- Step 2: Add the soy flakes or beeswax pellets to the bowl. Then turn the heat to medium-high, bringing the water in the pot/saucepan to a lively simmer.
- Step 3: Allow the wax to completely melt. This takes about 15 minutes (more or less). Soy wax melts much faster, beeswax pellets take a bit longer.
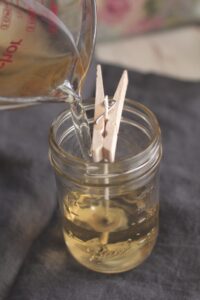
- Step 4: Once melted, place the candle jars on a towel (to protect your countertop) and dip the metal part of each candle wick in the hot wax.
- Step 5: Place the metal base of the wick at the bottom of each jar. Use a clothespin or mechanical pencil (the clip portion works well) to secure the wick, placing the pin or pencil on top of the jar to keep the wick upright.
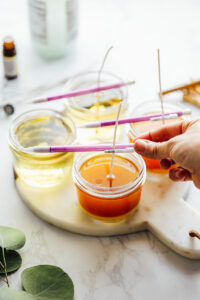
- Step 6: Pour the melted wax into the jars.
- Step 7: For a scented candle, add drops of natural essential oils, candle fragrance oil (according to the package), or any dried herbs (like dried lavender or dried rosemary). The wax will instantly begin to harden as it comes in contact with the jar. Let the wax cool and solidify. This takes about 20 minutes, or longer.
How to Make Scented Candles With Essential Oils or Fragrance Oil
If you want to add a scent to homemade candles, follow the recipe above and add the scent during Step 7. There are two main options for adding scent to the candles: essential oils or fragrance oils.
- Essential oils or a blend of essential oils is the most natural option. Essential oils aren’t as powerful as fragrance oils. I love lavender, eucalyptus, lemongrass, peppermint, or grapefruit essential oil for a candle. I use about 60 drops of essential oil per candle. Learn more about using essential oils.
- To make homemade candles smell stronger, fragrance oils are the strongest scent option. I can’t tell what goes into making fragrance oils just by reading the ingredient list, so if you go with this option you may want to call the company first and ask for a disclosure of ingredients. Use the brand’s recommended dosage amount on the package when adding fragrance oils.
- Dried herbs, like crushed roses, lavender, or rosemary, may also be used in a candle, with caution (keeping an eye on the candle when it’s burning), but they don’t provide much fragrance. I’ve also seen candle makers use coffee beans as well.
How to Prevent Problems With DIY Candles
- It’s best to allow the candle to “cure” for 24 hours before use. Just let the candle rest before use, which allows the wax time to fully harden. But if you want to burn it right away, you’re welcome to do so.
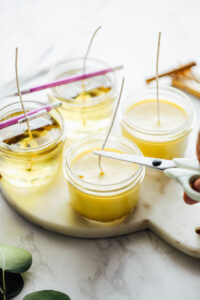
- Once the wax is solid, trim the wicks down to about 1 inch.
- If there are any cracks or tunneling in the wax, melt a bit more wax and fill in the cracks with the wax. The candles are still usable with tunneling or cracks in the wax; it’s just a cosmetic issue.
- To prevent the wax from tunneling the first time you burn the candles, burn the candle long enough so there’s liquid across entire the top before extinguishing.
FAQs
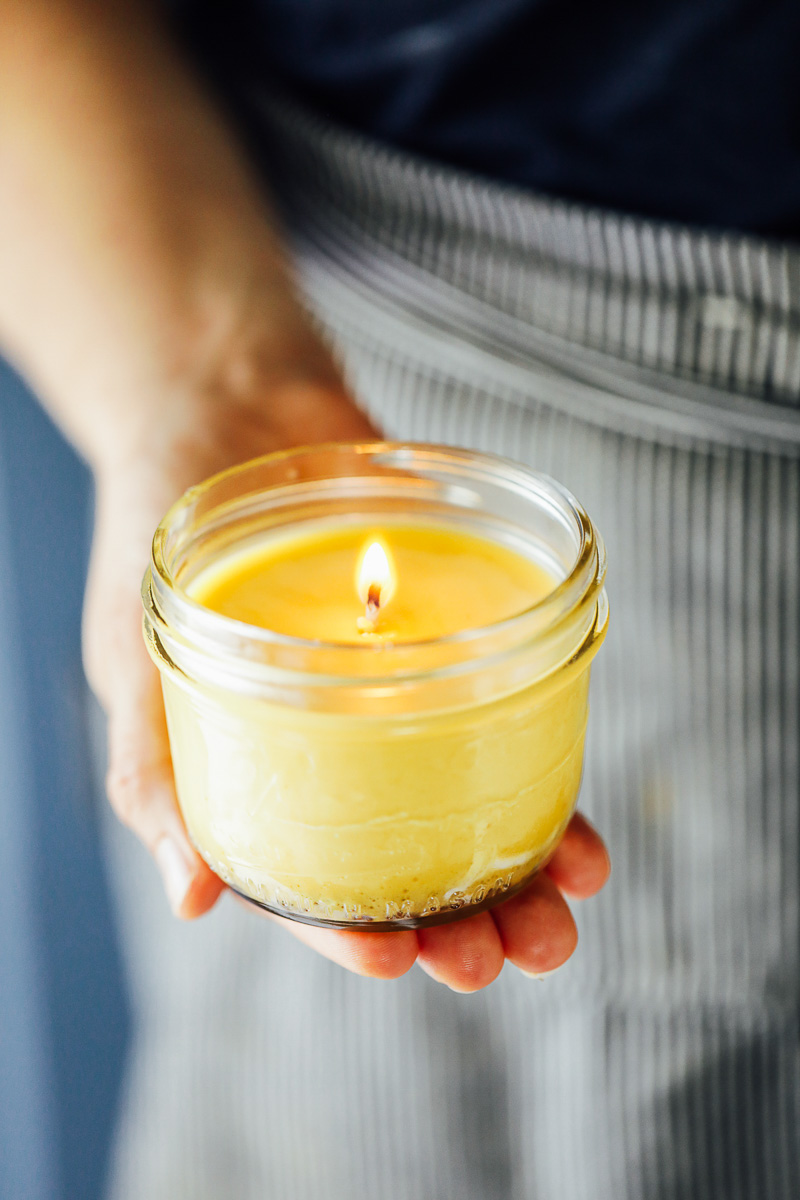
- What’s the best kind of wax to use for homemade candles? Paraffin wax is a common wax used to make candles; however, it’s derived from petroleum and not the best natural product. Soy wax and beeswax are both natural waxes that are inexpensive and easy to find. Both soy candles and beeswax candles are slow-burning. Soy holds fragrance better than beeswax. But beeswax has its own honey scent, which many folks (including myself) find appealing.
- Can you reuse old candle jars to make homemade candles? Yes, you can! It’s a great way to save money. Place the used candle jars in the freezer. After a couple of days, remove the jars and gently scrape out the old wax and wick. Or, leave the old wax and just remove the wick, since you’ll be re-pouring new wax overtop anyway.
- The wax cracked on top of my candles. What can I do? Melt a bit more wax and fill in the cracks with the wax. The candles are still usable with tunneling or cracks in the wax; it’s just a cosmetic issue.
Conclusion: Is it cheaper to make your own candles?
Yes, it is cheaper to make your own homemade candles, particularly if you want to use natural candles, made with the highest-quality ingredients like pure soy and beeswax and quality scents, like essential oils.
- A 16-ounce bag of beeswax costs about $13 and a 5-lb bag of soy flakes costs about $20. Both options will make multiple candles. 2 cups of wax = 1 8-ounce candle.
- Candle wicks will cost about $10, making many candles. You only need 1 wick per jar.
- Use leftover jars. Use extra mason jars, leftover jam or candle jars, or thrifted tea cups.
- Purchase a tall glass measuring cup, heat-safe mixing bowl, or candle pourer just for melting the wax, as it will be impossible to clean the wax out of the jar once melted and cooled. Reuse this container each time you make candles. This will cost about $6-10.
- Essential oils or fragrance oils vary in price. Fragrance oils are the cheaper options, essential oils can be more expensive. But you can use essential oils to make other cleaning and beauty products.
Even with a $20-30 investment, you can make many homemade candles! If you’ve checked the price of natural candles lately, you know that’s a deal. Plus, you’ll be able to say “I did this!” and impress your friends and family (priceless).
So tell me, what do you think? Will you try making your own candles, or do you prefer store-bought candles?
Give this candle recipe a try and tell me what you think and how you decide to customize your candles!
Homemade Candles Recipe
Equipment
- 1 small cooking pot/saucepan
- 1 wax melting cup such as: a medium-size glass bowl or metal bowl, tall glass measuring cup, or candle pourer
- 2 8-ounce jars such as: glass mason jars, jam jars, tin cans, tea cups, etc. Or use 4 4-ounce jars for smaller candles.
- 2 clothespins or mechanical pencils
- 2 small washcloths OPTIONAL, but helpful for insulating the jars to keep the wax from cracking while it cools
- 1 skewer or chopstick OPTIONAL, if adding fragrance to stir and combine the fragrance and wax
Ingredients
- 4 cups soy wax flakes or beeswax pellets
- 2 candle wicks with a metal base
- 60 drops essential oil of choice OPTIONAL, or fragrance oil (use the amount directed on package)
- 1/2-1 teaspoon dried herbs OPTIONAL, like dried lavender, rosemary, or crushed roses
Instructions
- Add water to the saucepan/pot, about 1/2 way full. Place your heat-safe bowl, tall glass measuring cup, or candle pourer either in the water or sitting on top of the water-filled pot (either way is safe). This is called the double boiler method, which keeps the wax out of direct contact with the heat source and avoids burning the wax.
- Add the soy flakes or beeswax pellets to the bowl. Then turn the heat to medium-high, bringing the water in the saucepan to a lively simmer.

- Allow the wax to completely melt. This takes about 15 minutes (more or less). Soy wax melts much faster, beeswax pellets take a bit longer to melt.
- Once the wax has melted, turn off the heat and dip the metal ends of the wicks in the hot wax. Place the wick ends in the center of each candle jar, pressing the metal ends down with a skewer or chop-stick until set at the base of the jar. The wax acts like glue, securing the metal end at the bottom of the candle jar.
- Gently straighten the wick and secure it at the mouth of the jar with a clothespin or the clip on a mechanical pencil (resting the pencil or clothespin on the top of the jar).
- Gently pour the wax into each jar. Place a towel (or parchment paper) underneath the jars to protect your countertop.
- To make scented candles, add the essential oil or candle fragrance oil to the wax. If desired, add a teaspoon of dried herbs. For fragrance oil, follow the instructions on the bottle for amount recommended. Using the skewer or chopstick, gently stir the candle to combine the fragrance and wax.
- Wrap the jars in the washcloths to prevent the wax from cooling too fast and shrinking or cracking. This step isn't mandatory, but helps if you're concerned about cracks which are purely cosmetic and can be fixed if they occur by adding more melted wax overtop to fill the crack.
- The candles will take about 30 minutes to fully set. But I recommend letting the candles rest for 24 hours. This rest time allows the candles time to cure before burning, giving you the best results!
- Once set, remove the clothespins and washcloths, and trim the top of the wicks to 1 inch. The candles are now ready to use and enjoy!
- To avoid watery candles + a clogged sink: Only fill the bottom pot with 1–2 inches of water. If it starts to boil up toward the pouring bowl, turn the heat down or lift the bowl an inch. Any water that sneaks in will make the wax look frosty and sink like a rock when you pour it down the drain. If you do splash a little, let the wax harden in the sink, then scoop it out with a plastic bag over your hand before running hot water.
- Never pour wax down the drain, wipe the bowl with paper towels while it’s still hot and toss them in the trash.

I was hoping to use pint mason jars for these candles, but I’m worried about the wicks. Have you had any problem with the large wicks from Candle Science (the ones you link above) not being long enough/producing too large a flame for such a small opening? This is my first time making them and I’d rather not smoke up everyone’s house for Christmas.
Thanks!
Hey Cass, I just measured one of the wicks (I just bought more for Christmas :)) against a pint-size mason jar and the wick is just tall enough to fit the jar with a safe amount of extra wick on top. I believe there are a couple of pint-size mason jar options: wide mouth and then the traditional smaller mouth jars. I would probably go with the wide mouth jars just to be safe. The flame may leave a bit of black soot on the jars.
I am thinkning of making these for gifts for the Holidays but wondered how many candles come from a pound of wax?
Hey Emily, A pound of beeswax should produce about 2-8 ounce candles.
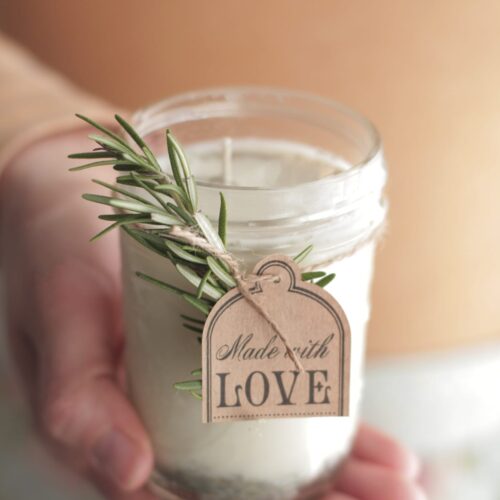
Hey Kristin! I’m looking forward to making these soon, and love the tags you have tied to them. Would you be willing to send a link for printing them? Thanks so much!
Kat
Hey Kay, Here’s a link to the printable gift tags on the blog (scroll to the bottom of the post): https://livesimply.me/2015/11/21/homemade-granola-gift-ideas/.
Just started making my own candles this fall so it was fun to come across this post while looking for ideas! In my experience tho … it is much easier and neater to add the essential oil to the wax after it’s melted BUT before it’s poured into the containers. The candles themselves seem to set up “smoother” that way and I read somewhere that somehow adding the oils to the melted wax before it’s poured and letting it cool a bit somehow makes the wax “capture” the scent better. Don’t know if that part is true but it’s definitely much neater than adding oil to the wax once it’s in the jar since I can never keep the wick straight when stirring the oil in that way 🙂 Anyway will definitely try out your idea to add lavender and rosemary leaves to my next batch!
Thanks for sharing, Tania!
Hi, These candles look wonderful! Tell me, do they liquefy when burning?
Thanks so much!
Karen
Hey Karen, They will burn just like a candle from the store :).
Kristin, thank you for this great and easy recipe. I found with the four cups of soy flakes, it only filled one mason jar, so if using masons you might want to increase the amount of flakes. Also had some trouble keeping the wick in place with the clothespins. Any other ideas of how to keep that rascally wick in place?
My candles came out great, however!
Hey Janet, I’m so glad you enjoyed making the candles.
Yea, the wicks are tricky! My best advice is to dip the wick in the wax, then press it down in the bottom of the jar. Holding the wick down and even adding an extra few drops (or even a couple of teaspoons) of wax over the wick base should help set the wick before clipping the top with the clothespin.
Hey Kristin.love everything you do.thank you for the for lovely recipe and all the information.i’m looking into starting my own candles but I’m not so sure on which wax to go for.i was looking for something that is environmentally friendly.your advice is much appreciated.tia
Hey Charms, Thank you so much. I’m so glad you’re enjoying Live Simply! The most environmentally friendly way to make candles is with beeswax (here’s a tutorial: https://livesimply.me/2015/03/26/easy-diy-beeswax-candles/). If you can find local beeswax that’s even better! Beeswax is a natural product and even helps clean the air when used for candles. Soy is usually cheaper and the next best ingredient, in my opinion.
how do i add scent to home made dinner candles
Hey kefilwe, Are dinner candles a particular kind of candle?
Oooh, these look absolutely lovely!
Someone mentioned in the comments above about the tea-cup candle craze! I made a whole bunch of teacup candles a couple of Christmases ago but I used a kit then and haven’t made any candles since. These look really fun to do so I might have to give them a go!
The last time I made candles though I found that once they had set the kind of “dipped” in the middle where the wick was and needed topping up. Do these do that?
Hey Jicsi, Thank you. Tea candles sound lovely! These will dip slightly in the center, but nothing really noticeable.
Hi Kristin, I made your rosemary/lavender soy candles for the first time today. I used the dried rosemary in mine but someone said that the rosemary may catch fire when the candle burns. Can you advise on this? The candle is for a gift and I don’t want them to get hurt.
Thank you!
Hey Francine, I haven’t had any issues with dried rosemary or lavender catching on fire (fresh is a different story), but I would advise attaching a note that the candle should only burn under supervision to prevent any accidents. This is a smart precaution with any candle, particularly one that contains dried materials (herbs). I hope your recipient loves the gift :).
Hi
I was wondering if you have tips to keeping lavender/rosemary from falling apart?
When I try to keep them as a whole sprig, the leaves seem to fall off easily.
Any ideas?
TIA.
Hey Deena, Do you want to add the whole herb sprigs to the soy?
can’t believe how easy it is to make candles. wish i had figured this out years ago 🙂 love the rosemary/lavender combination too. thank you for your wonderful recipes
My dried lavendar just flaoted to the top, will htey eventually distribute or do I need to stir it again once it starts to set?
Hey Tomasina, This is pretty normal. There should be a decent amount of lavender mixed throughout the candle, but some of it will also float to the top. I find this actually helps with additional fragrance when the candles burn. Just always watch the candles when you’re burning them. Since there are herbs in the candles, I don’t advise leaving them to burn without supervision (as with any candle).
Im need to make about 36 of these. I am assuming that I just multiply the recipe by 13 and use two double boilers. any helpful hints?
Hey Tomasina, I’ve never made 36 candles with this recipe, but I’m sure it can be multiplied to make as many candles as you may need. You’ll need a very large pot/double broiler to melt enough soy for 36 candles. Let me know how it goes!
Oh I love this idea, they look so beautiful. I had wanted to try and make candles when the candle-in-a-teacup craze was raging, though never quite got round to it. I am definitely going to give this a go before the mason jar craze finishes!
Thanks so much for sharing.
Sabrina (Wolves in London)
Wonderful, Sabrina! I forgot about the tea cup candle craze…hmmmm…maybe I should make some for Valentine’s Day ;). Enjoy the mason jar candles!!
My mom always used to keep the cardboard juice cans from concentrate for this purpose! Once the wax sets, just cut the cardboard off and you have a free-standing pillar candle! Even more frugal, and you get to show off all those lavender buds and rosemary leaves a little more. I also like to tie a bit of ribbon, raffia, or jute around the naked candle, but some burlap would be cute too.
Love the recipe, want to try it soon with beeswax!
That’s a great idea, Bethany! Thank you for sharing!
Hey there, I can’t wait to make this candle but I do habe a question. How many “4 cups” are in a 10 pound bag of soy flakes?
Thanks
Shelly
Shelly, Quite a bit. I’m guessing around 3-4 “4 cups” at least (so around 12-16 cups per bag).
I love love this! In fact I am getting an order together of what I need to make for Christmas gifts!
Question: How many drops do you get from one bottle of the Aura Cacia essential oil you have the link to? I am making 6-8 candles and wonder how many bottles to order?
Thank you….will place order as soon as I hear from you!
{Merry Christmas!}
Hey Brenda, Thank you! They make a wonderful gift!! I actually haven’t measured because I purchase my oils in larger bottles (due to the amount of DIYs I make), however, this conversion from Mountain Rose Herb (another great oil place) may help: http://mountainroseblog.com/dilutions-conversions/.
Thank you so much!! This is a huge help!
I’m so glad, Brenda! You can also adjust the amount of drops according to your preference, more or less. I can’t wait to hear about your homemade candles!!
If it is a 5ml bottle u get approximiately 100 drops and the larger bottle 15ml u get approximiately 300 drops hope this helps u out
Hi there – I actual did some internet research and everyone has the same thoughts as your husband as far as the rosemary molding if it’s fresh instead of dried! I’m going to hang the rosemary up to dry and go that route! Thanks so much – this is a great post! I love your site!
Thank you for sharing, Gail! I think drying your fresh rosemary is a great idea. And thank you, I’m so glad you love Live Simply!
Dear Kristin –
Does the rosemary have to be dried? I have some leftover rosemary in my fridge – which is not dried – which I would love to use for this. Thanks!
Hey Gail, I was concerned about fresh rosemary “going bad,” but my husband seemed to think the fresh rosemary would be preserved in the wax. I haven’t tried using fresh rosemary, but it may work? If you try it, let me know.
Can’t wait to try this! A few questions:
1) is there any concern that the dried rosemary or lavender could catch on fire?
2) could you stick the container you are using straight into the water (still creating a double broiler), side stepping the need to dirty another dish and pour the liquid wax into the candle?
3) have you found the EO actually scent your room or just the candle?
Thanks!
Hey Emma,
Here are some answers :).
1/ I was concerned about the burning this at first too. After many batches with the rosemary and lavender, I haven’t had any issues. I just add a small amount (the teaspoon recommended), so the jar isn’t overpowered by little herb pieces. If you have a spice grinder, you can grind the herbs. I’ve also done this to prevent large pieces in the candle. Either way, you’ll be safe, at least from all my experiences :). You can also try adding dry fine dried orange peels, if going for an orange-scented candle (Frontier makes a great product).
2/I’ve never tried that before. If you try, let me know! I wonder about the wicks not setting in the jar which could be difficult to work with, due to the constant heat.
3/The candle alone doesn’t have scent. The herbs add a beautiful appearance and a slight scent. I find the essential oils really do help to add a wonderful fragrance to a room and candle. When I first started making candles, I didn’t think the oils did much, until I walked out of the house (and immediately) came back in. The wonderful smell from the candle was very apparent :). Experiment with any oils you have. I think peppermint also makes a wonderful oil scent, along with vanilla and orange!
I love to make all sorts of homemade things myself, including candles. I did make a candle with lavender buds in it. Once. It was fine until it wasn’t. The buds caught fire and the flames were truly scary.
Just be careful and keep an eye on things.
Yikes, Kimberly, that’s not good. Thank you for sharing your experience.
This is how i make my candles … I use beeswax and coconut oil once the beeswax is melted i add n the coconut oil aftr i remove it from the heat i add n my essential oils speariment and peppermint wit a dash of lemon smells like a yummy candy cane! I used lavender for bed stand while reading books and orange wit lemon even citrus fresh for a fresh clean aroma…
Sounds wonderful, Sarah!