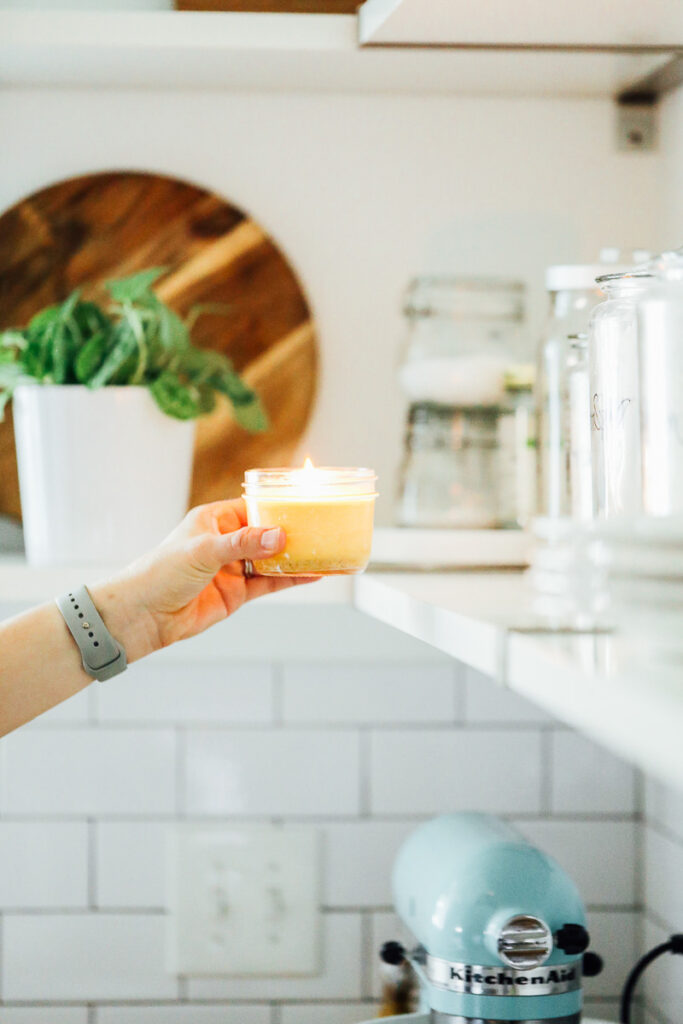
Want to make beautiful, natural candles to burn in your home or gift to family and friends but don’t want to spend hours on a DIY project? Here’s how to make the most beautiful homemade candles using simple ingredients in just 20 minutes (with both scented and unscented options)!
Want to Save This Article?
Enter your email & I’ll send it straight to your inbox. And you’ll get new recipes & tips each week.
In this blog, I’m outlining the exact steps you’ll need to successfully make beautiful jar candles at home. If you’d like to make taper candles, follow this guide.
My DIY Candle Experience
My first DIY ever was homemade foundation powder. That one little DIY project ignited a passion for making my own cleaning and beauty products…
- hand soap
- laundry soap
- homemade surface cleaner
- body butter
- bathroom cleaner
- DIY floor cleaner
- glass cleaner
- and the list goes on…
One of my favorite DIY products to make is candles using soy wax or beeswax.
I’ve been making homemade candles for years now and they’ve quickly become the #1 requested homemade gift that we give out during the holiday season. I love adding natural candles to my home, both for the cozy ambiance and scent.
Key Takeaways
- To make your jar candles, you’ll need 20 minutes, a jar, wax (beeswax or soy), a wick, a pot, essential oil or fragrance oil for a scent, and a stove-top (or make homemade candles in slow-cooker).
- This recipe makes 2 candles, but you can easily double or triple the amounts to make 4-6 candles simultaneously (or more).
- Add essential oils or fragrance oil to make scented candles. Or go all-natural and skip the scent.
- This is a beginner-level DIY project! Whether you’re making candles for yourself or others, you’ll find the process simple and therapeutic.
- If you have kids at home, this is a great project for them to get involved with. My kids love making handmade candles for their teachers.
Before You Get Started: What You’ll Need
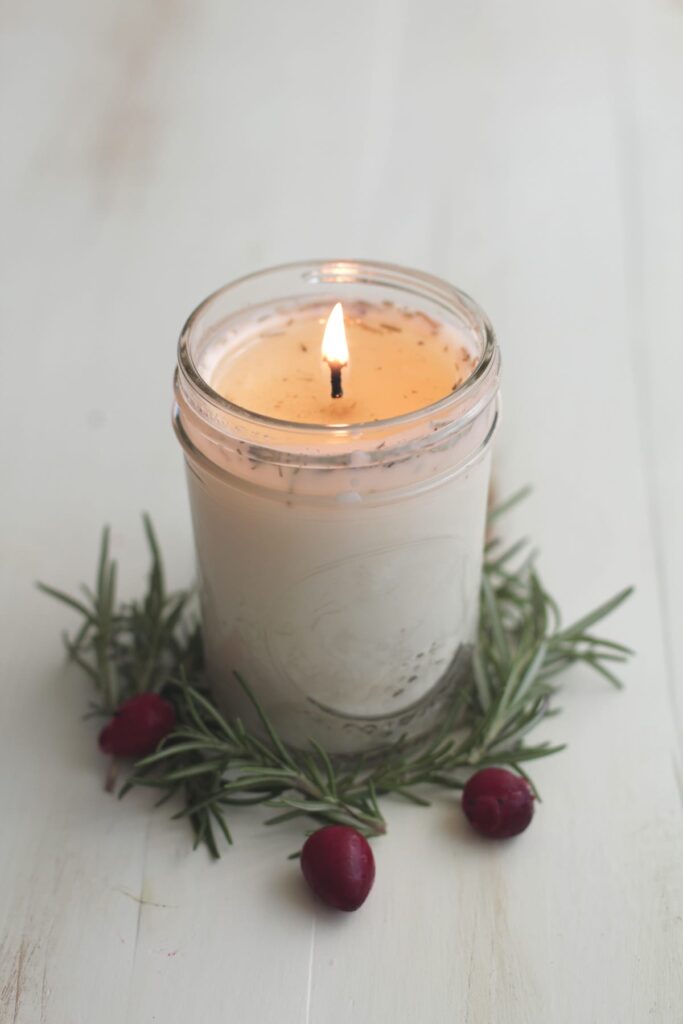
This recipe is a great starting point. Use the recipe (just wax and wicks) and customize with your favorite scents (I love to combine rosemary and lavender essential oils) or go all natural with no added scents.
Candle Ingredients
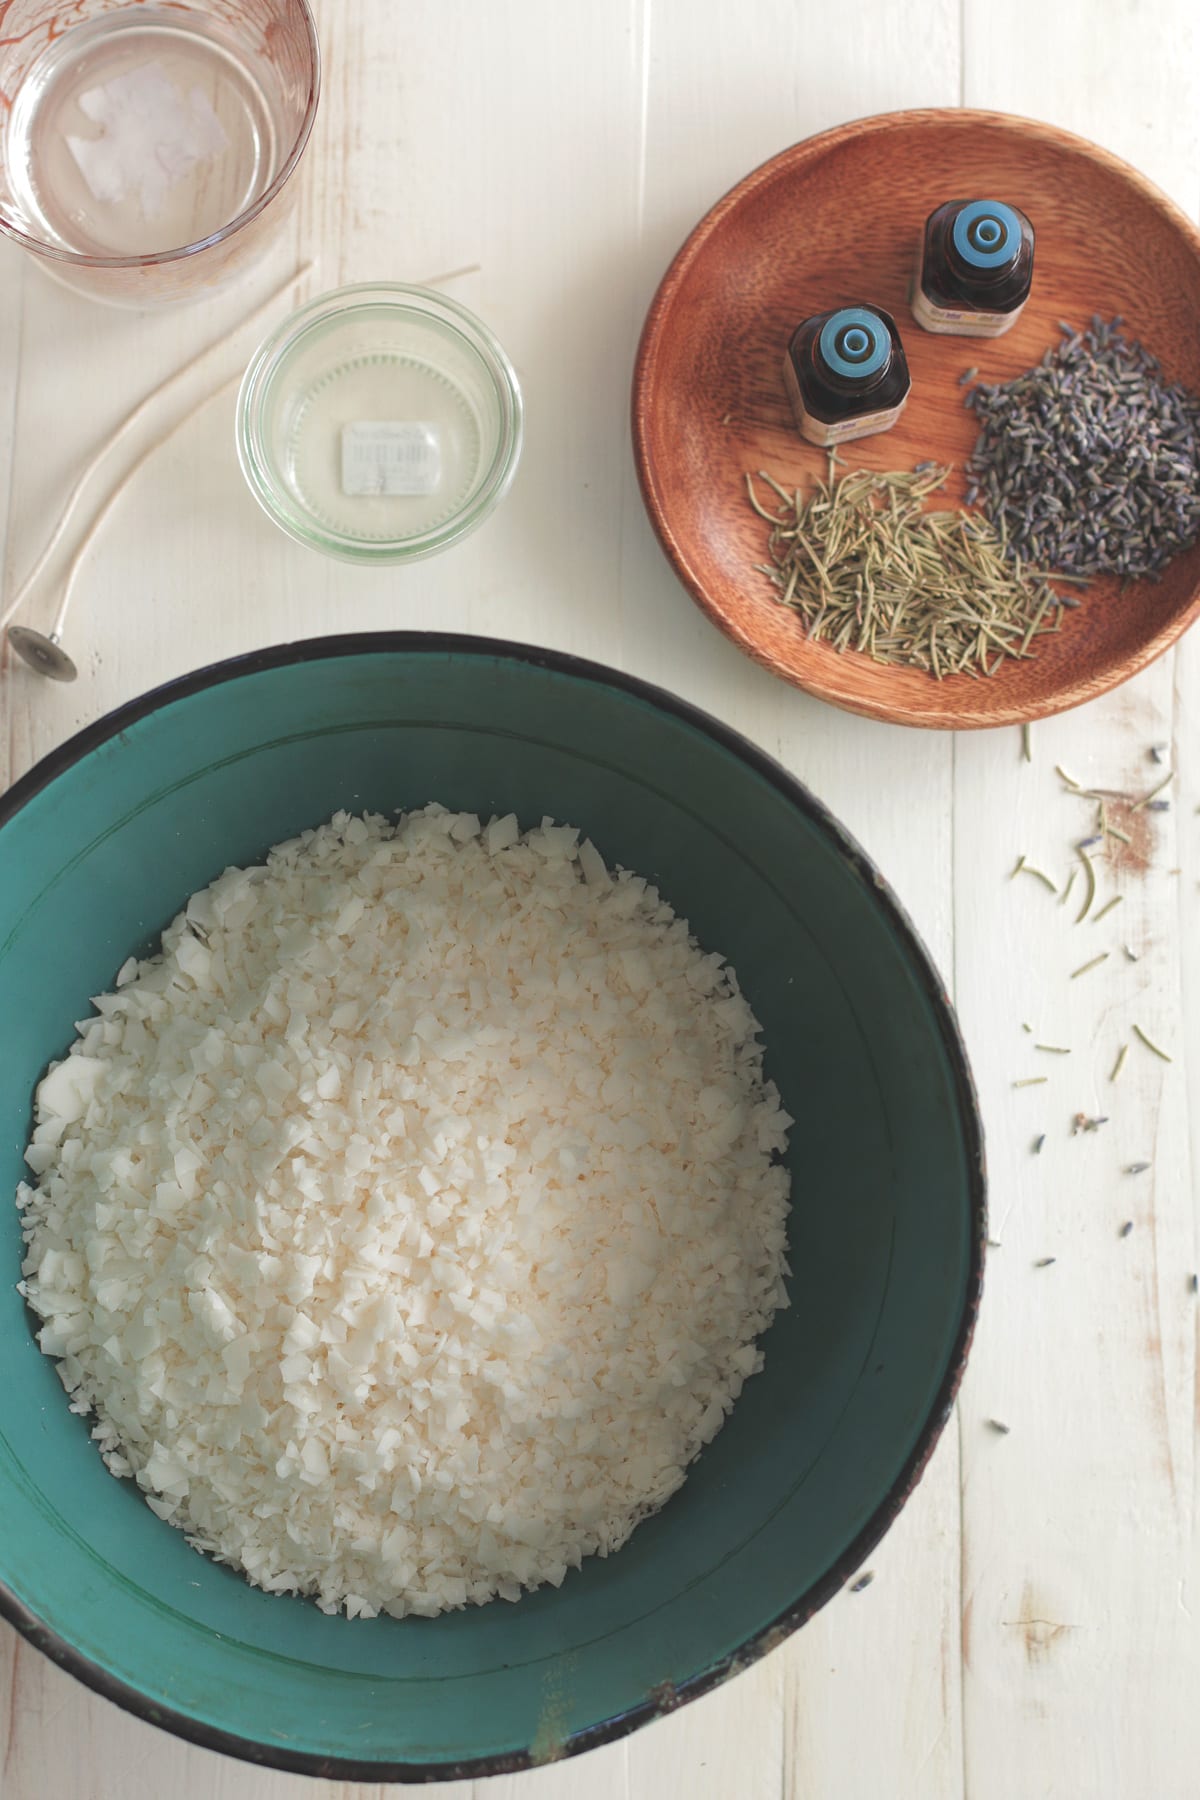
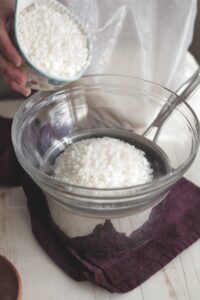
- 4 cups of wax: either soy wax flakes or beeswax pellets
- 2 wicks: Wicks with a metal base are the easiest to work with. I have no experience with wooden wicks.
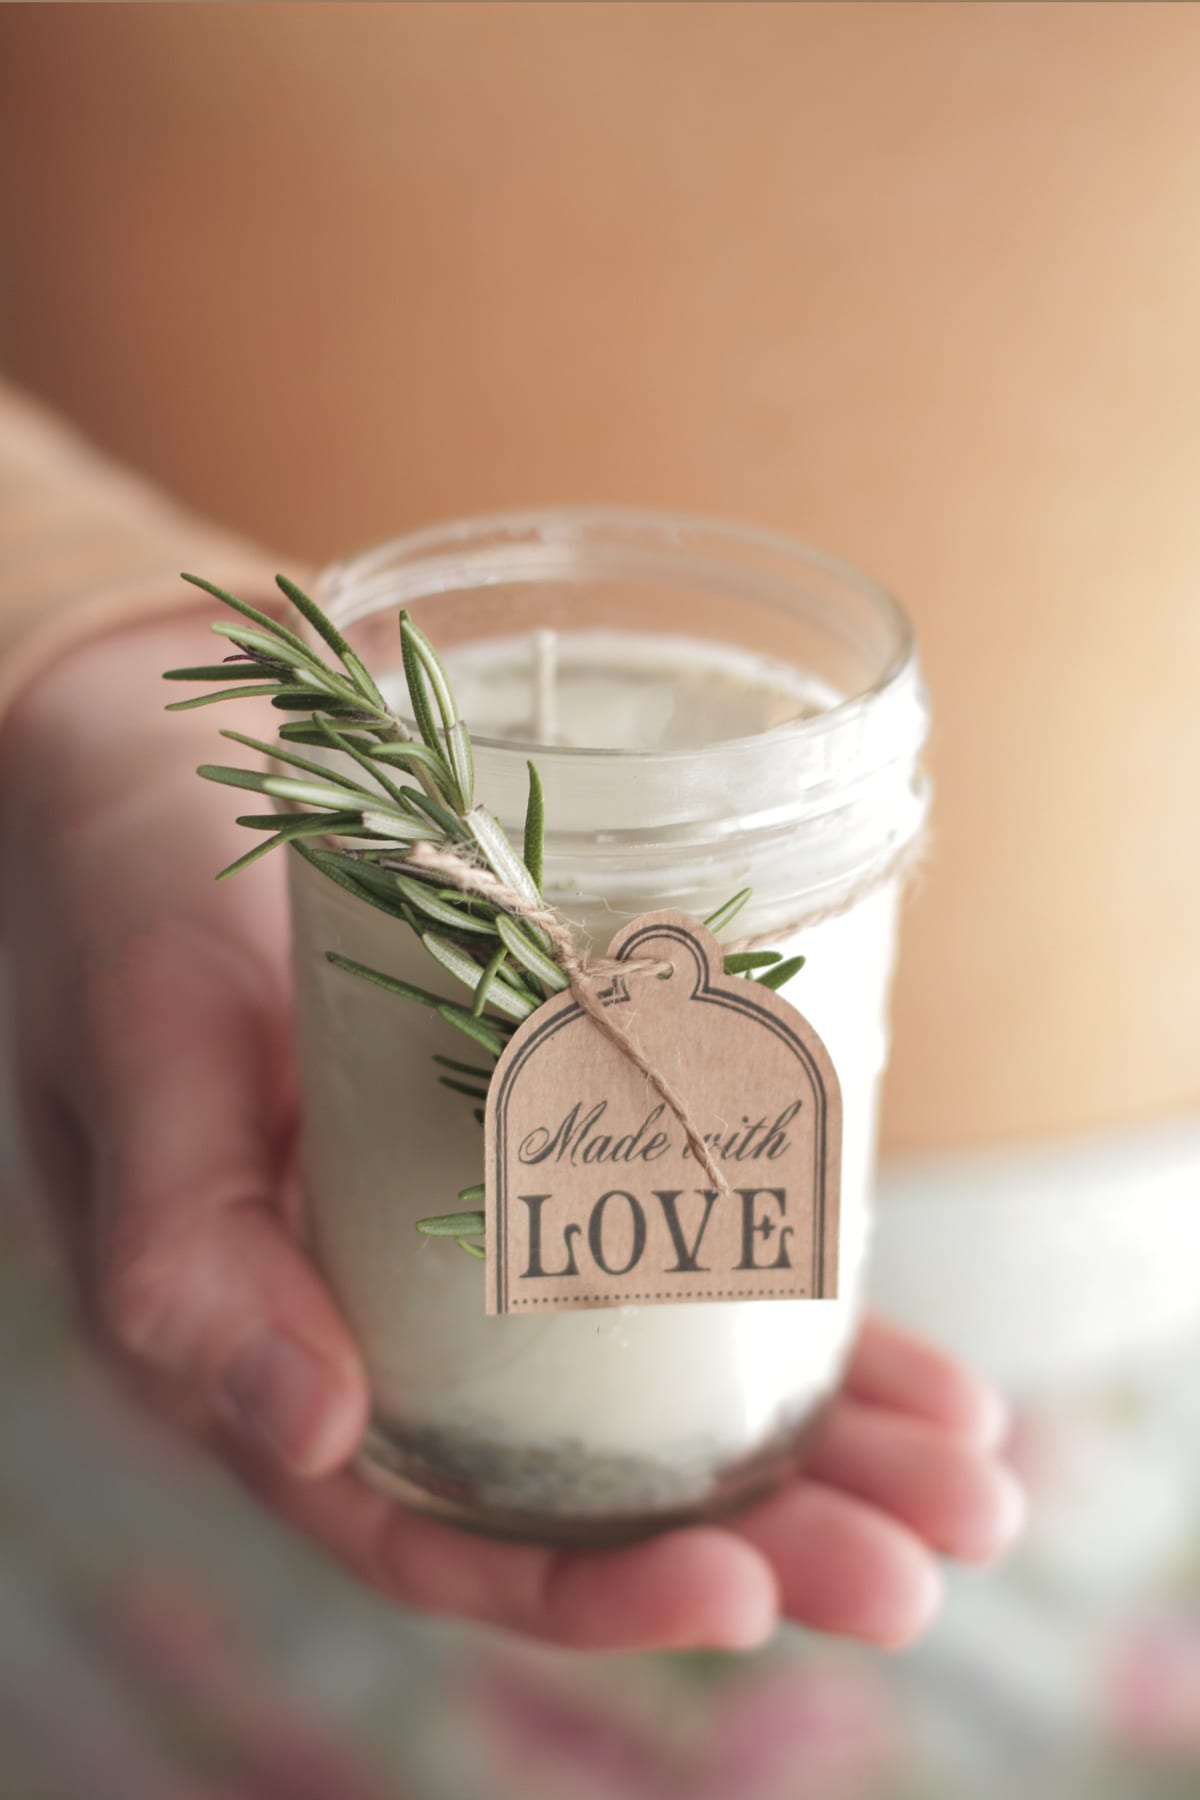
- (OPTIONAL) 1 teaspoon dried herbs, 60 drops essential oils, or fragrance oils: For naturally-scented candles. Fragrance oils have a stronger, longer-lasting scent, but most fragrance oils are not natural. Essential oils have a very subtle scent. And dried herbs, like dried lavender or dried rosemary, may be used for decoration.
Candle-Making Equipment
- Small cooking pot/saucepan: You’ll fill this pot with water to make a double boiler. The wax will not come into contact with this pot, so use what you have in the kitchen.
- Wax melting pot: Such as a medium-size glass mixing bowl, metal mixing bowl, tall glass measuring cup, or candle pourer. You’ll never be able to use this pot for anything other than candle making, as the wax will adhere to the pot and be difficult to scrape off and remove.
- 2 8-ounce heat-safe jars: mason jars, glass jam jars, tin cans, tea cups, etc. Or use 4 4-ounce jars for smaller candles. Any kind of high-rimmed, heat-proof jar will work for candle making.
- 2 clothespins or mechanical pencils: For keeping the tall wicks upright in the jars.
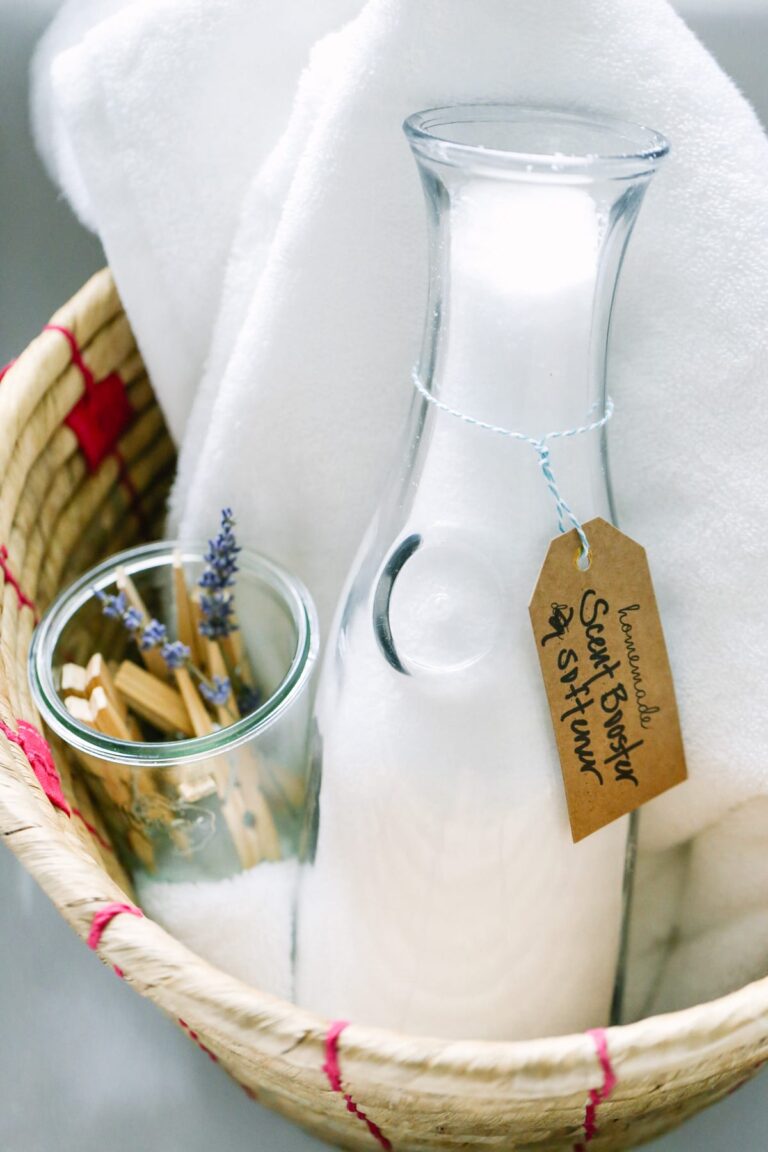
- 2 washcloths or small towels: This isn’t required. Insulting the outside of the candle jar with a towel can prevent the wax from cooling too fast which may cause shrinkage and cracks at the top of the candle.
- 1 wooden skewer, popsicle stick, or chopstick: Also not required, unless adding a fragrance. For stirring the fragrance into the melted wax. Use something you can toss (or purposely reuse for candle-making) as wax will adhere to this utensil.
How to Make Homemade Candles: Step-by-Step Guide
Once you have your ingredients and tools, you’ll need about 20 minutes to make the candles.
You’ll find a printable version of the ingredients and instructions at the end of this article. Here’s my step-by-step guide with photos to guide you…


- Step 1: Add water to the saucepan/pot, about 1/2 way full. Place your heat-safe bowl, tall glass measuring cup, or candle pourer either in the water or sitting on top of the water-filled pot (either way is safe). This is called the double boiler method, which keeps the wax out of direct contact with the heat source and avoids burning the wax.
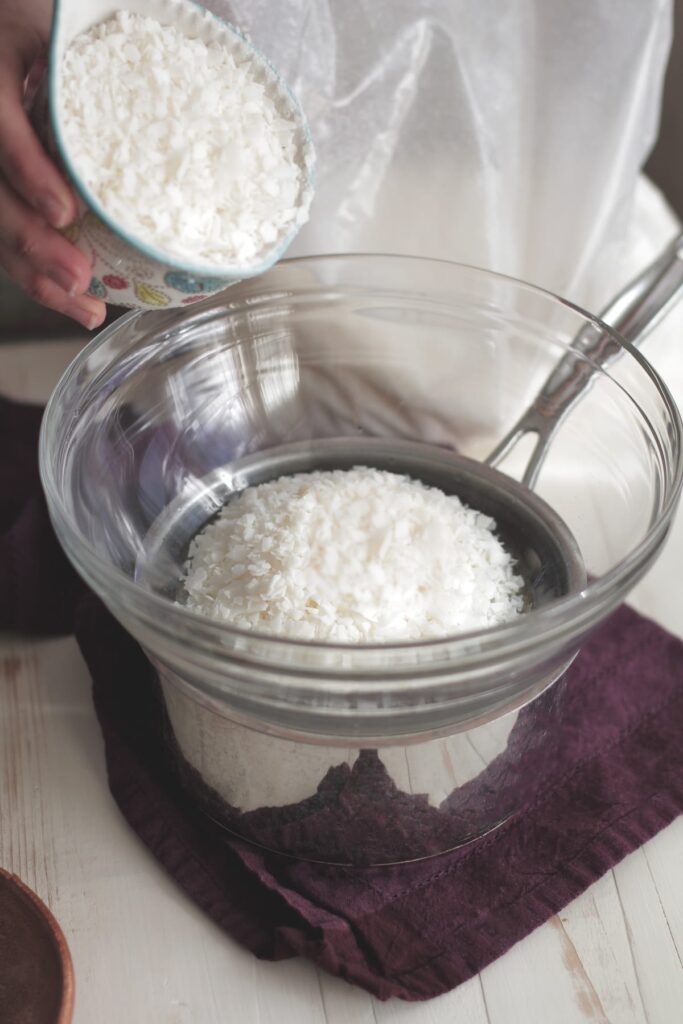
- Step 2: Add the soy flakes or beeswax pellets to the bowl. Then turn the heat to medium-high, bringing the water in the pot/saucepan to a lively simmer.
- Step 3: Allow the wax to completely melt. This takes about 15 minutes (more or less). Soy wax melts much faster, beeswax pellets take a bit longer.
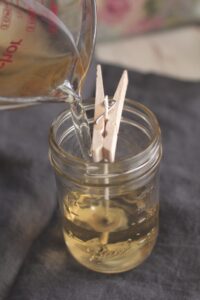
- Step 4: Once melted, place the candle jars on a towel (to protect your countertop) and dip the metal part of each candle wick in the hot wax.
- Step 5: Place the metal base of the wick at the bottom of each jar. Use a clothespin or mechanical pencil (the clip portion works well) to secure the wick, placing the pin or pencil on top of the jar to keep the wick upright.
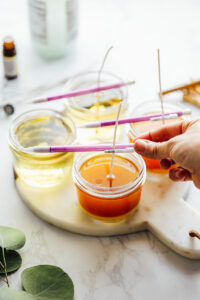
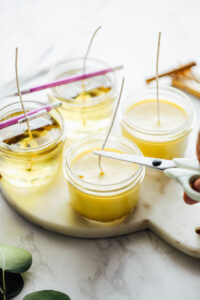
- Step 6: Pour the melted wax into the jars.
- Step 7: For a scented candle, add drops of natural essential oils, candle fragrance oil (according to the package), or any dried herbs (like dried lavender or dried rosemary). The wax will instantly begin to harden as it comes in contact with the jar. Let the wax cool and solidify. This takes about 20 minutes, or longer.
How to Make Scented Candles With Essential Oils or Fragrance Oil
If you want to add a scent to homemade candles, follow the recipe above and add the scent during Step 7. There are two main options for adding scent to the candles: essential oils or fragrance oils.
- Essential oils or a blend of essential oils is the most natural option. Essential oils aren’t as powerful as fragrance oils. I love lavender, eucalyptus, lemongrass, peppermint, or grapefruit essential oil for a candle. I use about 60 drops of essential oil per candle. Learn more about using essential oils.
- To make homemade candles smell stronger, fragrance oils are the strongest scent option. I can’t tell what goes into making fragrance oils just by reading the ingredient list, so if you go with this option you may want to call the company first and ask for a disclosure of ingredients. Use the brand’s recommended dosage amount on the package when adding fragrance oils.
- Dried herbs, like crushed roses, lavender, or rosemary, may also be used in a candle, with caution (keeping an eye on the candle when it’s burning), but they don’t provide much fragrance. I’ve also seen candle makers use coffee beans as well.
How to Prevent Problems With DIY Candles
- It’s best to allow the candle to “cure” for 24 hours before use. Just let the candle rest before use, which allows the wax time to fully harden. But if you want to burn it right away, you’re welcome to do so.
- Once the wax is solid, trim the wicks down to about 1 inch.
- If there are any cracks or tunneling in the wax, melt a bit more wax and fill in the cracks with the wax. The candles are still usable with tunneling or cracks in the wax; it’s just a cosmetic issue.
- To prevent the wax from tunneling the first time you burn the candles, burn the candle long enough so there’s liquid across entire the top before extinguishing.
FAQs
- What’s the best kind of wax to use for homemade candles? Paraffin wax is a common wax used to make candles; however, it’s derived from petroleum and not the best natural product. Soy wax and beeswax are both natural waxes that are inexpensive and easy to find. Both soy candles and beeswax candles are slow-burning. Soy holds fragrance better than beeswax. But beeswax has its own honey scent, which many folks (including myself) find appealing.
- Can you reuse old candle jars to make homemade candles? Yes, you can! It’s a great way to save money. Place the used candle jars in the freezer. After a couple of days, remove the jars and gently scrape out the old wax and wick. Or, leave the old wax and just remove the wick, since you’ll be re-pouring new wax overtop anyway.
- The wax cracked on top of my candles. What can I do? Melt a bit more wax and fill in the cracks with the wax. The candles are still usable with tunneling or cracks in the wax; it’s just a cosmetic issue.
Conclusion: Is it cheaper to make your own candles?
Yes, it is cheaper to make your own homemade candles, particularly if you want to use natural candles, made with the highest-quality ingredients like pure soy and beeswax and quality scents, like essential oils.
- A 16-ounce bag of beeswax costs about $13 and a 5-lb bag of soy flakes costs about $20. Both options will make multiple candles. 2 cups of wax = 1 8-ounce candle.
- Candle wicks will cost about $10, making many candles. You only need 1 wick per jar.
- Use leftover jars. Use extra mason jars, leftover jam or candle jars, or thrifted tea cups.
- Purchase a tall glass measuring cup, heat-safe mixing bowl, or candle pourer just for melting the wax, as it will be impossible to clean the wax out of the jar once melted and cooled. Reuse this container each time you make candles. This will cost about $6-10.
- Essential oils or fragrance oils vary in price. Fragrance oils are the cheaper options, essential oils can be more expensive. But you can use essential oils to make other cleaning and beauty products.
Even with a $20-30 investment, you can make many homemade candles! If you’ve checked the price of natural candles lately, you know that’s a deal. Plus, you’ll be able to say “I did this!” and impress your friends and family (priceless).
So tell me, what do you think? Will you try making your own candles, or do you prefer store-bought candles?
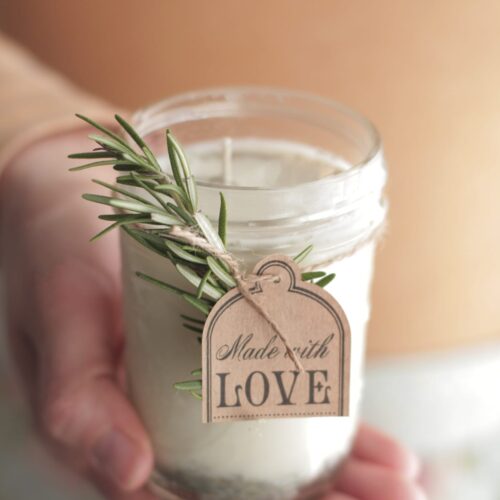
Give this candle recipe a try and tell me what you think and how you decide to customize your candles!
Homemade Candles Recipe
Equipment
- 1 small cooking pot/saucepan
- 1 wax melting cup such as: a medium-size glass bowl or metal bowl, tall glass measuring cup, or candle pourer
- 2 8-ounce jars such as: glass mason jars, jam jars, tin cans, tea cups, etc. Or use 4 4-ounce jars for smaller candles.
- 2 clothespins or mechanical pencils
- 2 small washcloths OPTIONAL, but helpful for insulating the jars to keep the wax from cracking while it cools
- 1 skewer or chopstick OPTIONAL, if adding fragrance to stir and combine the fragrance and wax
Ingredients
- 4 cups soy wax flakes or beeswax pellets
- 2 candle wicks with a metal base
- 60 drops essential oil of choice OPTIONAL, or fragrance oil (use the amount directed on package)
- 1/2-1 teaspoon dried herbs OPTIONAL, like dried lavender, rosemary, or crushed roses
Instructions
- Add water to the saucepan/pot, about 1/2 way full. Place your heat-safe bowl, tall glass measuring cup, or candle pourer either in the water or sitting on top of the water-filled pot (either way is safe). This is called the double boiler method, which keeps the wax out of direct contact with the heat source and avoids burning the wax.
- Add the soy flakes or beeswax pellets to the bowl. Then turn the heat to medium-high, bringing the water in the saucepan to a lively simmer.

- Allow the wax to completely melt. This takes about 15 minutes (more or less). Soy wax melts much faster, beeswax pellets take a bit longer to melt.
- Once the wax has melted, turn off the heat and dip the metal ends of the wicks in the hot wax. Place the wick ends in the center of each candle jar, pressing the metal ends down with a skewer or chop-stick until set at the base of the jar. The wax acts like glue, securing the metal end at the bottom of the candle jar.
- Gently straighten the wick and secure it at the mouth of the jar with a clothespin or the clip on a mechanical pencil (resting the pencil or clothespin on the top of the jar).
- Gently pour the wax into each jar. Place a towel (or parchment paper) underneath the jars to protect your countertop.
- To make scented candles, add the essential oil or candle fragrance oil to the wax. If desired, add a teaspoon of dried herbs. For fragrance oil, follow the instructions on the bottle for amount recommended. Using the skewer or chopstick, gently stir the candle to combine the fragrance and wax.
- Wrap the jars in the washcloths to prevent the wax from cooling too fast and shrinking or cracking. This step isn't mandatory, but helps if you're concerned about cracks which are purely cosmetic and can be fixed if they occur by adding more melted wax overtop to fill the crack.
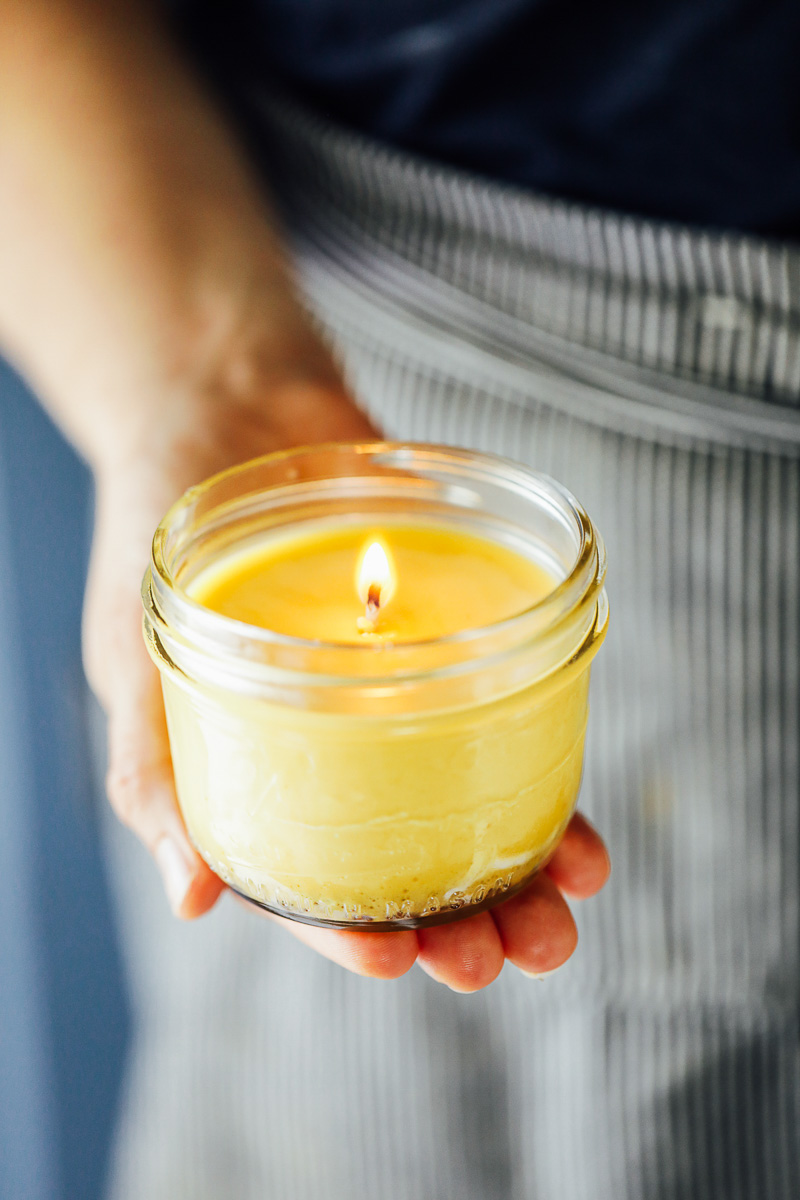
- The candles will take about 30 minutes to fully set. But I recommend letting the candles rest for 24 hours. This rest time allows the candles time to cure before burning, giving you the best results!
- Once set, remove the clothespins and washcloths, and trim the top of the wicks to 1 inch. The candles are now ready to use and enjoy!
- To avoid watery candles + a clogged sink: Only fill the bottom pot with 1–2 inches of water. If it starts to boil up toward the pouring bowl, turn the heat down or lift the bowl an inch. Any water that sneaks in will make the wax look frosty and sink like a rock when you pour it down the drain. If you do splash a little, let the wax harden in the sink, then scoop it out with a plastic bag over your hand before running hot water.
- Never pour wax down the drain, wipe the bowl with paper towels while it’s still hot and toss them in the trash.

very great post.I love the post.
thank so much.
Thanks, Anele! Enjoy making the candles.
Made candles years ago with paraffin, before all the modern conveniences for candle making… we would attach washers to the end of a cotton string (often braided crochet thread to make heavier cord), found carefully used aluminum cans created very smooth polished candles (just carefully cut the top off as the raw edge is deadly… and now aluminum cans come in such pleasing sizes and shapes), and could use crushed ice to create an effect like swiss cheese. Also, nylon hose were great for polishing the ‘edges’ off the candles if needed. After reading your site about using EO I’m inspired to make more, again 🙂 But now you know old school methods from the 60’s and 70’s 🙂 Thanks! Great site!!!
Thank you, Debbie!
I wanted to know about using FRESH rosemary in candles, & this is not it. I know how to make candles, but am looking for information that I can use. Not sure why this turned up on using FRESH herbs in candle making
Hey Kathy, I don’t have much control over what Google ends up showing for search results. I understand your frustration, but that’s part of searching the internet. This recipe clearly indicates the use of dried herbs :). I hope you find some information that helps you.
Does this throw a scent? I used patchouli essential oil eith juniper berry and no scent was thrown.
Hey Lids, It will be very, very subtle, but nothing that will fill a room. I would use a diffuser for that.
Can i use rosemary and bergamot essantial oils to make paraffin wax candles?
Hey Lou, I think so.
Hi! I am thinking of what to give away for Christmas and this article came of great help. Scented candles are really good and would recommend it to anyone. And I just want to share something.. it is good for our health too. Asthmatic people tend to avoid scented candles because it triggers attacks but say no more… soy wax candles doesn’t give that effect.
Thank you for the tutorial. Would make sure to apply this! 🙂
These look lovely! I’m going to give them a go myself. Thanks for an informative post too! x
Awesome, Laura.
The correct term for the melting pot is “double boiler” not “broiler”. 🙂
Hey Lib, Lol, correct. Thanks so much for catching this typo. I’ll make sure this typo is corrected.
Hi There! Chelsea here from The Johnsons Plus Dog. Just wanted to pop you a quick note and let you know that this DIY was featured today on my blog for my DIY Handmade Christmas Gift Guide! I’d love for you to come take a look. Have a great day!!
http://www.thejohnsonsplusdog.com/2016/11/08/diy-handmade-christmas-gift-guide-giveaway/
Love this combination. It would be great for an outdoor mosquito candle too.
That’s a great idea, Shellie!
These candles look so simple! I’m so happy I found your blog. I also have a love for making things homemade for the sake of being healthy and “green”. I can’t wait to try out these candles! Thank you for sharing!
How well does the scent burn? I want to try this, but i also want the scent to last, burn well and really smell the aroma .
Hey Inia, The essential oil won’t provide the same strong scent as a fragrance oil. I haven’t looked into fragrance oils, but there may be a safer option available?
This is a fantastic DIY! Thank you for sharing! We were looking for something DIY for our wedding favors and this is it! We still have over a year until our wedding, but this is something I can do way ahead of time. Thank you again!! 😀
Thanks, Ashely! What a great idea!
I absolutely love the smell of cilantro and am wondering if you could make these with cilantro. Any thoughts?
Yes, you can use paraffin to make these candles! I have used paraffin for all candle making over the years. The hardest part is chopping the wax into melting size because the wax comes in big slabs.
For melting, you can use large soup cans with a pour spout crimped into the top with pliers, and use the double boiler. Wax has a low flash fire temperature and should be melted over an electric burner, not open flame like gas or propane. I’ve never had this happen, just don’t boil wax! Each soup can can have a different scent and color as you want.
I have not used herbs as fragrance, but I think this is a splendid way to avoid artificial fragrances at a lower cost than essential oils.
I’ve used manufactured tin candle molds which have a small hole at the bottom to knot/tape the wick on the bottom of the mold. You can buy wax-free cotton wicks with out the metal tab by poking a hole in the bottom of milk cartons or frozen juice cans. Cover the hole and wick with masking tape to prevent the melted wax from running out.
To ensure the wick is straight tie it tightly to a pencil, and rest the pencil on the top of the mold. The prep work is worth the results! When the candles are finished, I have a hard time giving them away…because they are all unique.
Wax will sink down as it cools, so reserving some melted wax to ‘top-off’ the candle is a good idea.
You can melt the wax from old candles over again, but the mixed fragrances are not so pleasing. Melting wax is totally Messy! Cover your counter tops and expect your stove top area to get dripped on.
This blog has put me in the candle-making mode so I need to scurry out to plan some spring and summer gifts.
Are soy flakes more natural? I’ve never tried them.
Best of luck with your creativity and happy romantic evenings!
Can i use paraffin to make this candles? i found it easier cause ive worked with it before
Hello! What size mason jars would you suggest?
Hey Katelan, I like the 8oz. mason jars.
I enjoyed the recipe and the simplicity- the result was aesthetically very pleasing. The only downside was that the candles we made aren’t very fragrant. We stirred in 30 plus drops of essential oil in each vessel after adding the wax (most were 16 oz or less) of Eucalyptus, Lemon or Lavender. While not an exact measurement, I figure that “drops” are pretty universal. I used essential oils that are meant for aromatic diffusers, could that be it? I have some candle science oils coming.
Any tips would be greatly appreciated. We are going to go heavier on the drops but am wondering if there are any additional pointers.
They LOOK great and it was a fun project! Looking forward to round 2.
Thanks in advance!
Hey Nazli, Yes, the scent of these candles isn’t very strong, especially compared to a store-bought candle. There are fragrances made specifically for candles, so they produce a very strong end product. However, I’m not sure about the ingredients used to make these scents. This is probably the best option for a strong scent, particularly if you can find a more natural version.
Hi there!
First of all, thank you so much for sharing this recipe, it’s great. I decided to make these for Christmas gifts this year, and everyone has absolutely loved them… and now I have the fever to make EVERYTHING 😀
With some of the candles I made, the wicks become loose and start moving around once I pour the wax into the jars… but it doesn’t happen every time. I’m wondering if you have any insight into this? Am I not allowing the “glue wax” enough time to dry with the wick, or is it just that the wax is just so hot, it’s melted the “glue wax” again?
Thanks in advance:)
Hey Casey,
That’s so great! I’m so glad everyone loved the homemade candles. I made a bunch of candles for our family this year, too.
I’ve experienced the same issue with the wicks wiggling around after the wax has been poured. I’ve found this is caused when I don’t allow the wick to set long enough. If you allow about 10 minutes for the wicks to set in the wax and jar, the problem should be resolved. I’ll make note of this in the recipe, too.
Hi
I just made these candles. I noticed that a few of them dried with holes and cracks. Can I melt wax and just fill the cracks and holes? Do you know why this happened?
Thank you!
Hey Kate, The cracking is generally caused by the candles cooling too fast. This is common when the candles are placed on granite or other cooler counter-tops, and the solution is usually to insulate the outside of the jars with a towel. The cracking is more of a cosmetic issue, so they will still burn beautifully! I think your idea to melt some extra wax to fill the cracks should work great!